
CMS application management (Content Management Systems)
A content manager or CMS (Content Management System) is a tool for web servers that allows creating, managing, and publishing content on a website without the need for advanced programming knowledge. Through its interface, the user can control, maintain, and update content in a simple way. As the name suggests, it is a system specifically designed to manage content efficiently.
The choice of a content manager will depend on our specific needs. Some of the most popular are:
- WordPress: Ideal for creating websites and blogs. It is one of the most widely used CMS worldwide.
- PrestaShop: Specialized in the creation of online stores and e-commerce management.
- Moodle: Designed for educational environments, it allows the management of courses, students, and learning materials.
From SWPanel, there are several ways to deploy content managers:
- Linux Domain Services in Cloud or Hosting: Allows activating a CMS in a matter of minutes directly from SWPanel.
- Cloud & Apps: Offers you the possibility to create a new Cloud with your preferred manager preinstalled or connect to the Cloud to manually install the CMS that best suits your needs.
Below, we explain how to deploy a content manager using both options.
Install CMS application in Cloud Hosting service
Access SWPanel and go to the Dashboard of the Hosting service where you wish to install the CMS.
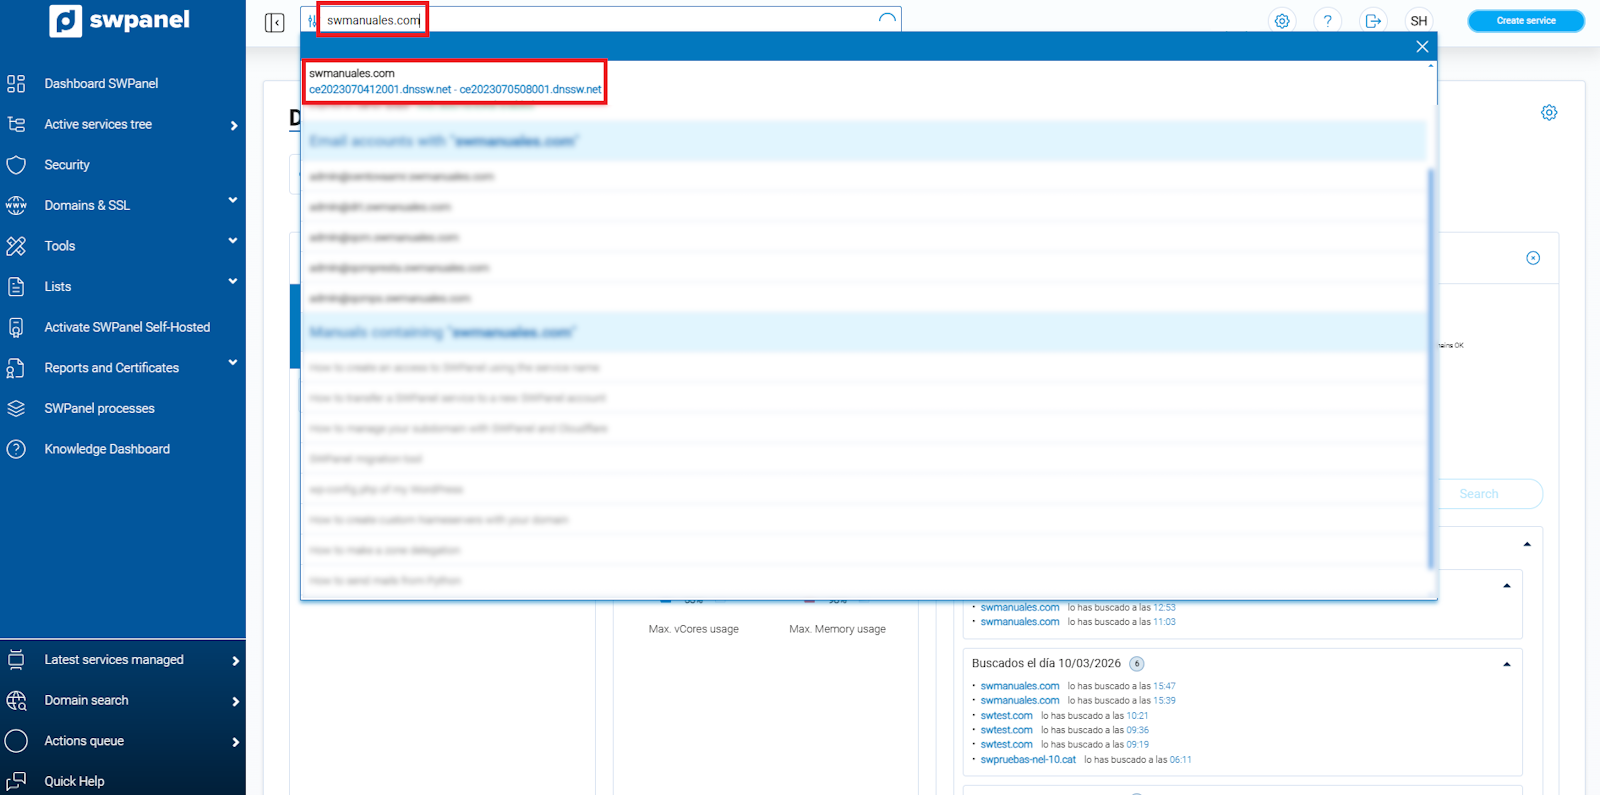
info_capture ℹ️ Note: The screenshot is for guidance purposes, taken from version 2026.000.0030 dated 14/03/2026. It may differ from the current version of SWPanel.
💡 Tip: Use the search bar at the top to locate your service quickly and easily.
In the CMS Application Management section, you can select and install the content manager that best suits your needs.
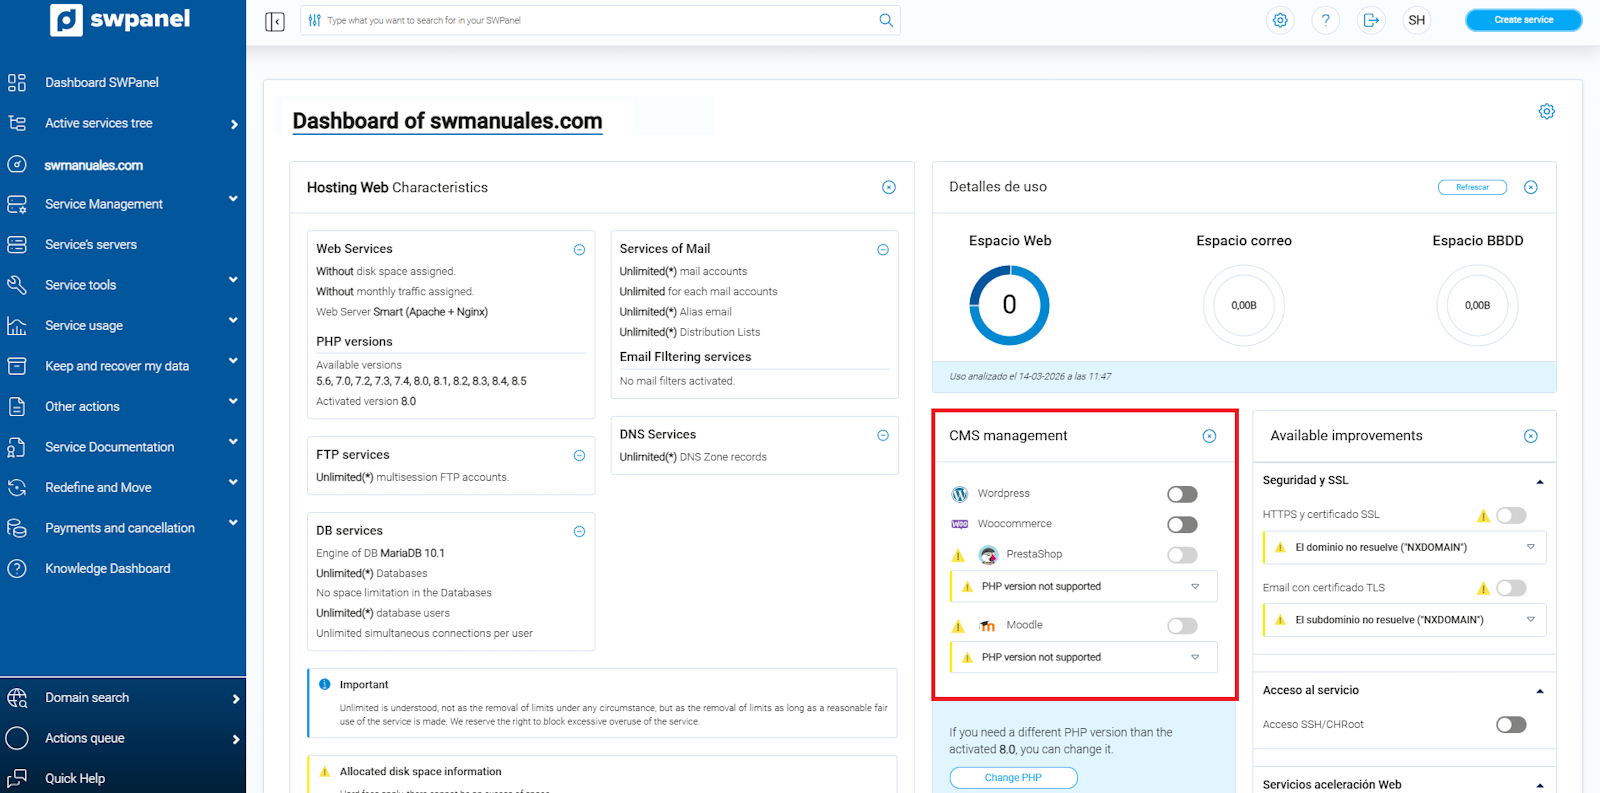
info_capture ℹ️ Note: The screenshot is for guidance purposes, taken from version 2026.000.0030 dated 14/03/2026. It may differ from the current version of SWPanel.
⚠️ Important: Only one CMS application can be active at a time in the same service.
The installation of your content manager will be completed in a matter of minutes.
Additionally, from this same section, you can uninstall the CMS application whenever necessary.
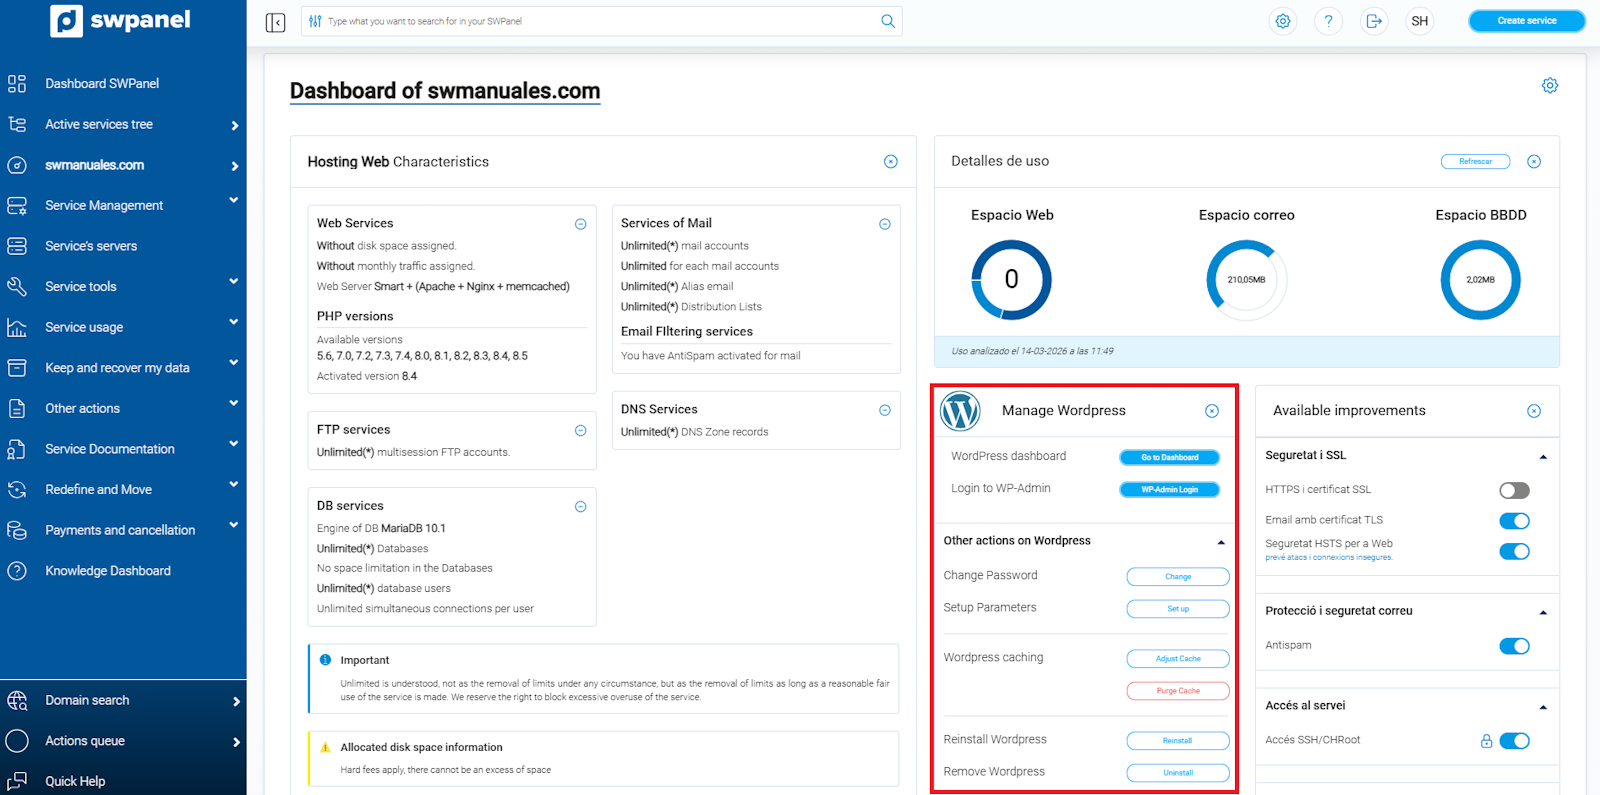
info_capture ℹ️ Note: The screenshot is for guidance purposes, taken from version 2026.000.0030 dated 14/03/2026. It may differ from the current version of SWPanel.
The next step is to perform the initial configuration of the CMS you have selected. Below, we explain how to do it.
Initial WordPress Configuration
Once you click Install, you will receive an email at your registered account with the access credentials for your WordPress.
In a few minutes, your WordPress will be completely installed and ready to use.
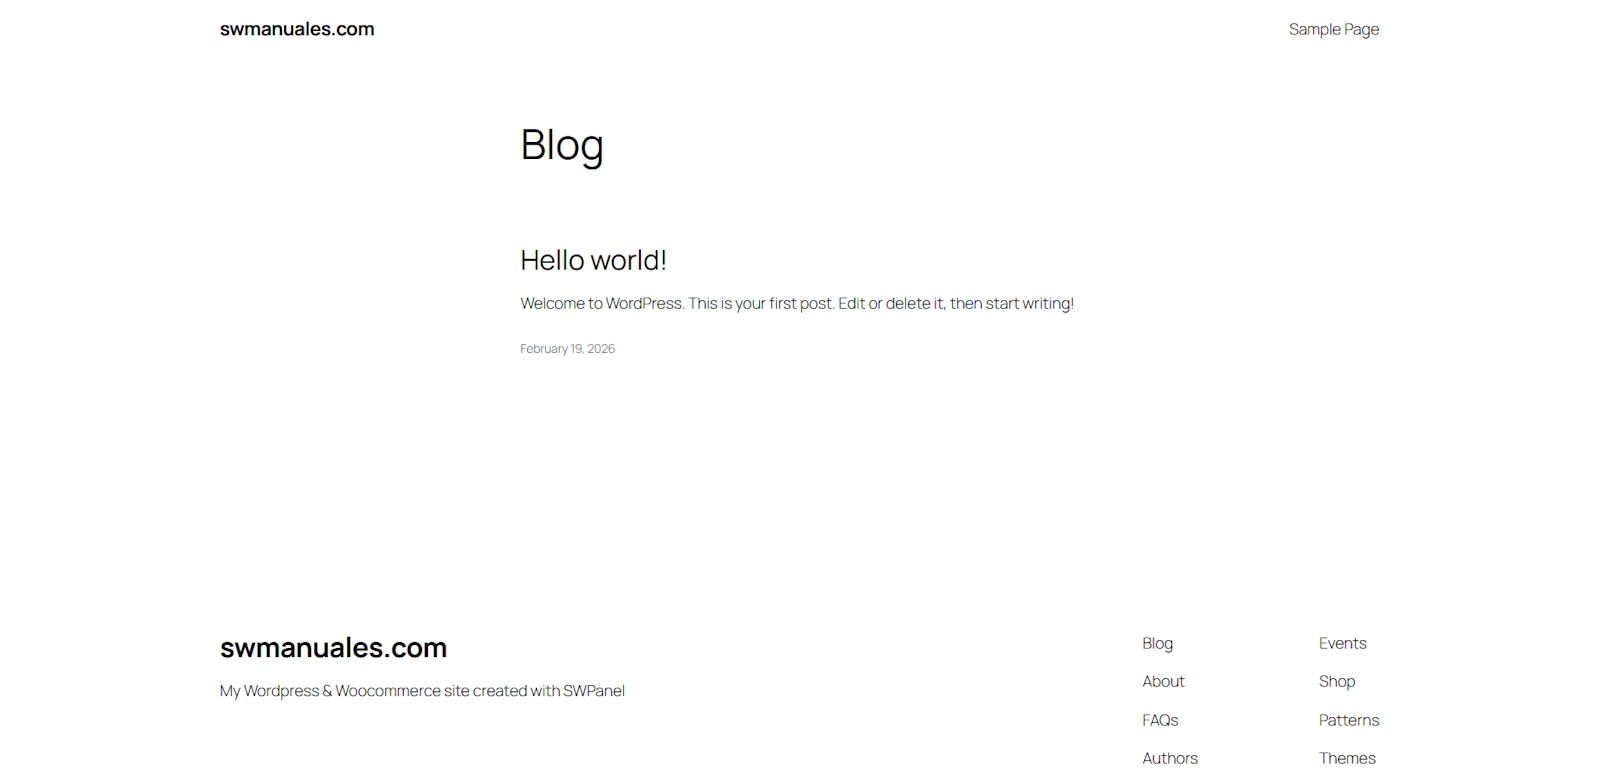
To access the WordPress administration panel, add /wp-admin/ to the end of your web address. For example:
http://yourdomain.com/wp-admin/
https://yourdomain.com/wp-admin/
Then, enter the username and password you received by email at the time of installation.
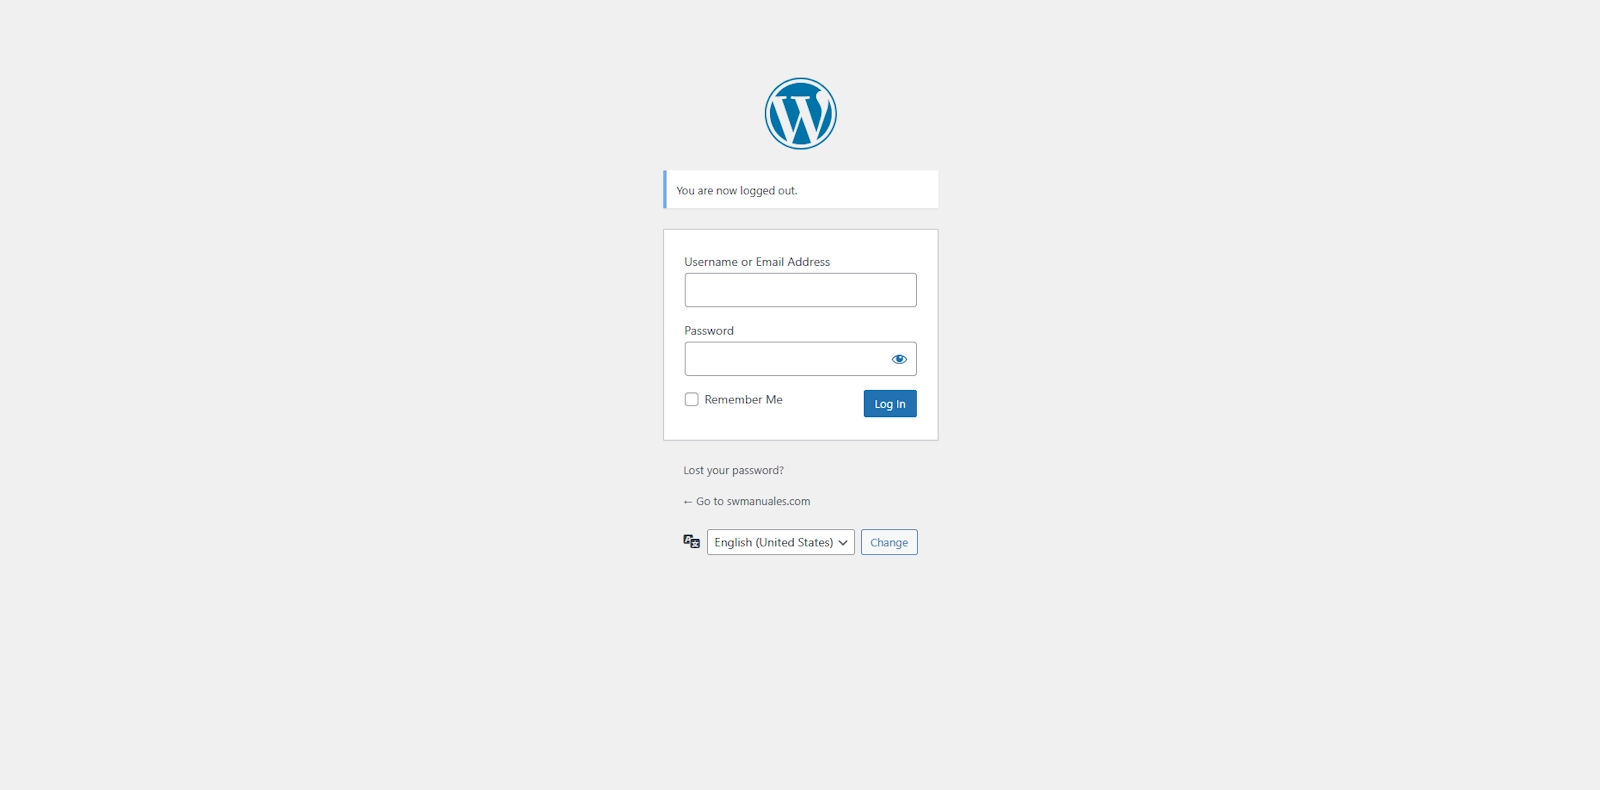
⚠️ Notice: If you need additional technical support for WordPress, consult their official documentation or the WordPress support service. For quality reasons, we do not offer assistance for external software.
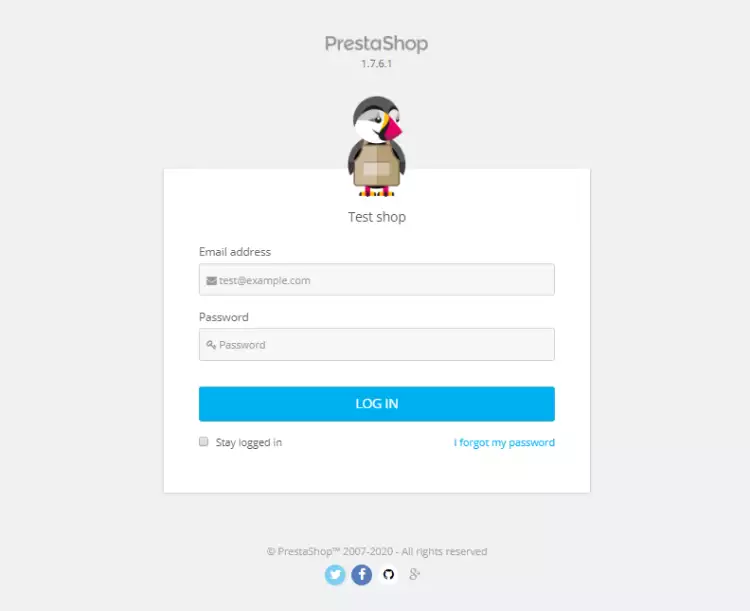
Initial PrestaShop Configuration
The configuration of PrestaShop must be completed manually. To do so, follow these steps:
- Once the installation is finished, access your domain. You should see a screen similar to the following:
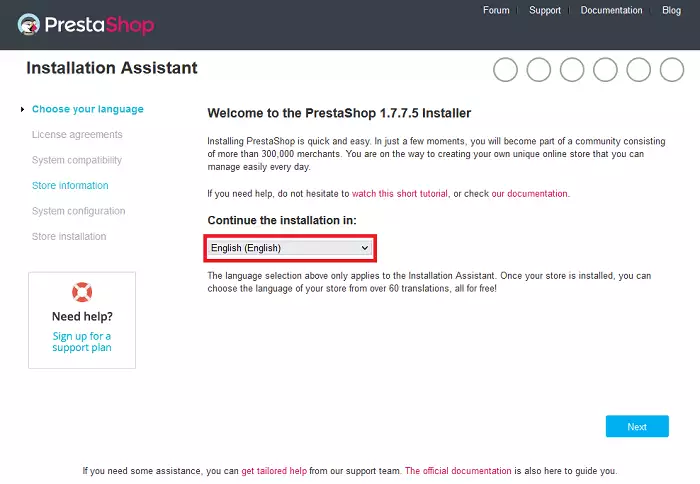
On this screen, select the language of the installation and click “Next” to continue.
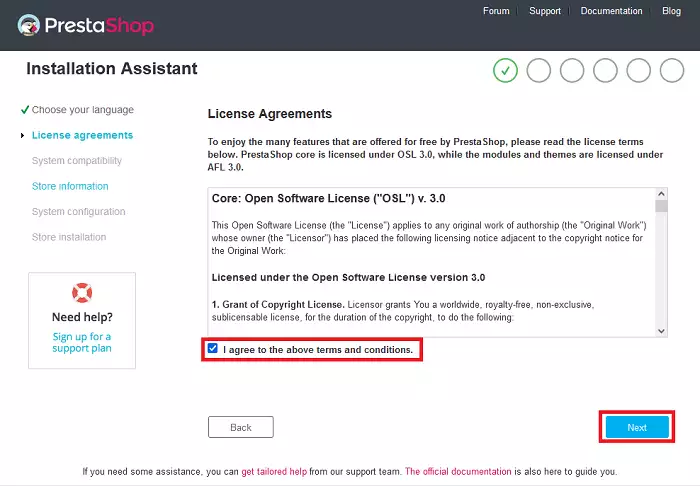
- Next, accept the terms and conditions of the license agreement by checking the corresponding checkbox and click “Next”.
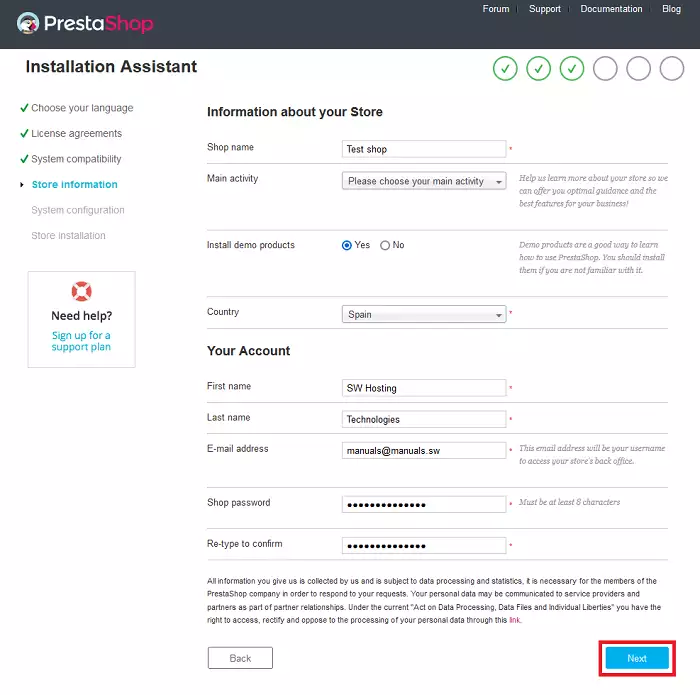
- Next, enter the details of your new online store. Once the information is complete, click “Next” to continue.
- In this step, configure the PrestaShop connection to the database. By default, the fields are usually automatically filled with the correct data. If you need to make any changes, you can do so at this time.
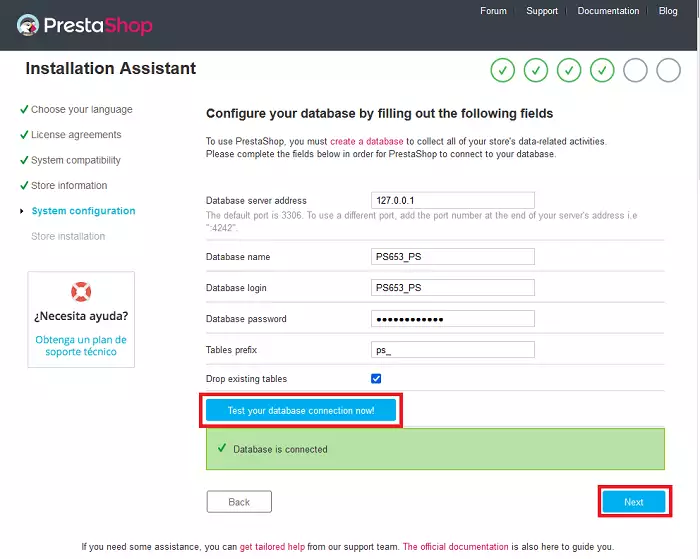
Click on “Check the connection to your database!”. You should see the following message:
The database is connected
If the message does not appear, review the connection details you entered and correct them as necessary.
- Press the “Next” button to continue. You will see that the installation of the components of your new PrestaShop store begins.
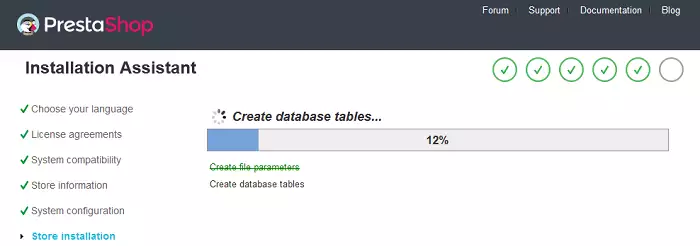
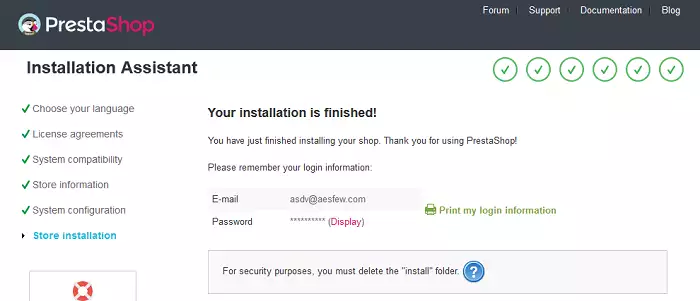
- Finally, access the web folder of your service via FTP and perform the following steps:
- Delete the
installfolder. - Rename the
adminfolder with a name of your choice.- For example, if you rename it as
admin123, you must access the PrestaShop administration panel via:http://yourdomain.com/admin123https://yourdomain.com/admin123
- For example, if you rename it as
This improves the security of your store and completes the initial configuration.
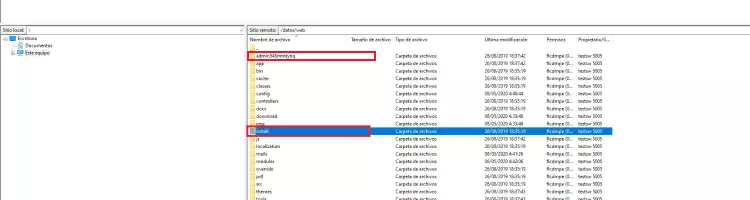
💡 Tip: If you do not know how to access your web service via FTP, consult the “Access the FTP server” section in our manual ? Handbuch: How to create an FTP account.
⚠️ Notice: If you need additional technical support for PrestaShop, consult their official documentation or the PrestaShop support service. For quality reasons, we do not offer assistance for external software.
Initial Moodle Configuration
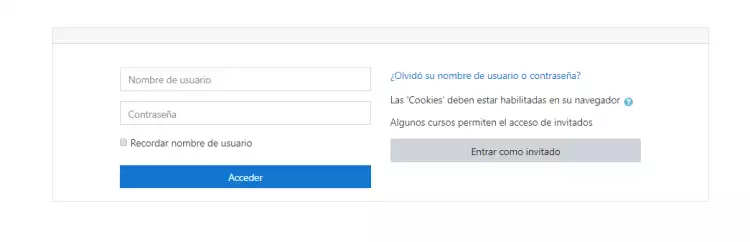
The Moodle CMS does not require manual configuration after installation.
To access the administration panel, use the following URL:
http://yourdomain.com/admin/
https://yourdomain.com/admin/
Enter the username and password you received by email at the time of installation.
Create a new Cloud with a preinstalled application
To create a new Cloud with your content manager preinstalled:
- Access Create a Service in the upper right corner of SWPanel.
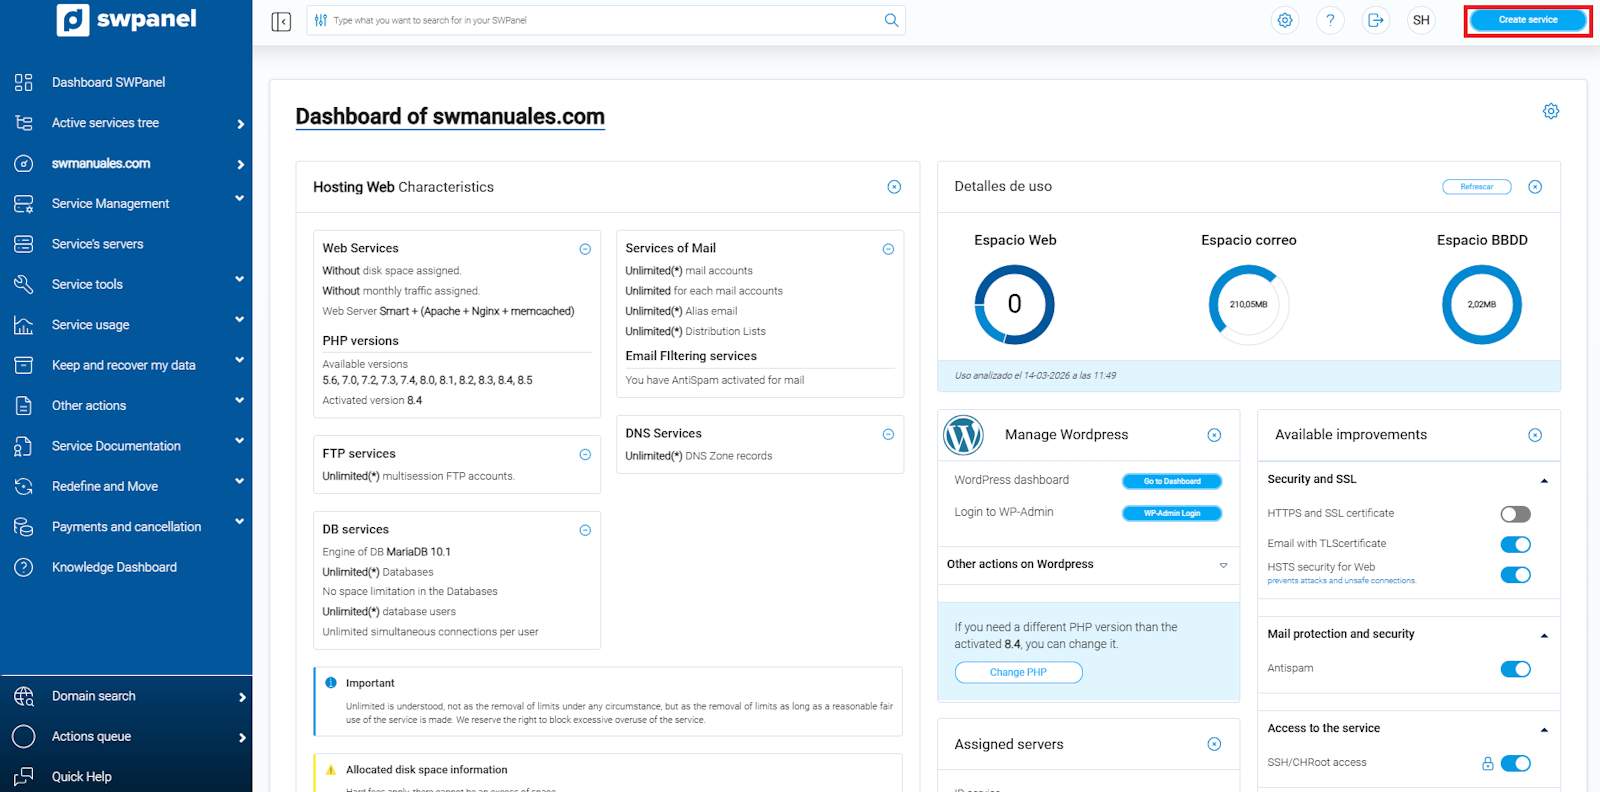
info_capture ℹ️ Note: The screenshot is for guidance purposes, taken from version 2026.000.0030 dated 14/03/2026. It may differ from the current version of SWPanel.
- Select the Cloud & Apps option.
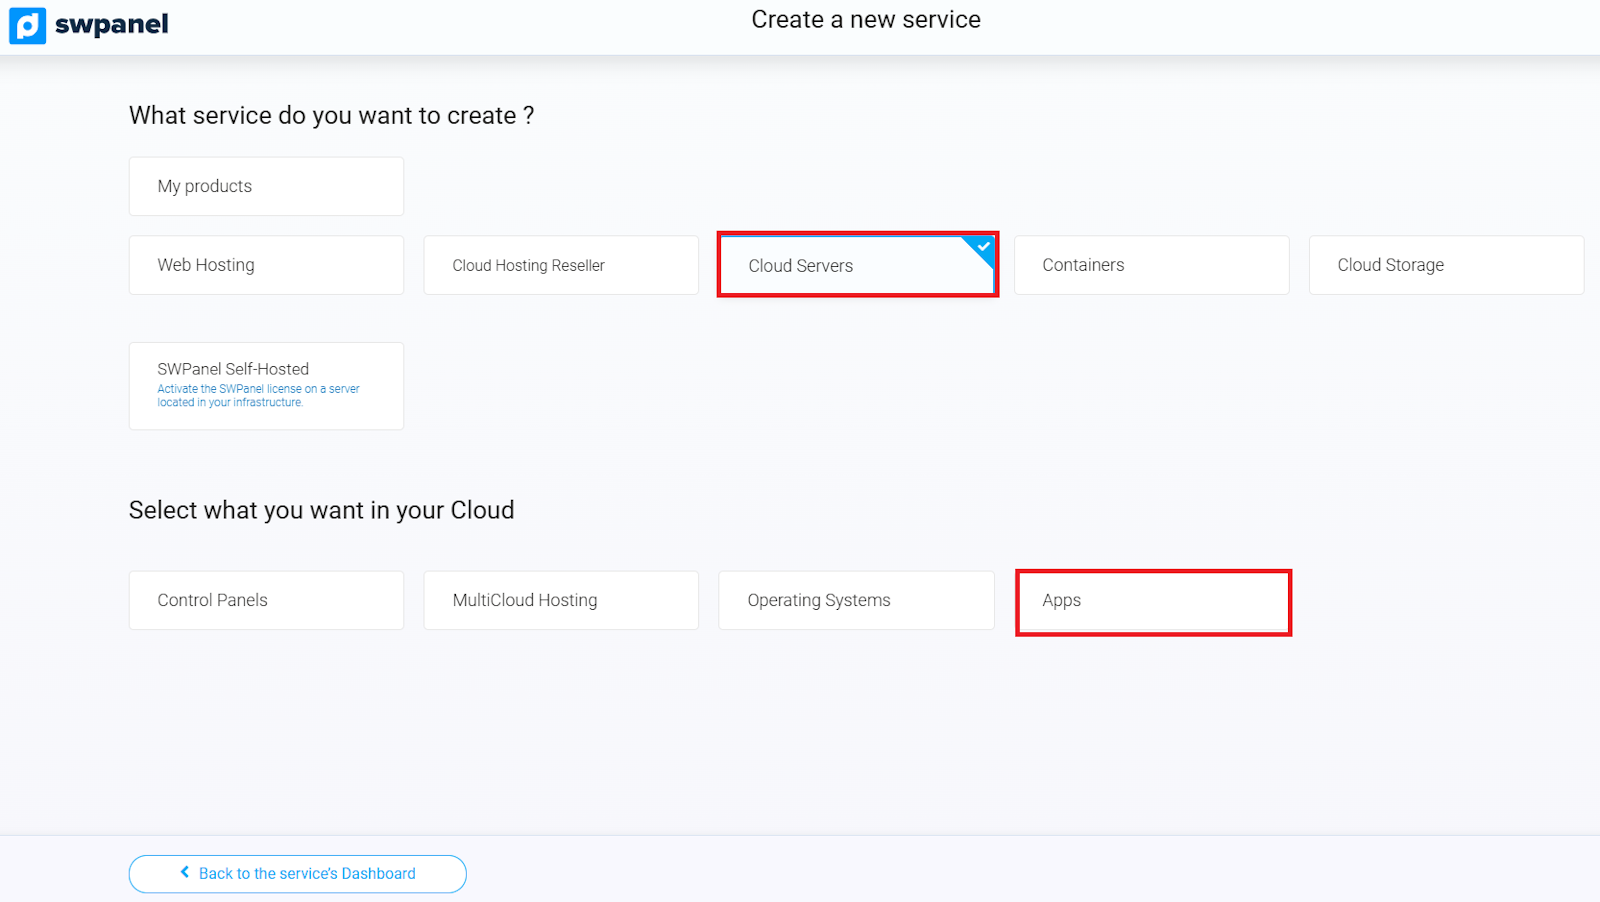
info_capture ℹ️ Note: The screenshot is for guidance purposes, taken from version 2026.000.0030 dated 14/03/2026. It may differ from the current version of SWPanel.
- Go to the One Click Apps tab:
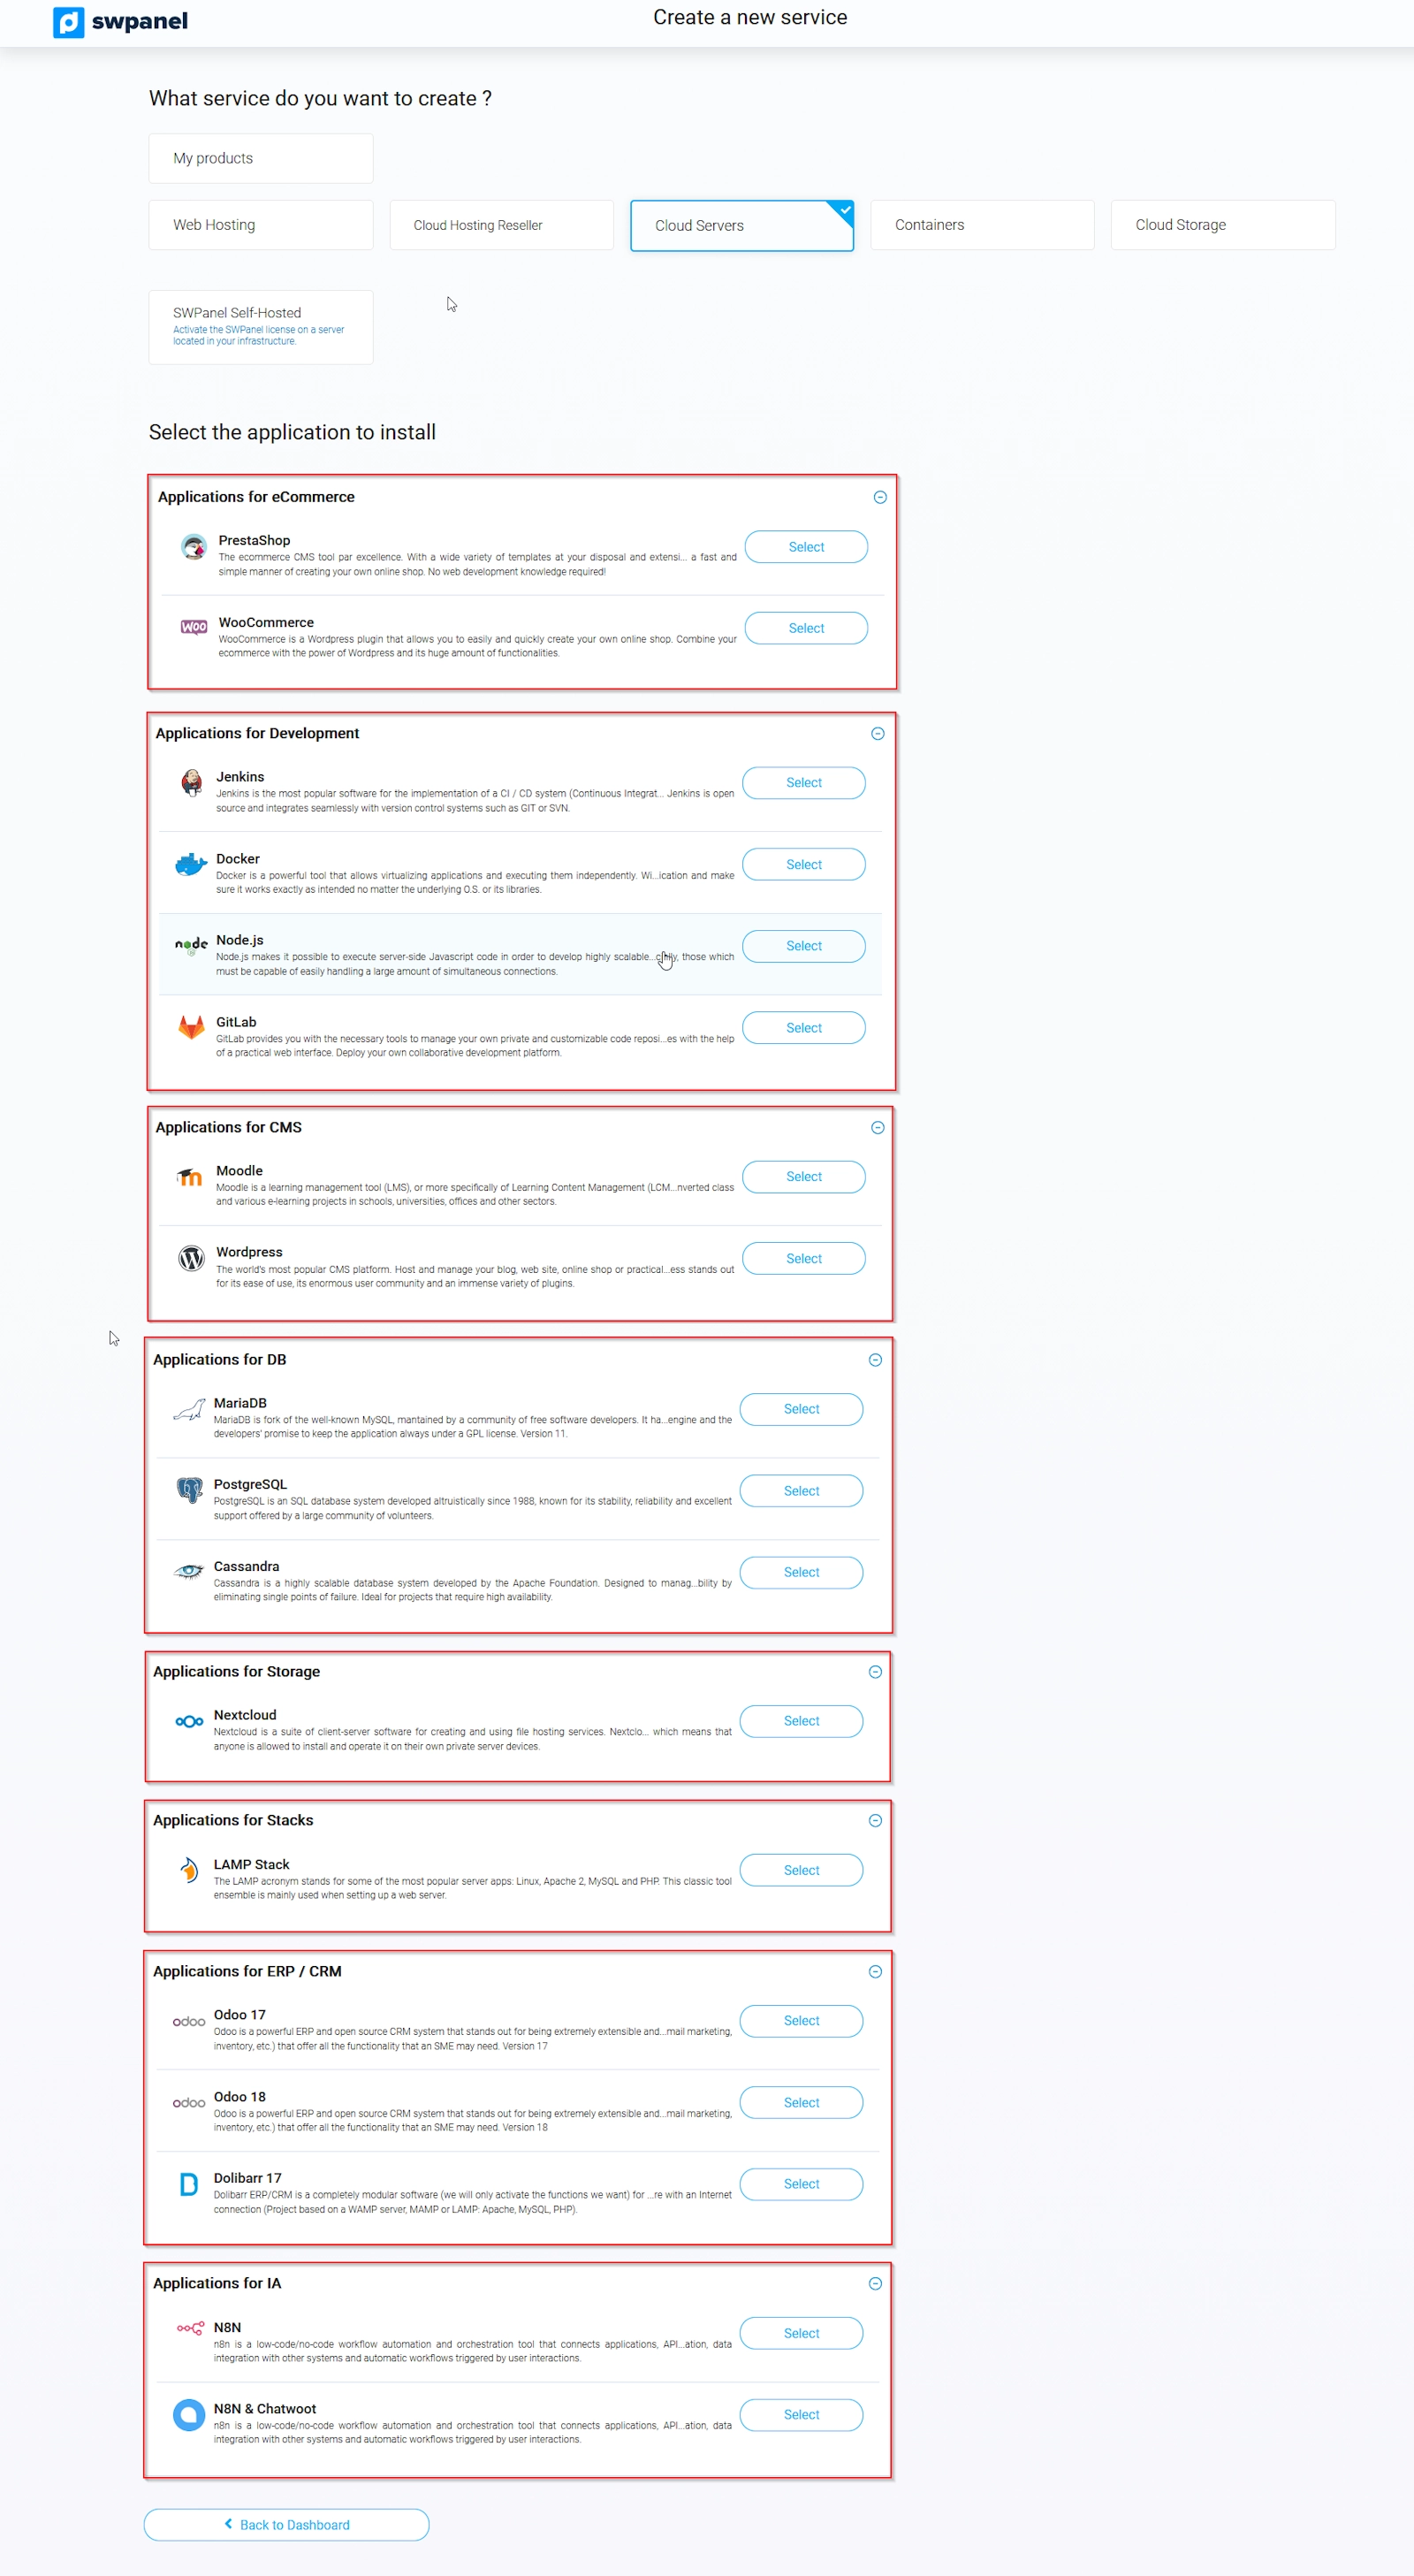
info_capture ℹ️ Note: The screenshot is for guidance purposes, taken from version 2026.000.0030 dated 14/03/2026. It may differ from the current version of SWPanel.
- Next, you can select the application that best suits your needs.
The Cloud will be created automatically with the chosen application already preinstalled. Remember that you can also access the Cloud directly and manually install any other application you prefer.
- Next, select the type and size of the new Cloud according to your needs.
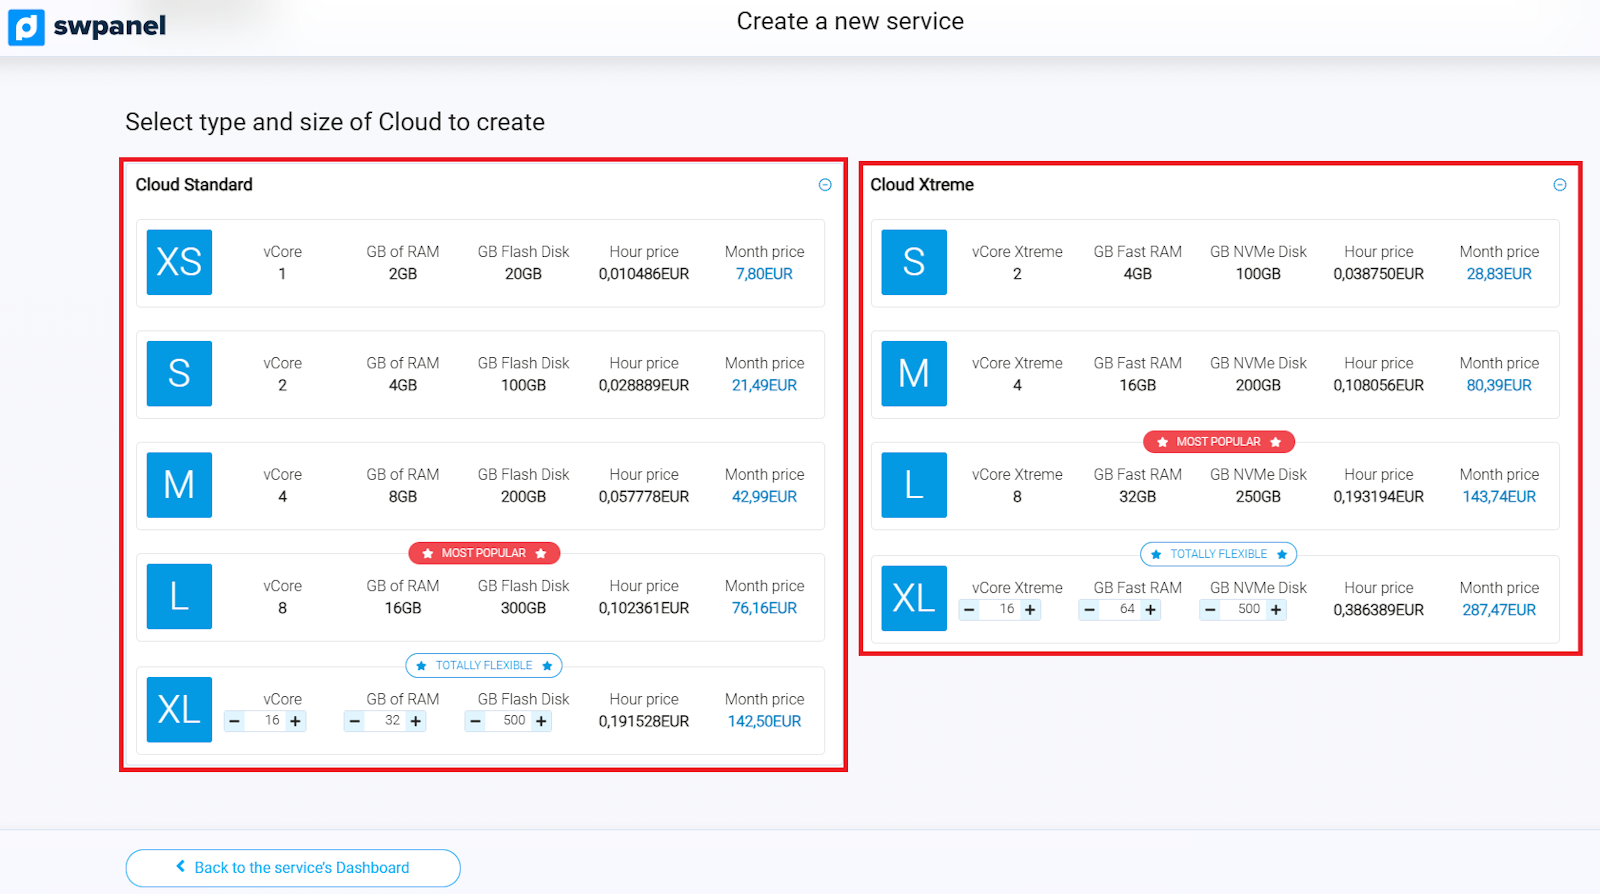
info_capture ℹ️ Note: The screenshot is for guidance purposes, taken from version 2026.000.0030 dated 14/03/2026. It may differ from the current version of SWPanel.
- Select the options that best suit your server and choose the location where you want it to be deployed.
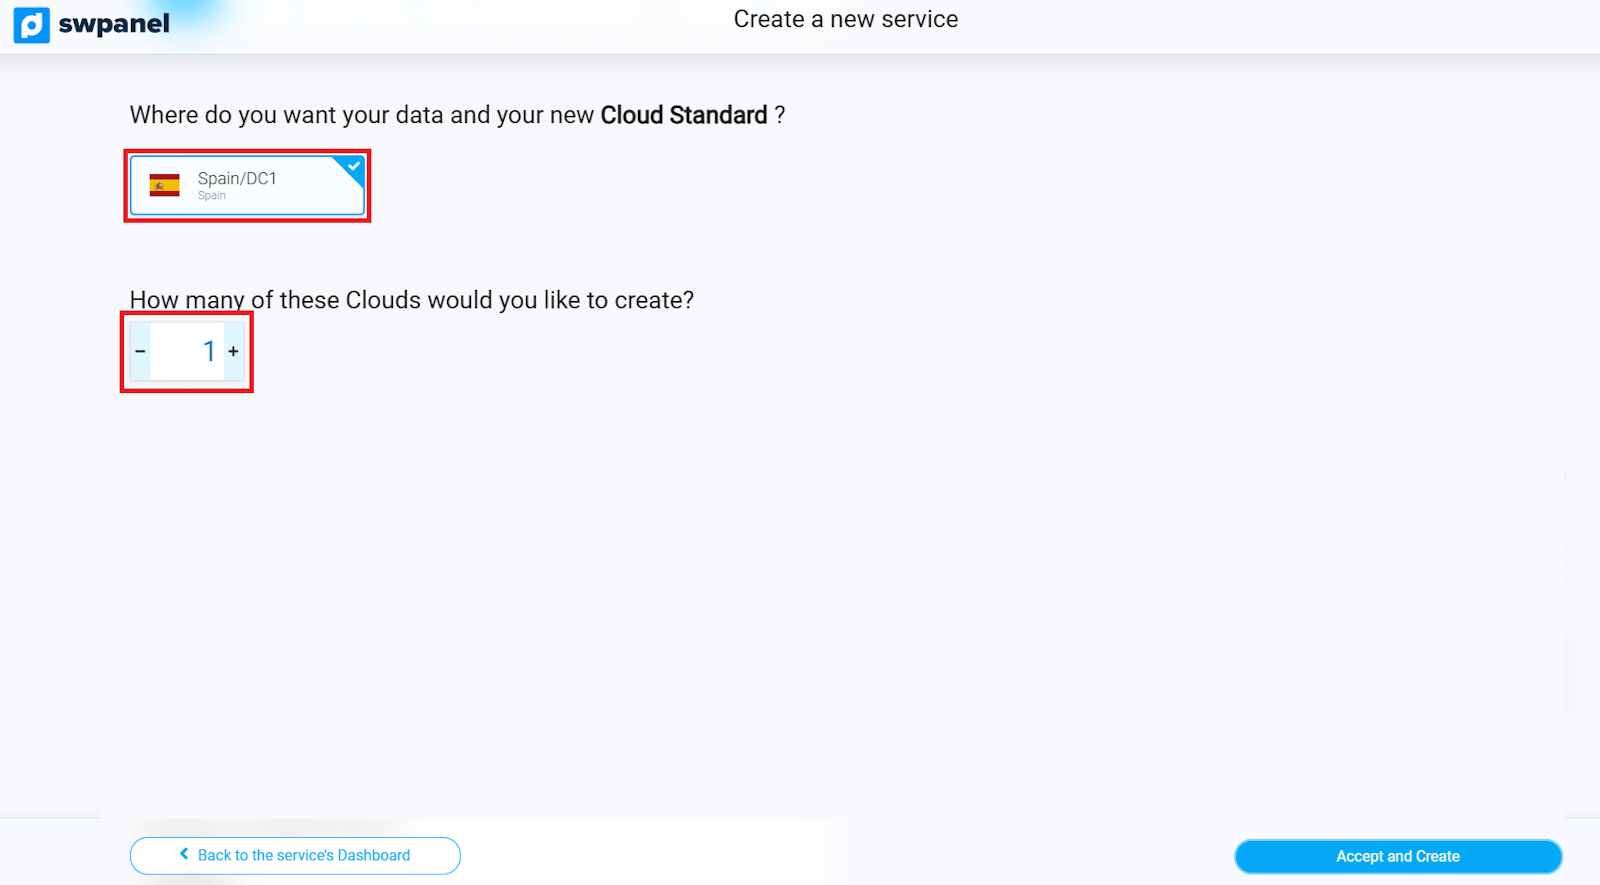
info_capture ℹ️ Note: The screenshot is for guidance purposes, taken from version 2026.000.0030 dated 14/03/2026. It may differ from the current version of SWPanel.
Finally, a summary with the contracting details will be displayed. Carefully review all the information and, when you are sure, press “Accept and create” to finalize the creation of the Cloud.
💡 Tip: Press “Download quote” to obtain a document with all the detailed characteristics of your new Cloud.
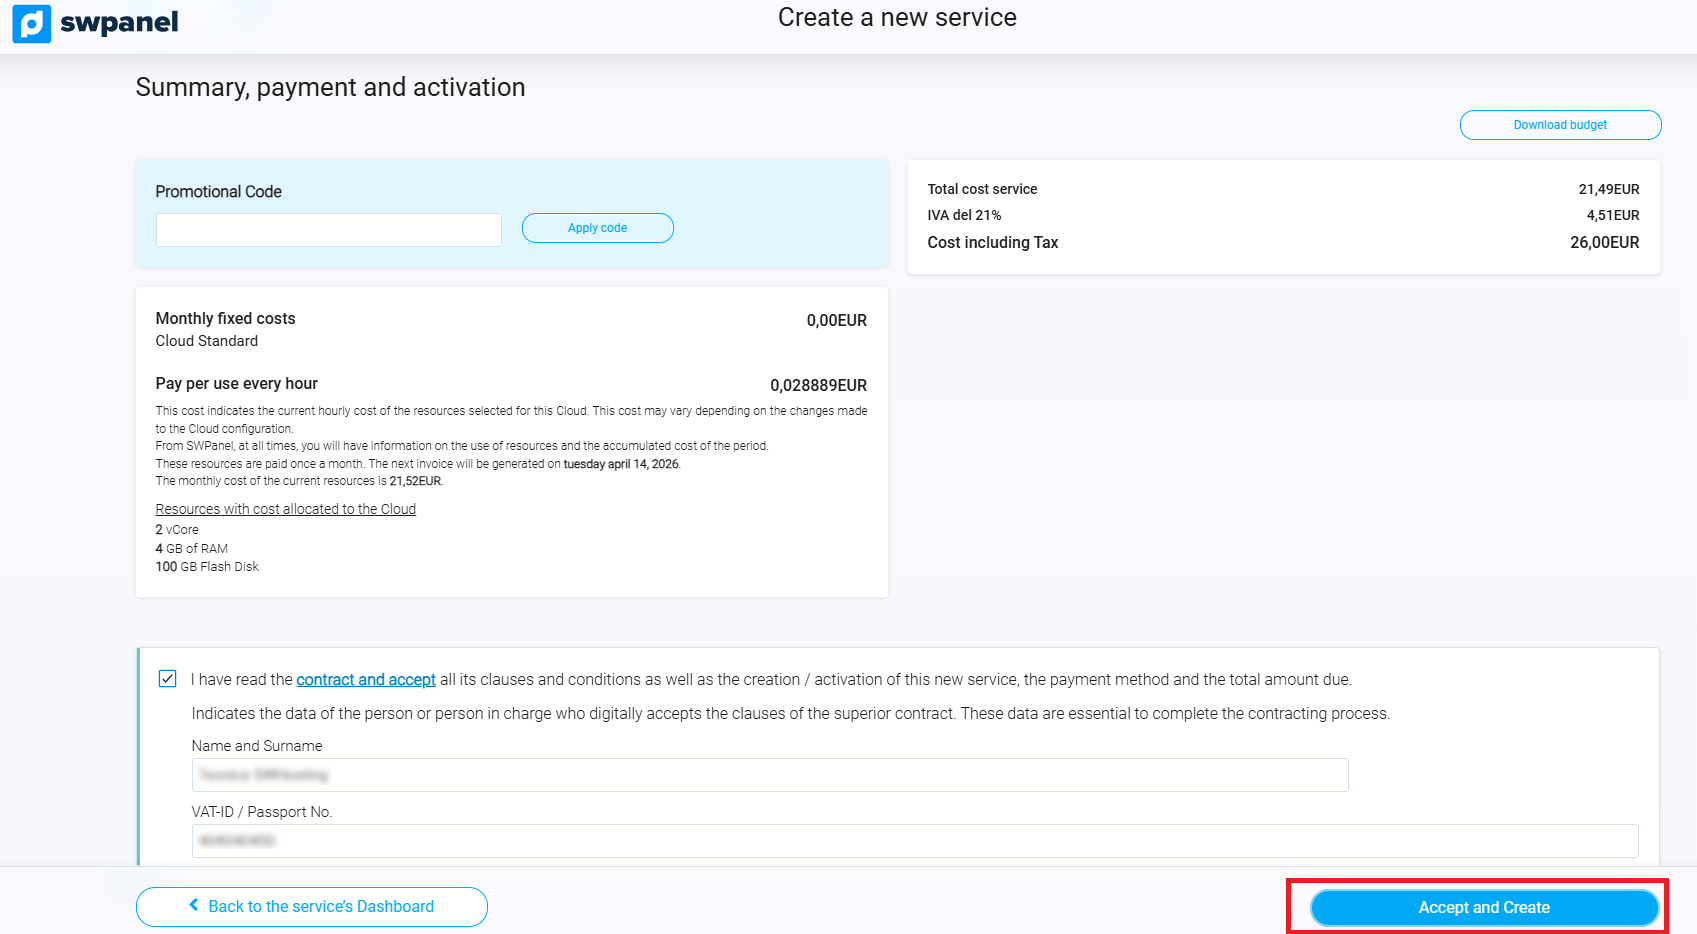
info_capture ℹ️ Note: The screenshot is for guidance purposes, taken from version 2026.000.0030 dated 14/03/2026. It may differ from the current version of SWPanel.
Ready! Your new Cloud with the selected application will be operational in a matter of minutes and ready to use.