
Install SSL certificate purchased via SWPanel
In this manual, you will learn how to install an SSL certificate quickly and easily. Before starting, make sure you meet these requirements:
- Have purchased the SSL certificate through SWPanel.
- Have an active hosting service in SW Hosting, whether in your Cloud or on a PHP Server.
If you have everything ready, let's follow these steps:
- Log in to SWPanel with your credentials.
- In the blue side menu (on the left), select:
Domains and SSL → SSL Certificate Portfolio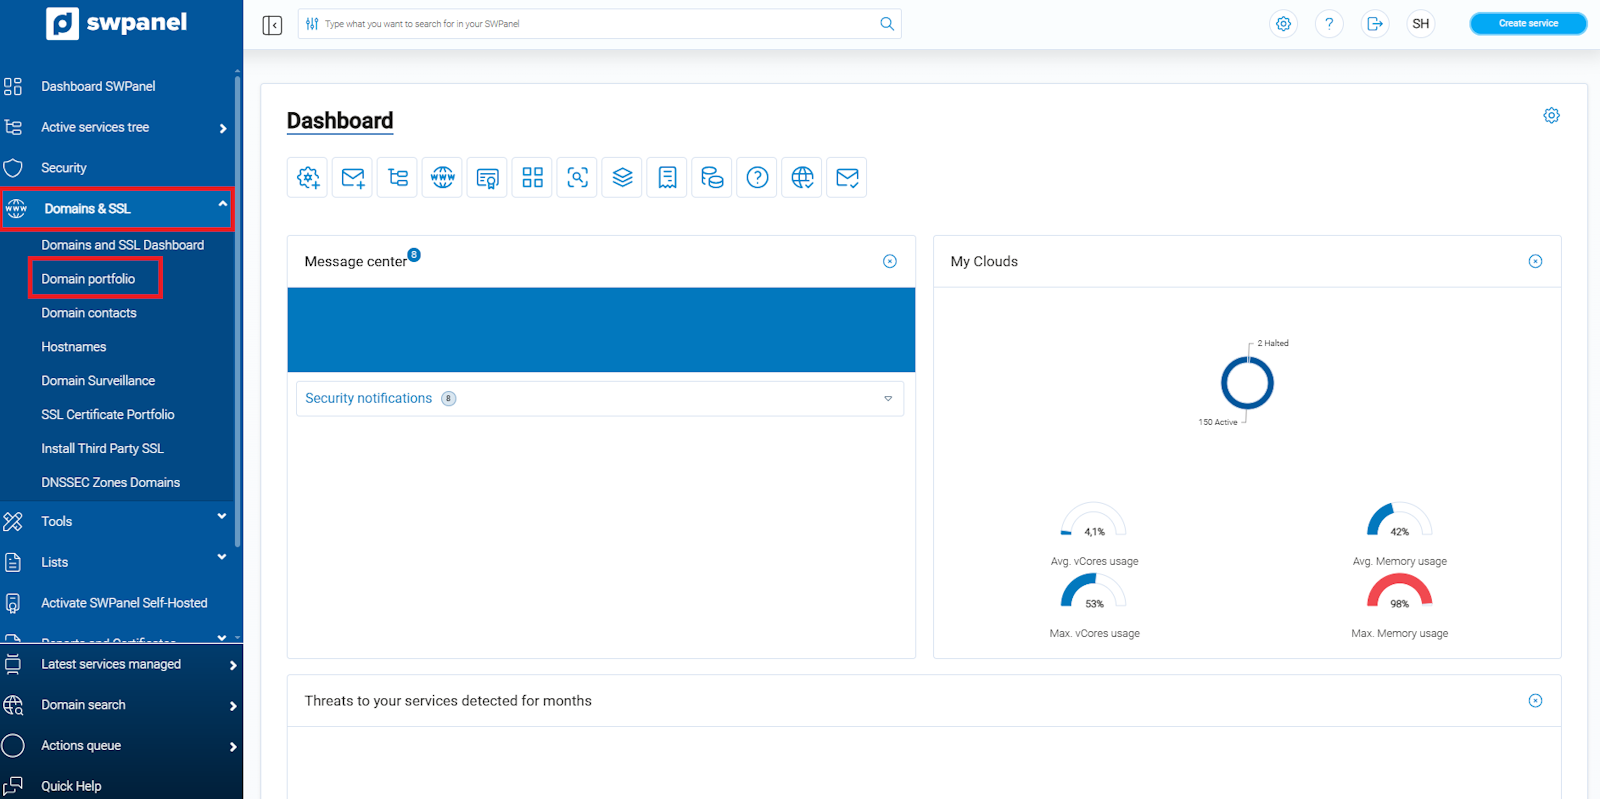
info_capture ℹ️ Note: The screenshot is for guidance only, taken on version 2026.000.0049 dated 03/22/2026. It may differ from the current version of SWPanel.
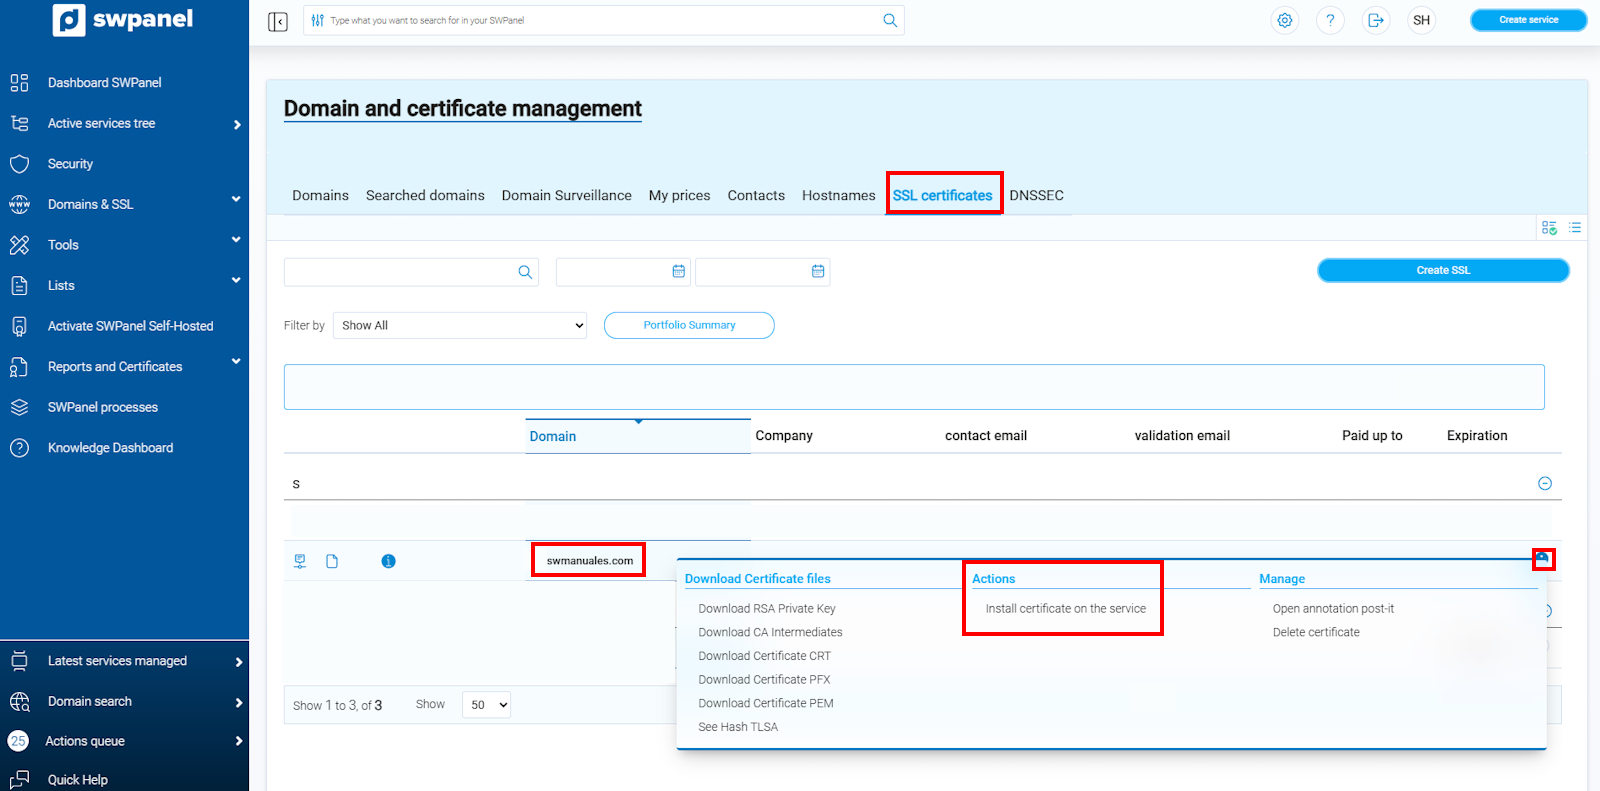
- Within SSL Certificate Management, you will be able to see all contracted certificates and important data, such as:
- The domain to be secured.
- The validation contacts.
- The expiration date of the certificate.
- Hover your cursor over the Manage tab of the certificate you wish to install and select: Install the certificate on the service
info_capture ℹ️ Note: The screenshot is for guidance only, taken on version 2026.000.0049 dated 03/22/2026. It may differ from the current version of SWPanel.
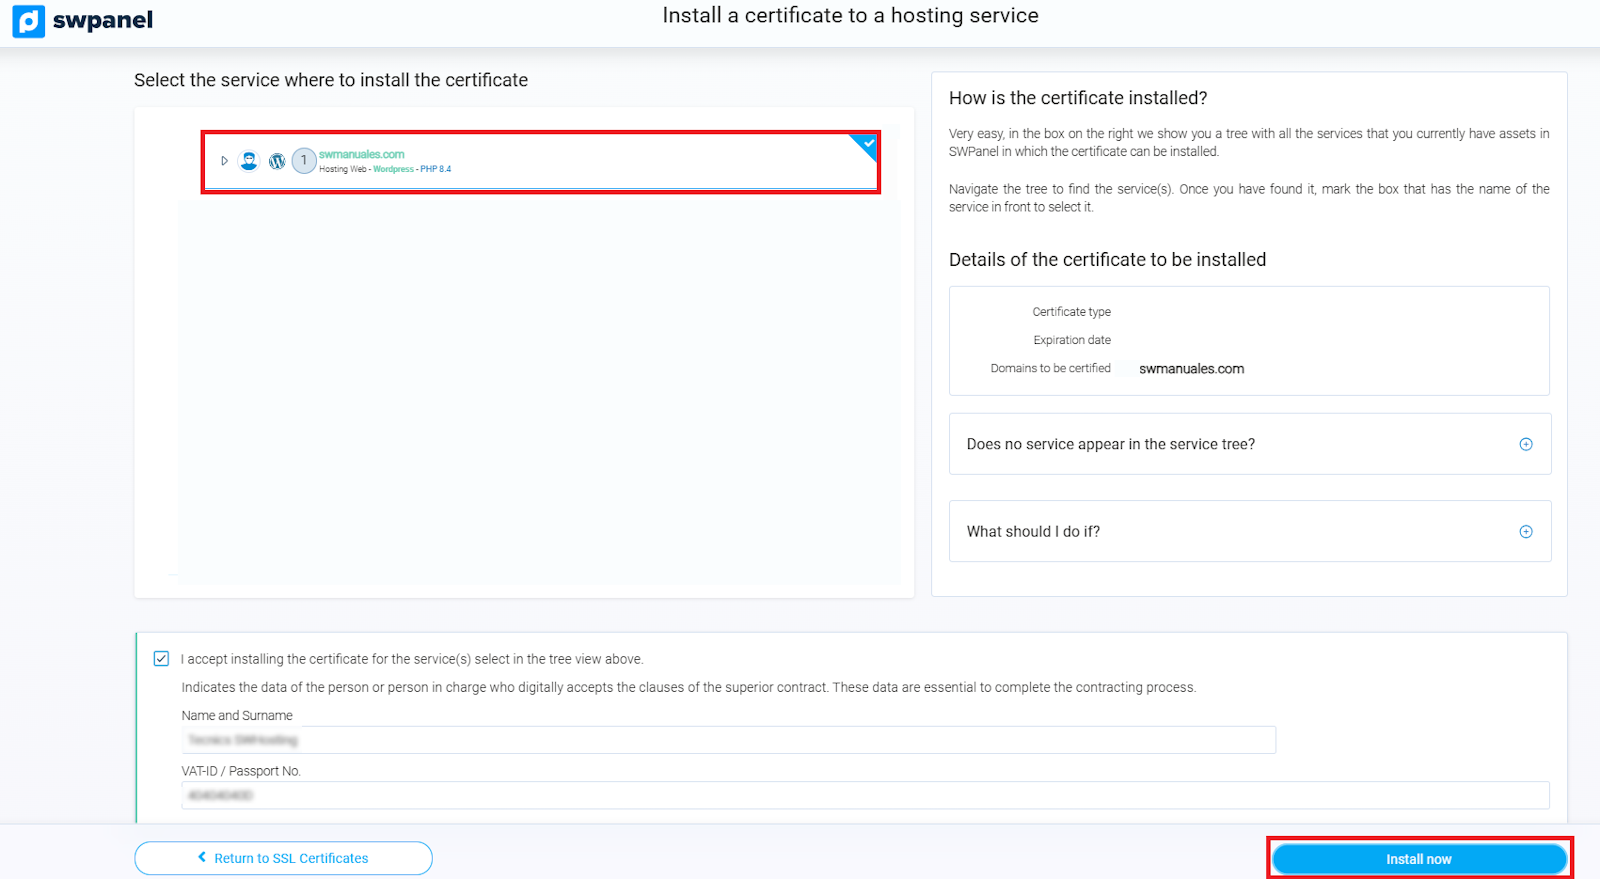
- A new window will open showing all services associated with the certificate you wish to install.
- Select the service on which you want to apply the SSL certificate.
- By doing so, the Continue button will be enabled, allowing you to proceed with the installation.
info_capture ℹ️ Note: The screenshot is for guidance only, taken on version 2026.000.0049 dated 03/22/2026. It may differ from the current version of SWPanel.
-
If you need help:
- No services appear in the tree?
- What should I do if...?
Finally, check the I agree to install the certificate checkbox and click the green button to complete the installation.
Done! Now access your website using https:// to verify that the SSL certificate is working correctly.