
Configure email sending plugin (WP Mail SMTP) in WordPress
One of the needs of your WordPress site may be sending emails, using the 'wp_mail()' function. Among others, it is usually used for sending:
- Contact forms
- Confirmation messages (registrations, orders...).
- Customer notifications.
We will explain how to incorporate the ability to connect to SMTP mail servers in WordPress for sending your emails. For this, we will use the 'WP Mail SMTP' plugin, as it is one of the simplest and most common.
Install 'WP Mail SMTP' plugin in WordPress
'WP Mail SMTP' is one of the most common plugins in WordPress for sending emails. We will proceed with the installation:
-
Access the WordPress administration panel. It is usually found in the 'wp-admin' directory, for example:
- https://www.tudominio.com/wp-admin
-
In the left menu, click on Plugins > Add New and in the search field enter 'wp mail smtp':
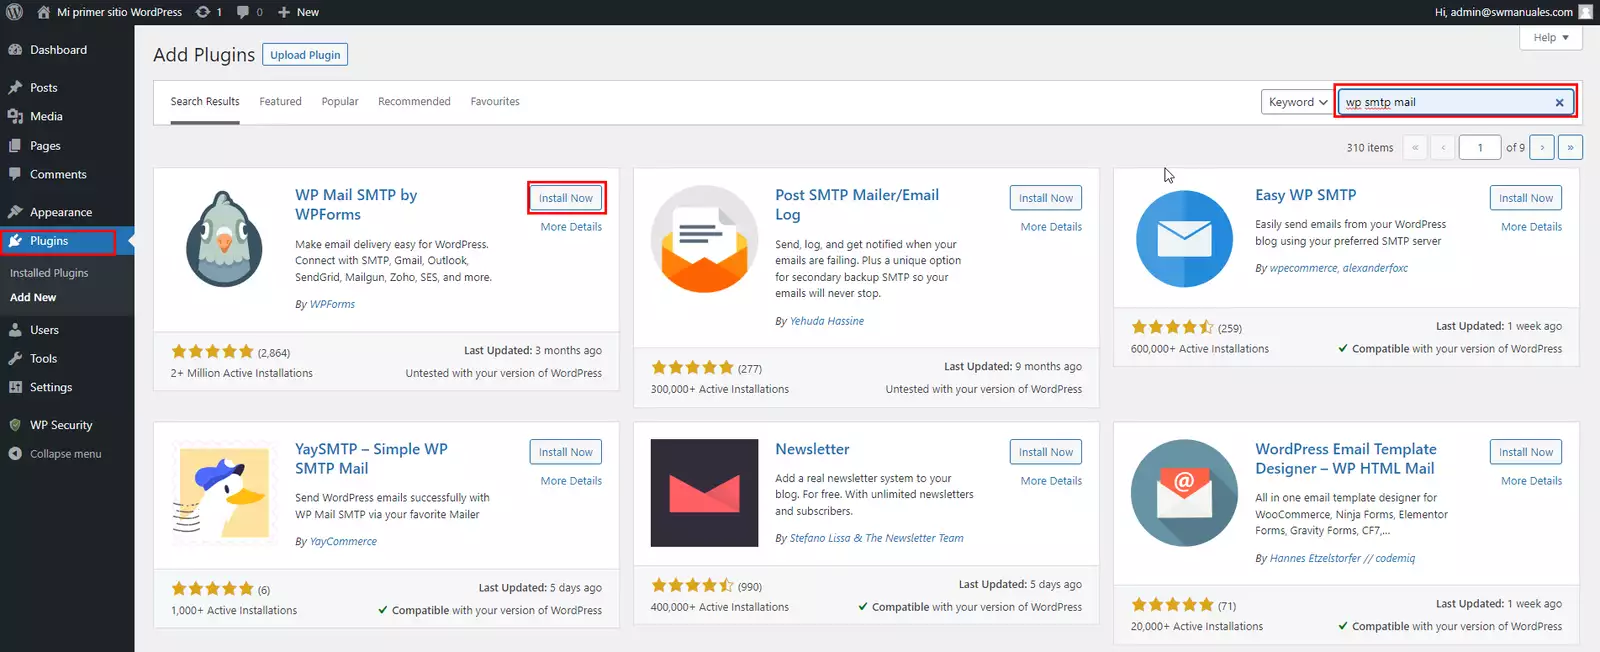
- Click on the Install Now button for the WP Mail SMTP by WPForms plugin and once installed, click on the Activate button that appears in the same place.
Now that we have installed the plugin responsible for sending emails, we proceed with its configuration:
- Access Settings > WP Mail SMTP:
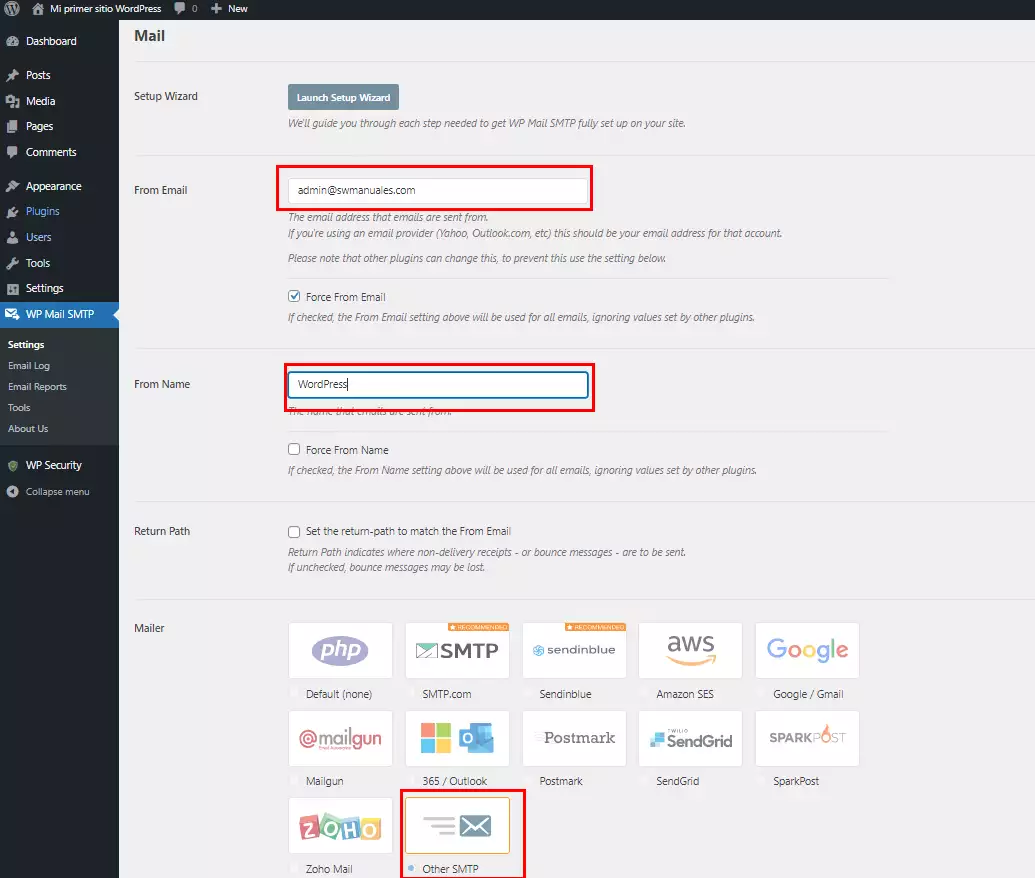
- Fill in the following fields:
-
From Email: The email address that will appear as the sender in WordPress email shipments.
-
From Name: The name that will appear as the sender in WordPress email shipments.
-
Mailer: In this example, we will assume that you want to configure the mail server you use in SW Hosting, select 'Other SMTP'. You can also choose to use a public server such as 'Gmail'.
-
-
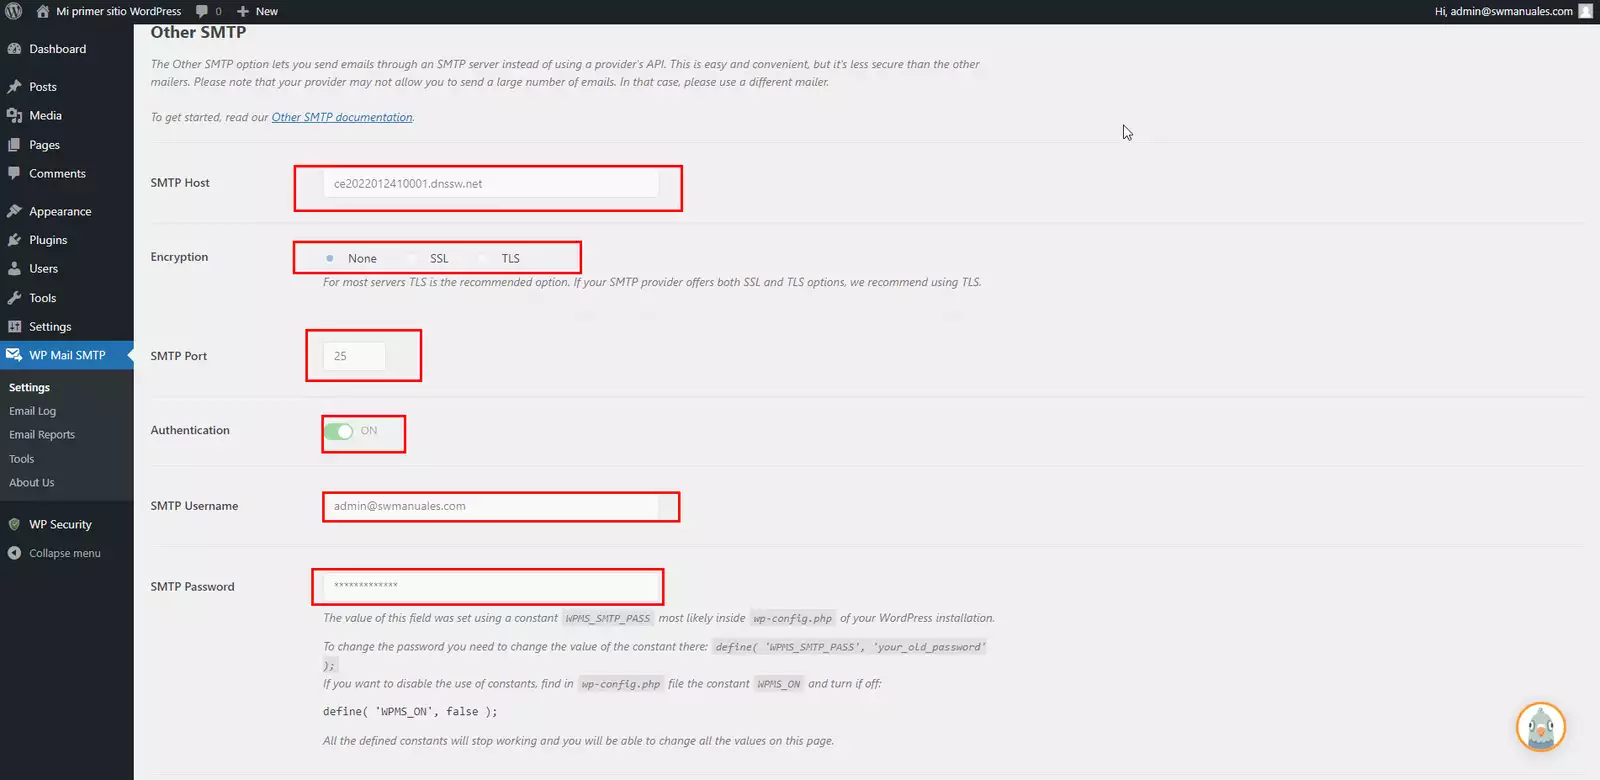
Fill in the following fields:
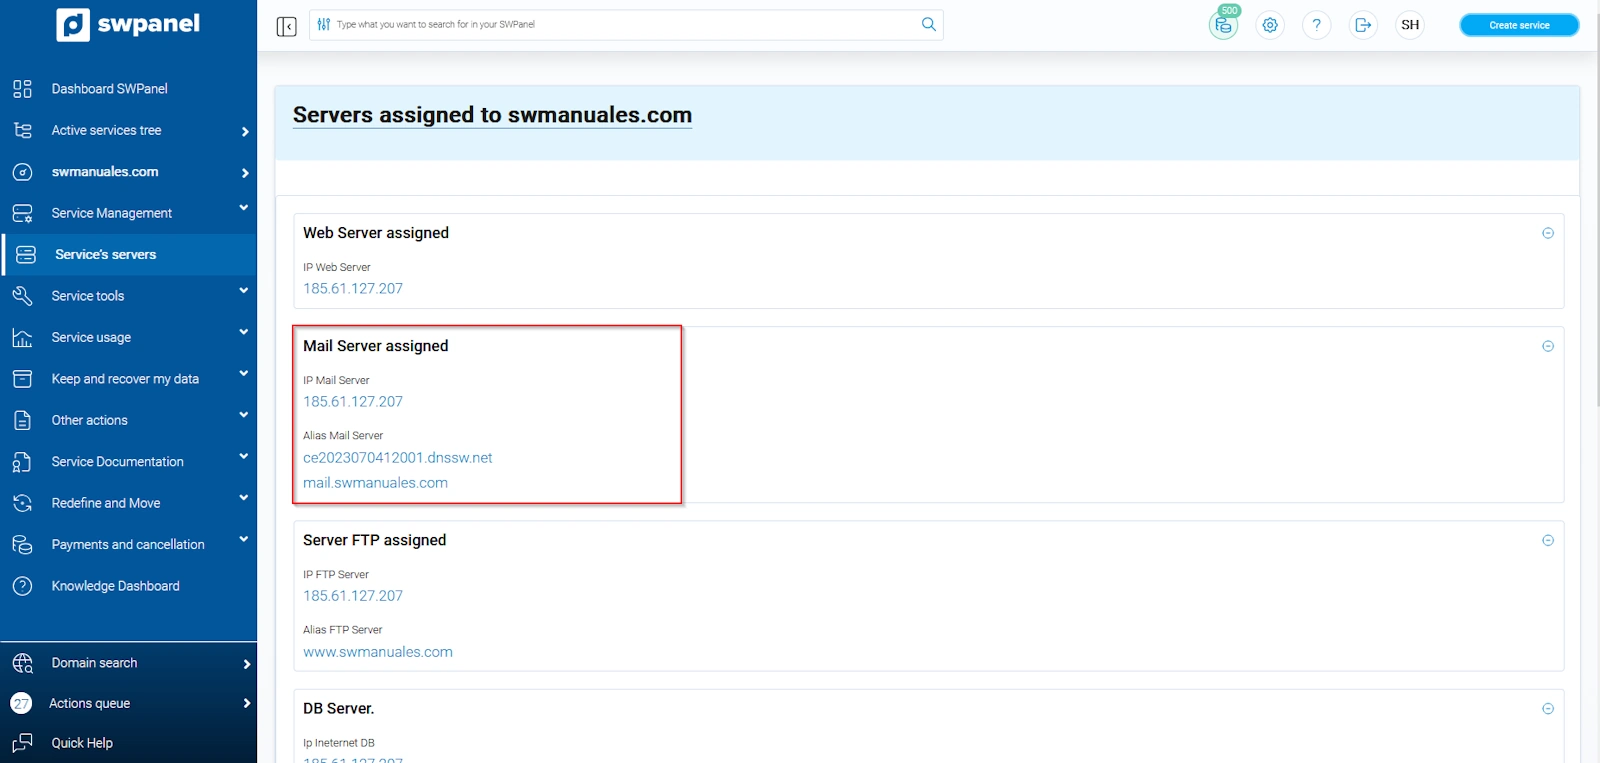
- SMTP Host: Mail server address. You can find this information in SWPanel, accessing your service and clicking on Service Servers:
-
Encryption: None.
-
SMTP Port: 25.
-
Auto TLS: On.
-
Authentication: On.
-
SMTP Username: Email account address.
-
SMTP Password: Email account password.
-
Click Save Settings to confirm the changes.
Generate test email
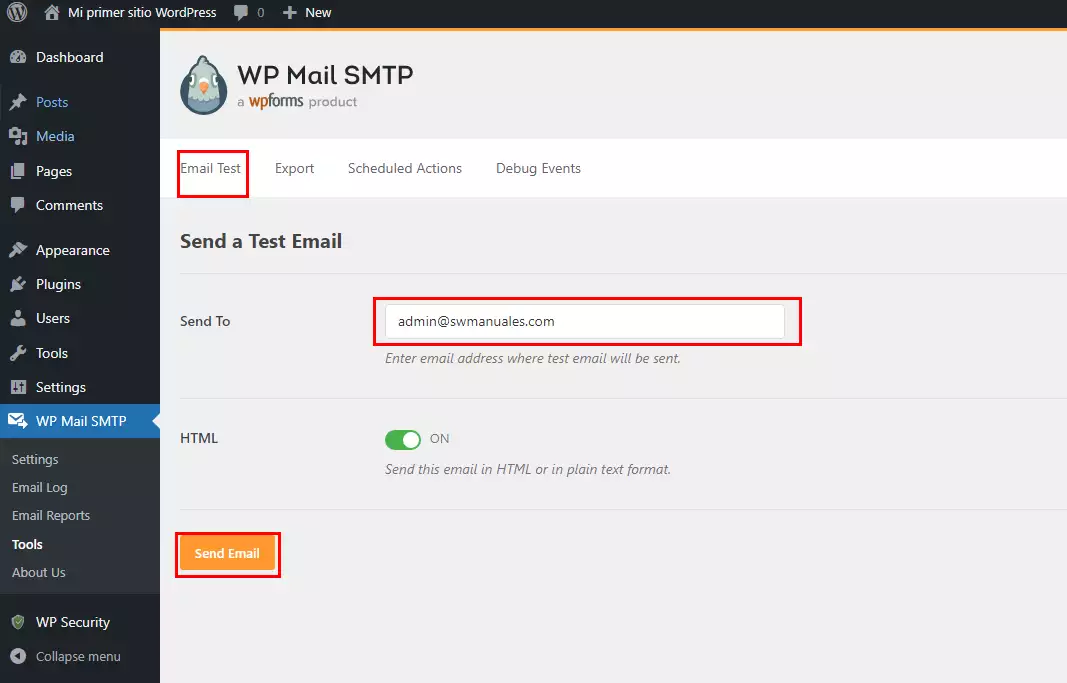
Once configured, we will check that it is working correctly by generating a test email:
- Access the Email Test tab.
- Enter the email address to which the test email will be sent.
- Click Send Email.
If the sending fails, review the entered configuration.
If everything is correct, the following appears:
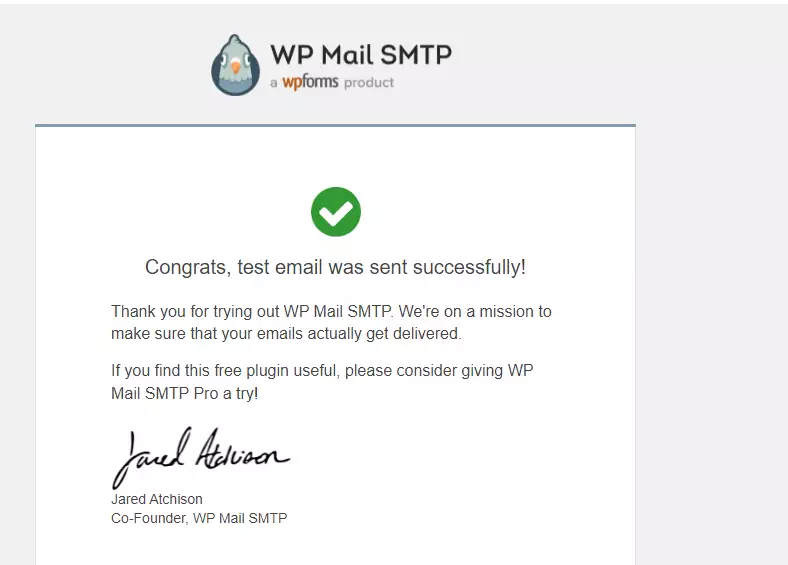
You will receive an email like the following:
You have now configured email sending in WordPress!