Configure email accounts from my Hosting in Apple iOS Mail
danger ⚠️ These email account settings are only valid for Cloud servers with Linux Debian 10 operating system versions or higher. ⚠️
info In order to use the configuration detailed below, it is essential to have the TLS certificate activated at the service level. The ? Handbuch: How to Activate TLS for my email via SWPanel. indicates how to proceed.
Configure the email account in Apple iOS Mail
iPhone email configuration is slightly different from Android, so we must pay special attention to certain details to avoid errors.
The data we must keep in mind for the email account configuration are as follows:
- Incoming mail server mail.dominioejemplo.com
- Outgoing mail server mail.dominioejemplo.com
- Account name [email protected]
- Access key ********
- SMTP Port: 465
- IMAP Port: 993
- POP3 Port: 995
- Protocol: SSL/TLS
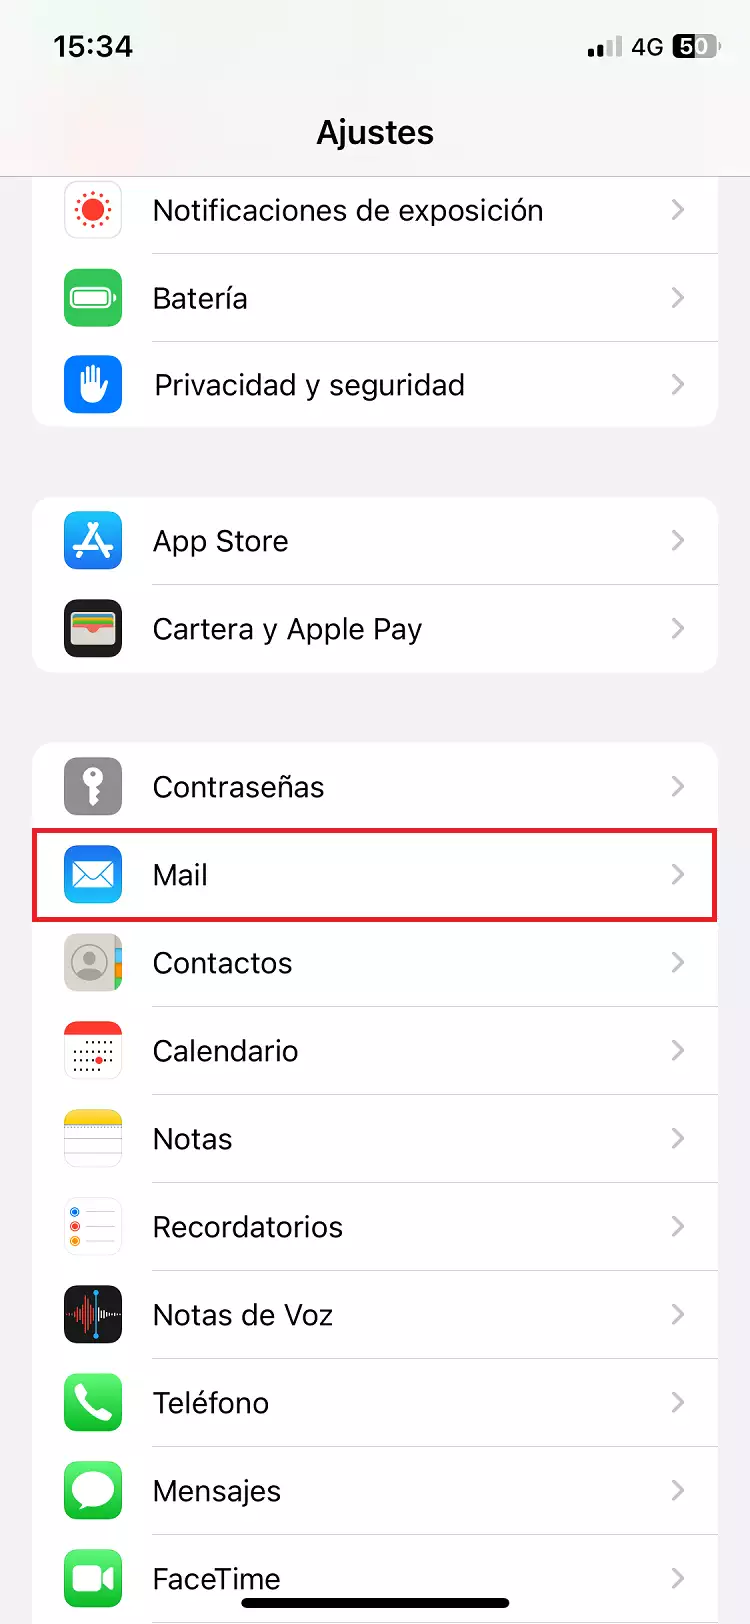
In phone settings, we look for the 'Mail' option:
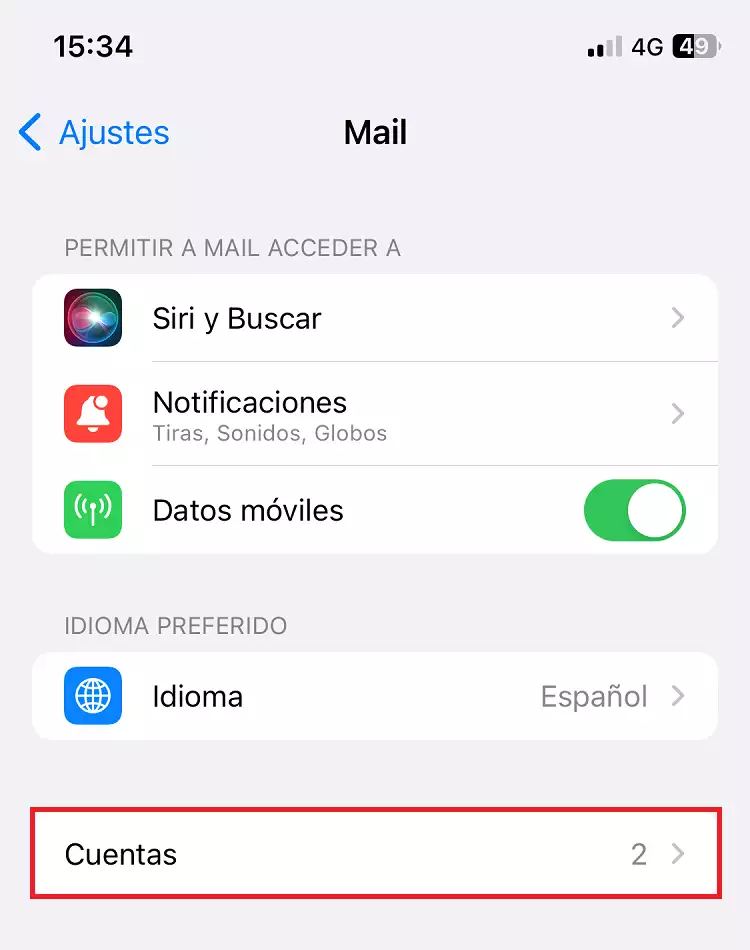
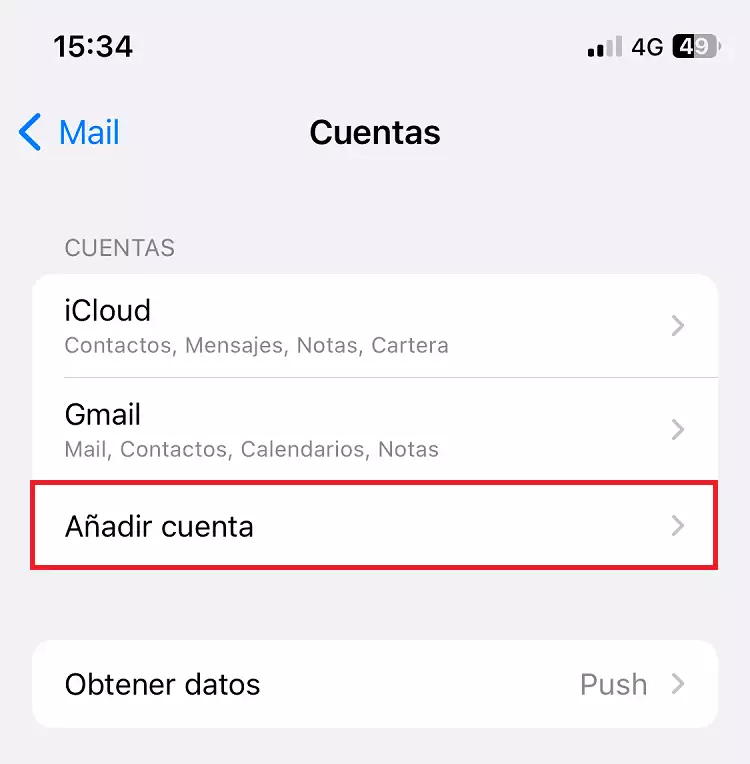
Once open, we select 'Accounts' and then click on 'Add Account':
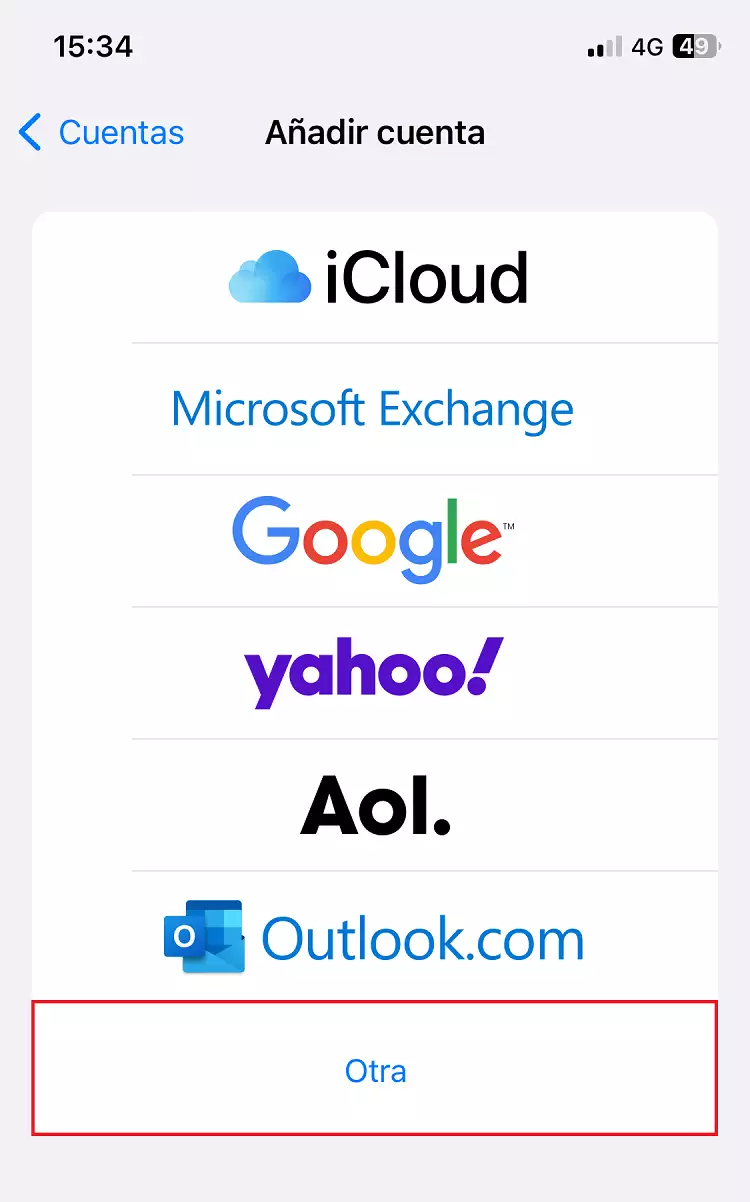
In the account selection panel, we choose the 'Other' option:
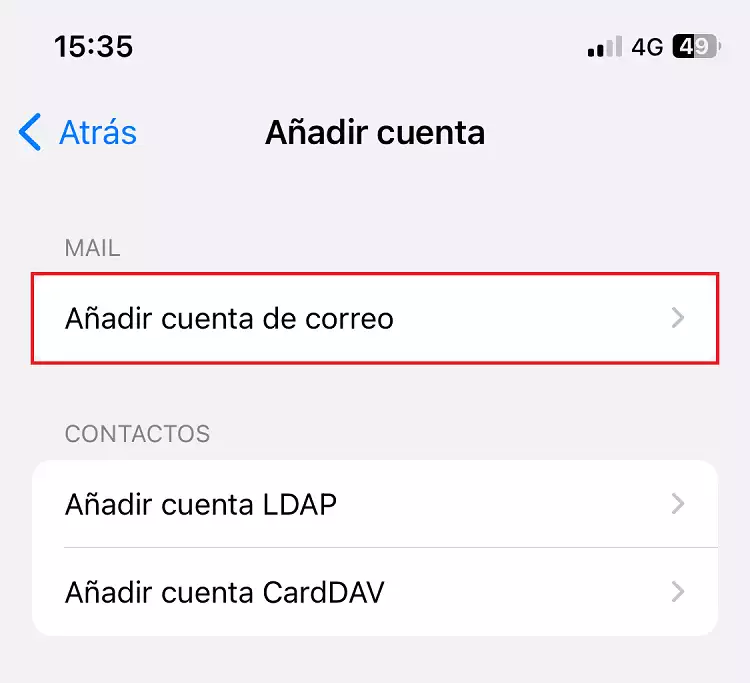
We select 'Add Mail Account' within the MAIL option:
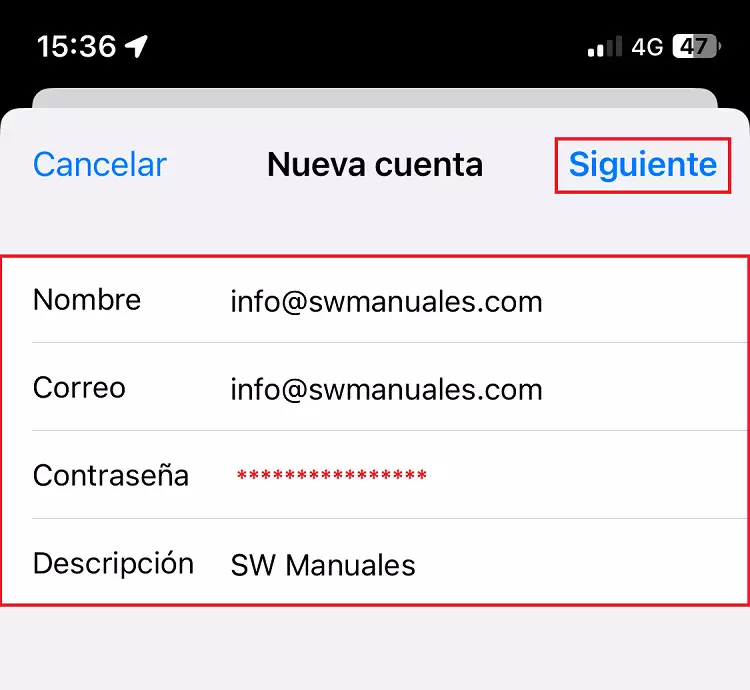
The email account creation wizard will open. In this step, we must fill in the requested data.
info It is very important to keep in mind that in the 'Name' section, we will not put our name, but the email account.
Once all fields are filled in, we click on 'Next':
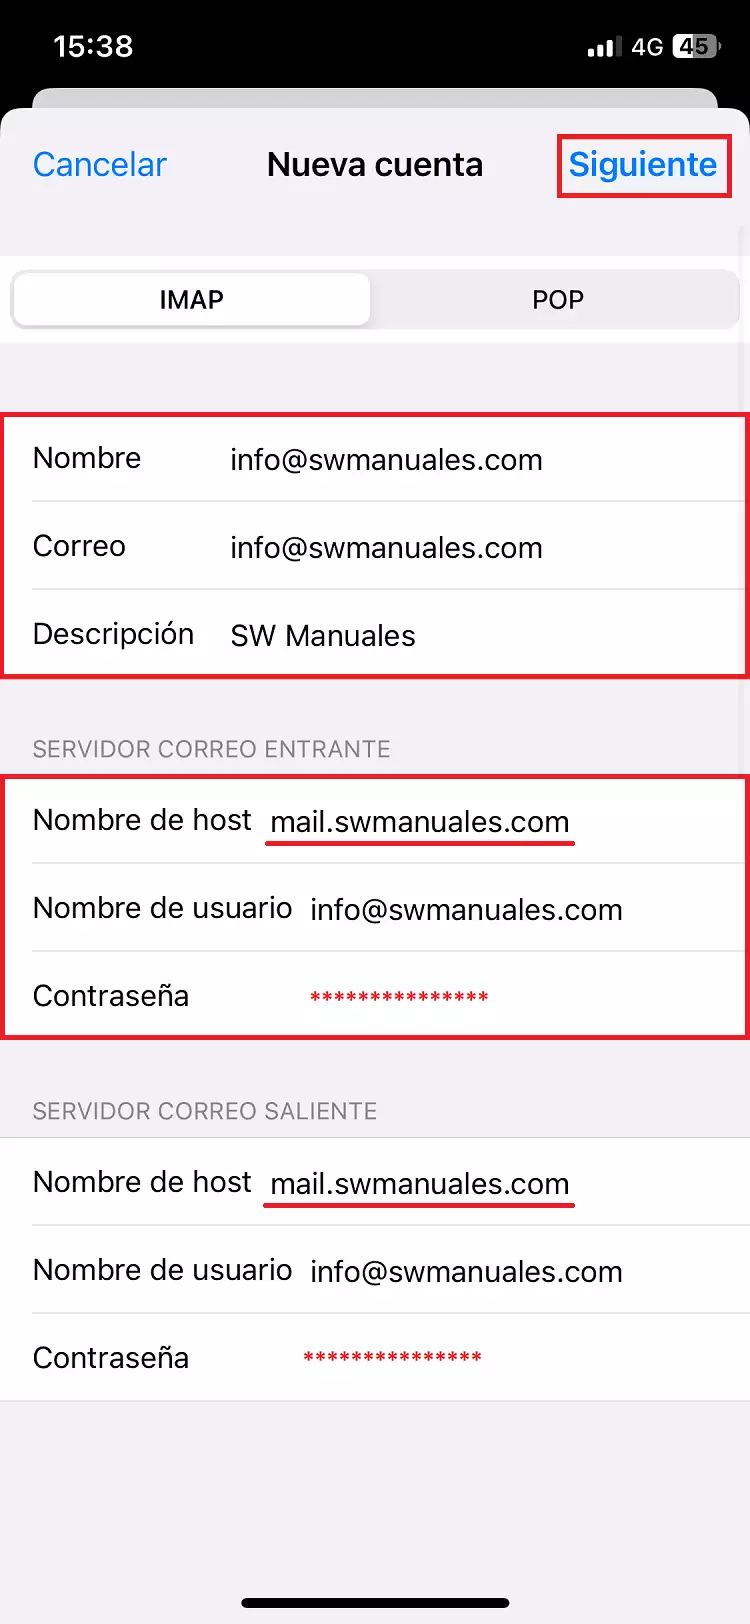
In this section, it will ask us to indicate which incoming protocol we wish to use (IMAP or POP3) and will request that we fill in the incoming and outgoing mail host data, username, and enter the access password again.
info In the username, we will again put the email account to be configured.
Once all fields are filled in, we click on 'Next':
info Please remember that the email account key information cannot be viewed from SWPanel, as in compliance with ISO 27001, LOPD, and GDPR regulations, we do not store or provide personal keys, nor do we have access to email account keys, let alone provide them.
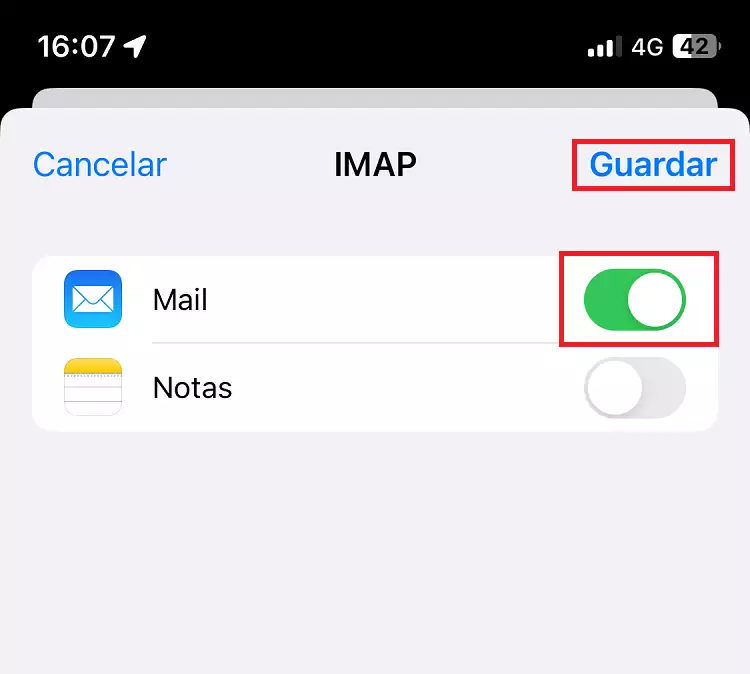
We will select which applications we want to synchronize and click 'Save' to complete the configuration: