
How to create custom Nameservers with your domain
How to create custom alternative nameservers with Glue Records in SWPanel
1. Introduction and summary of the manual
This manual will guide you step by step through the creation of alternative custom nameservers using your domain from SWPanel, making use of so-called Glue Records. This process is necessary if you want to use your own DNS servers (for example, ns1.yourdomain.com, ns2.yourdomain.com) instead of the default DNS such as dns3.swhosting.com or dns4.swhosting.com.
What are Glue Records?
Glue Records (or host records) are special DNS records that are necessary when the nameserver is within the same domain that it needs to resolve. They are used to prevent resolution loops by directly associating a subdomain such as ns1.yourdomain.com to a specific IP address.
Prerequisites
To be able to perform this configuration:
-
our domain must be managed within SWPanel.
? Manuel : How to transfer a domain from SWPanel ? Manuel : How to register a domain from SWPanel
-
The domain must have a hosting service associated with it, or at least a service that provides a functional DNS zone.
? Manuel : How to create a Hosting plan for a domain registered in your SWPanel
2. Create the A records in the DNS zone
2.1 Access the hosting service
From the top search bar in SWPanel, locate the hosting service associated with your domain:
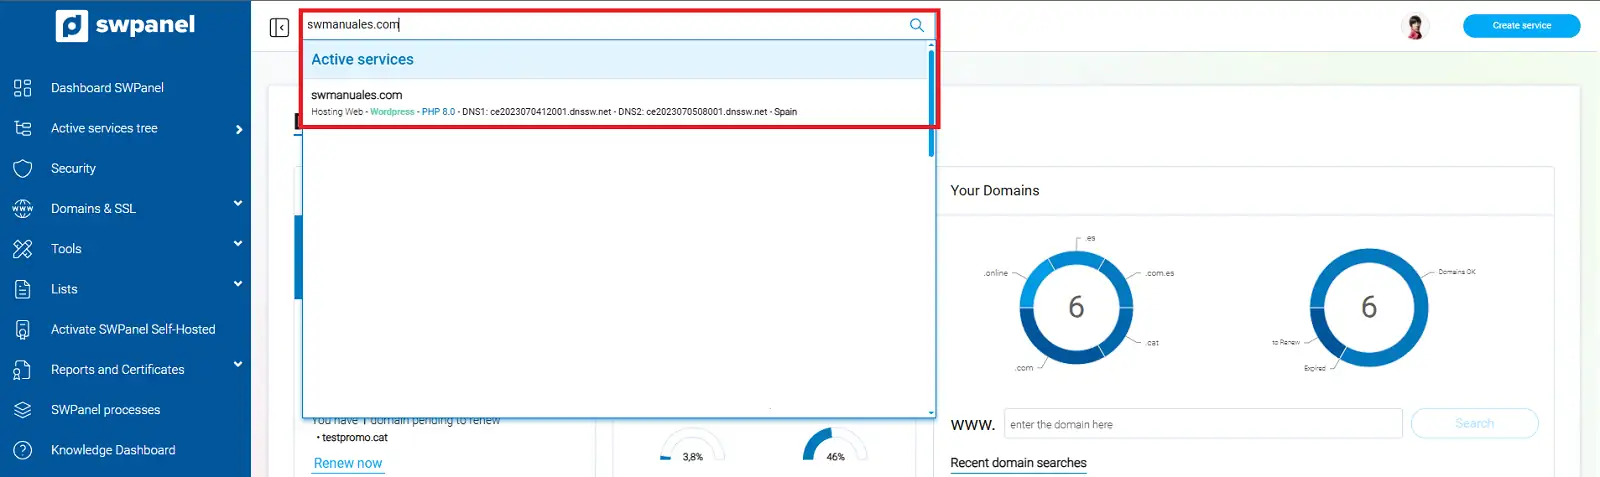
info_capture The screenshot is for illustrative purposes only. It may differ from the current version of SWPanel.
2.2 Create the A records
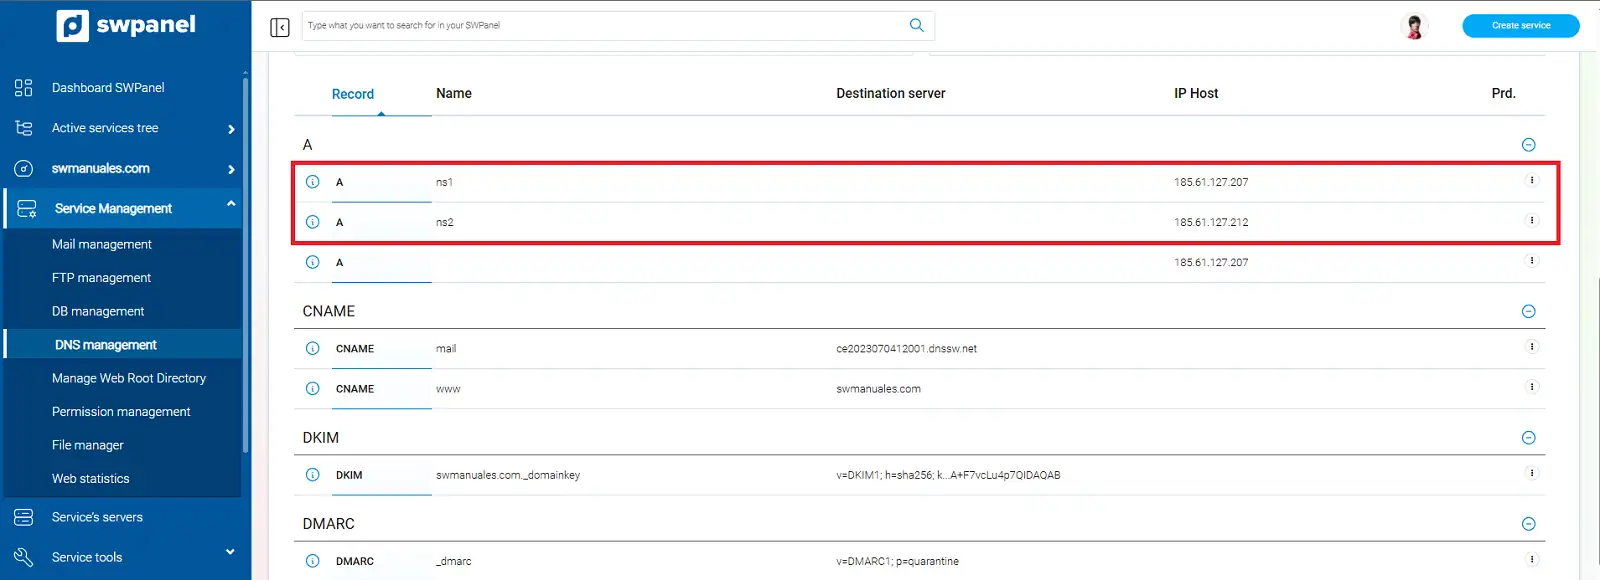
Access the left side menu and select DNS Management. Then, create two DNS records of type A.
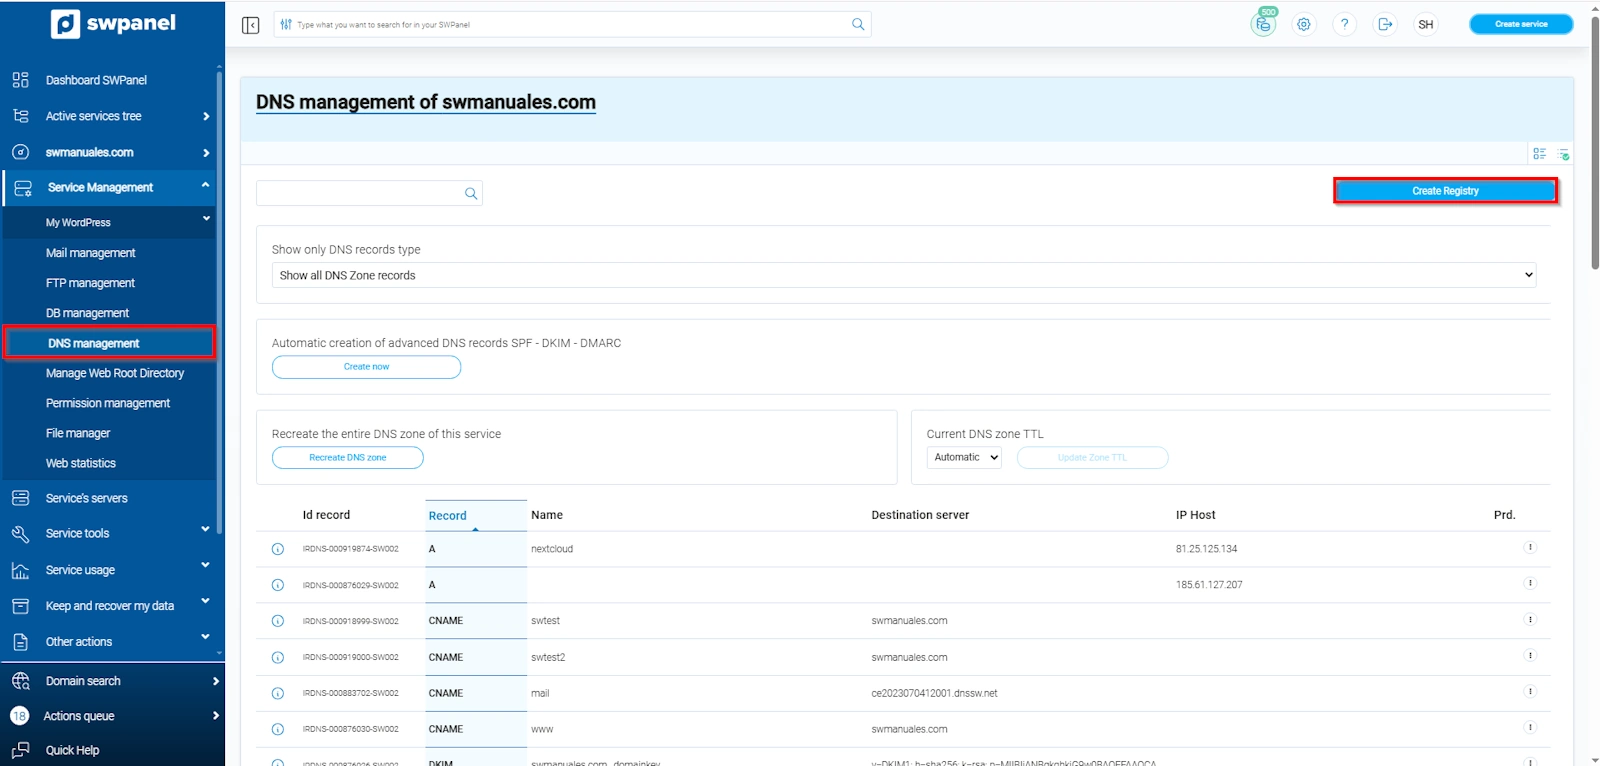
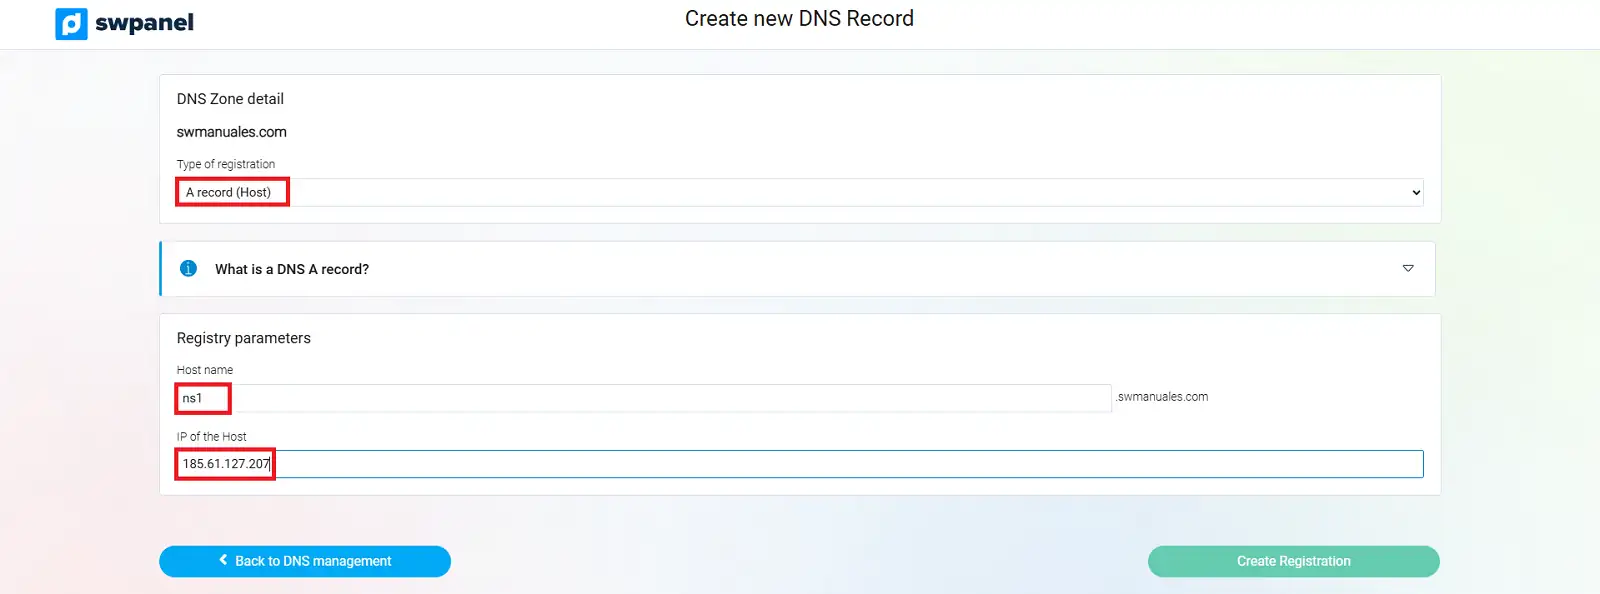
Configura los registros como sigue:
- Record type: A
- Host name: ns1 (or the desired name)
- Host IP: IP address of the primary DNS server
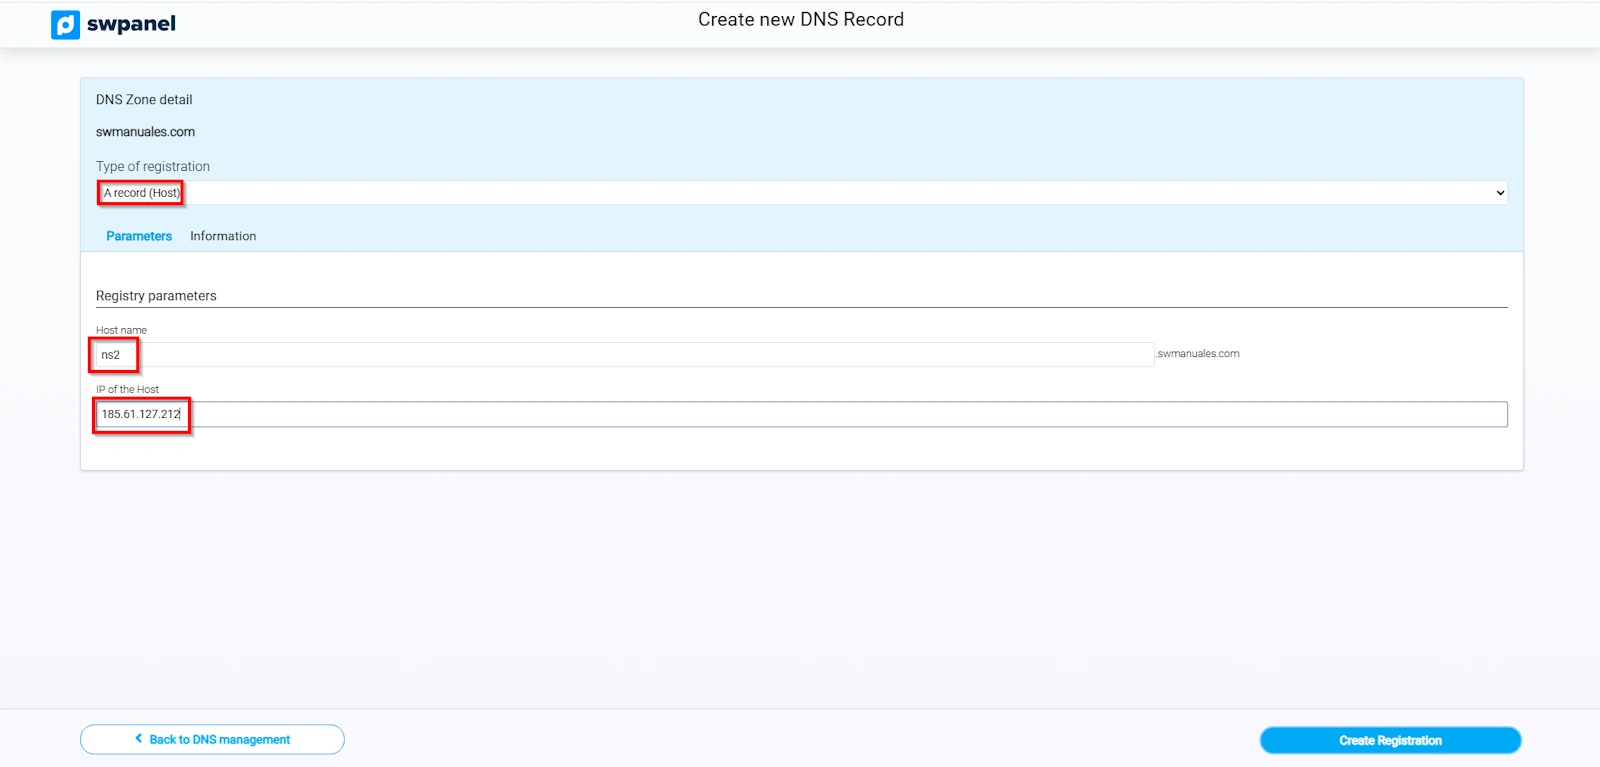
Repeat the process for the second record, pointing to the IP address of the secondary DNS server.
2.3 Wait for initial propagation
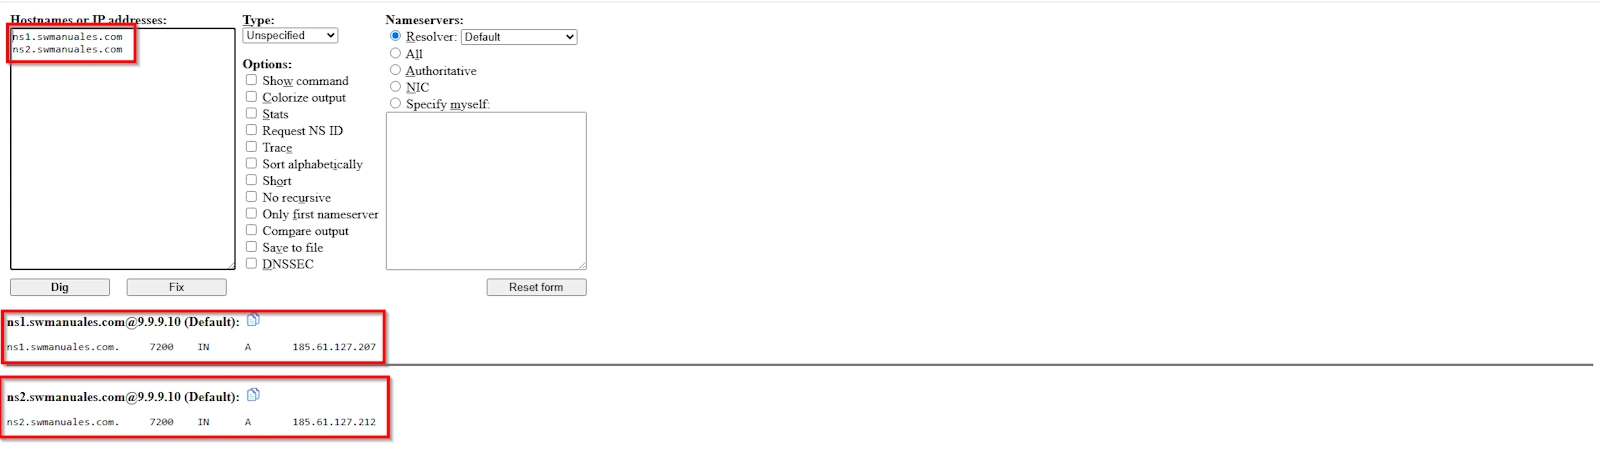
Once the records have been created, you will need to wait for them to propagate globally.
You can check the propagation using tools such as Dig Web Interface or What's My DNS.
3. Create custom hostnames
3.1 Access the Hostnames section
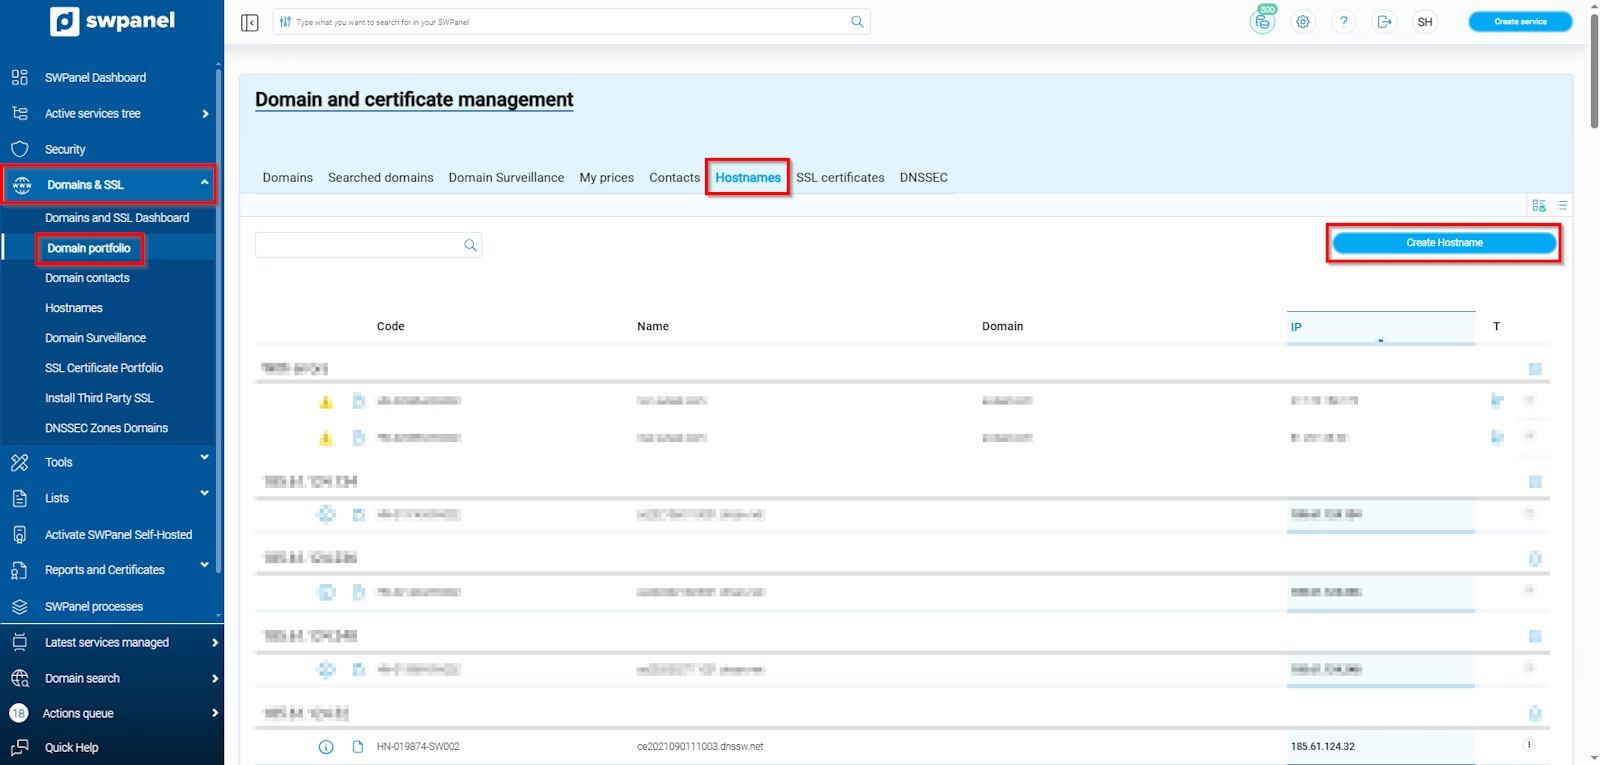
From the SWPanel Main Dashboard :
- Go to Domains and SSL > Domain Portfolio > Hostnames
3.2 Create the Hostnames
Click on Create Hostnames and enter the following information:
- DNS Name: subdomain.domain.extension (For example, ns1.swmanuales.com)
- Host IP: IP address of the server, in this case, it would correspond to 81.25.112.3
- Use by default: select whether it will be the primary or secondary
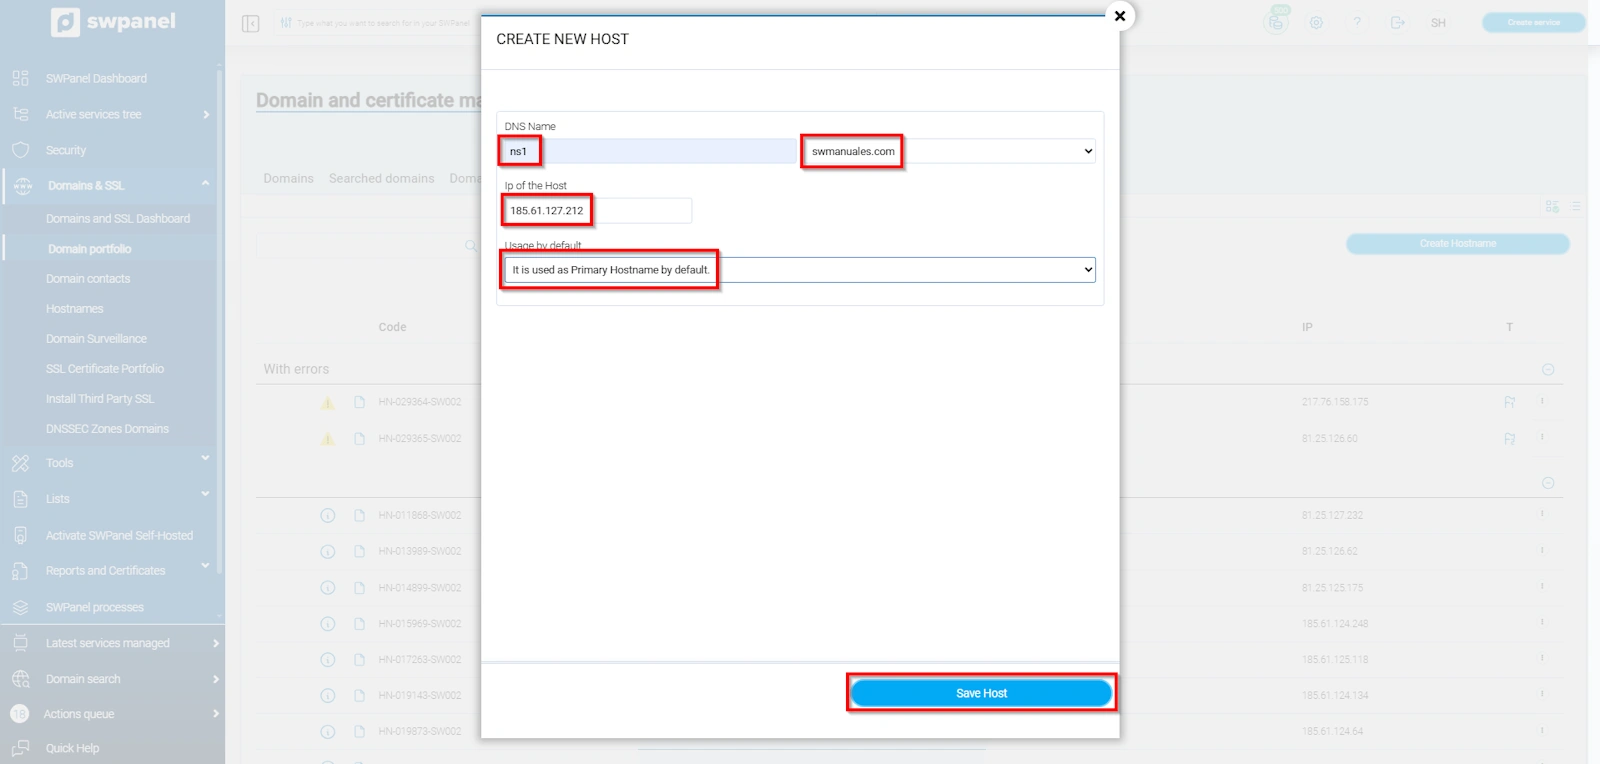
Repeat for ns2.swmanuales.com.
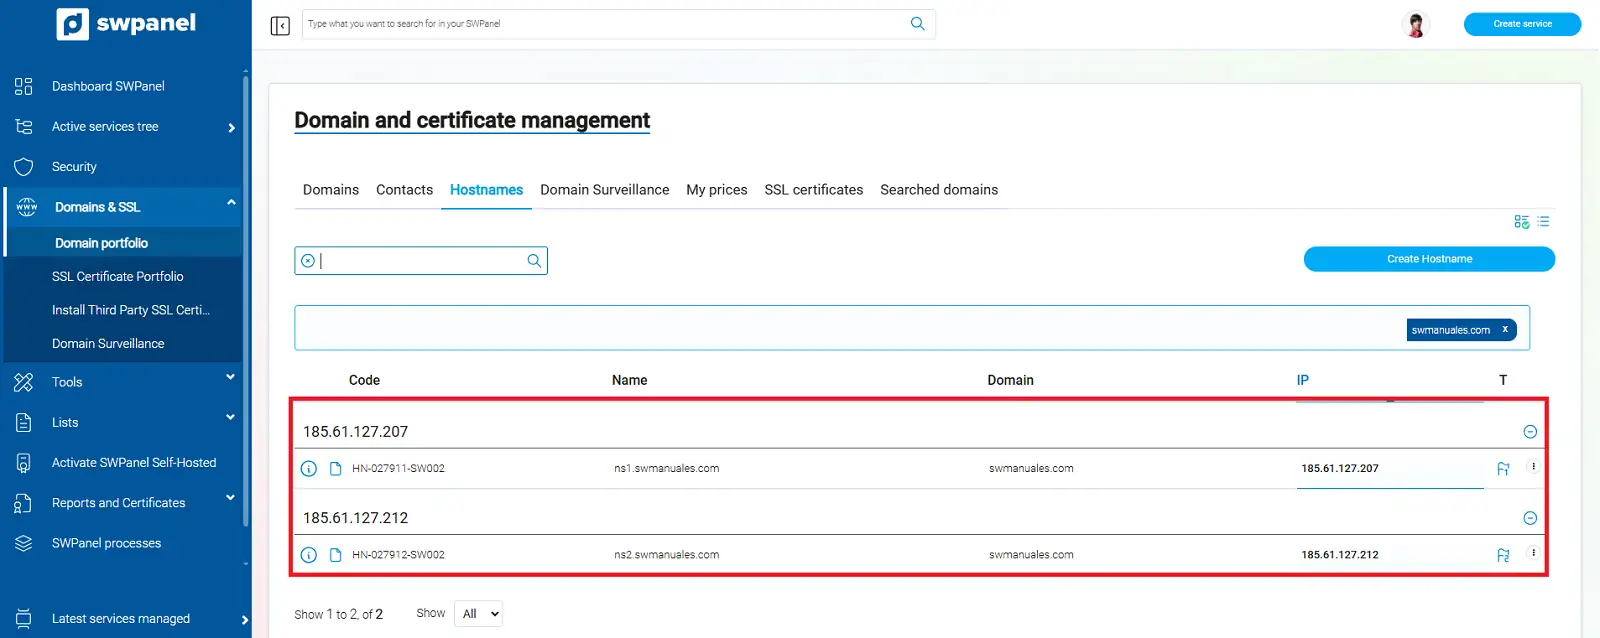
danger Remember: hostnames must match exactly the A records created in the previous step.
4. Modify the NS records in the DNS zone
4.1 Access DNS Management
From the service Dashboard, access DNS Management.
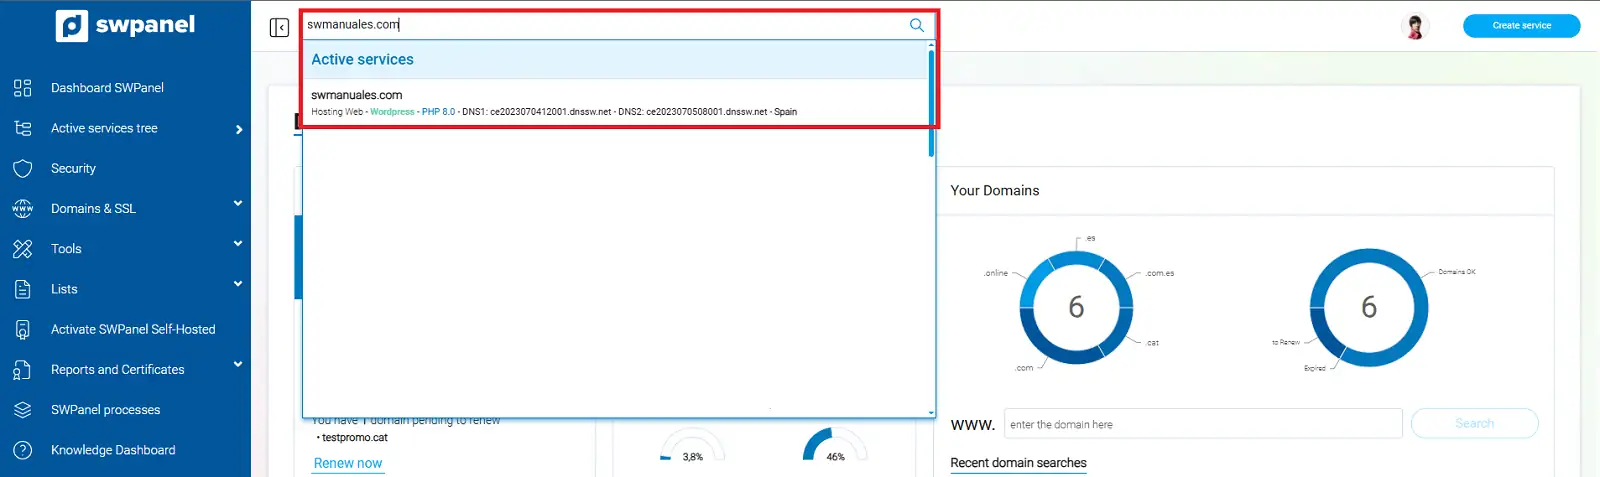
Locate the current NS records:
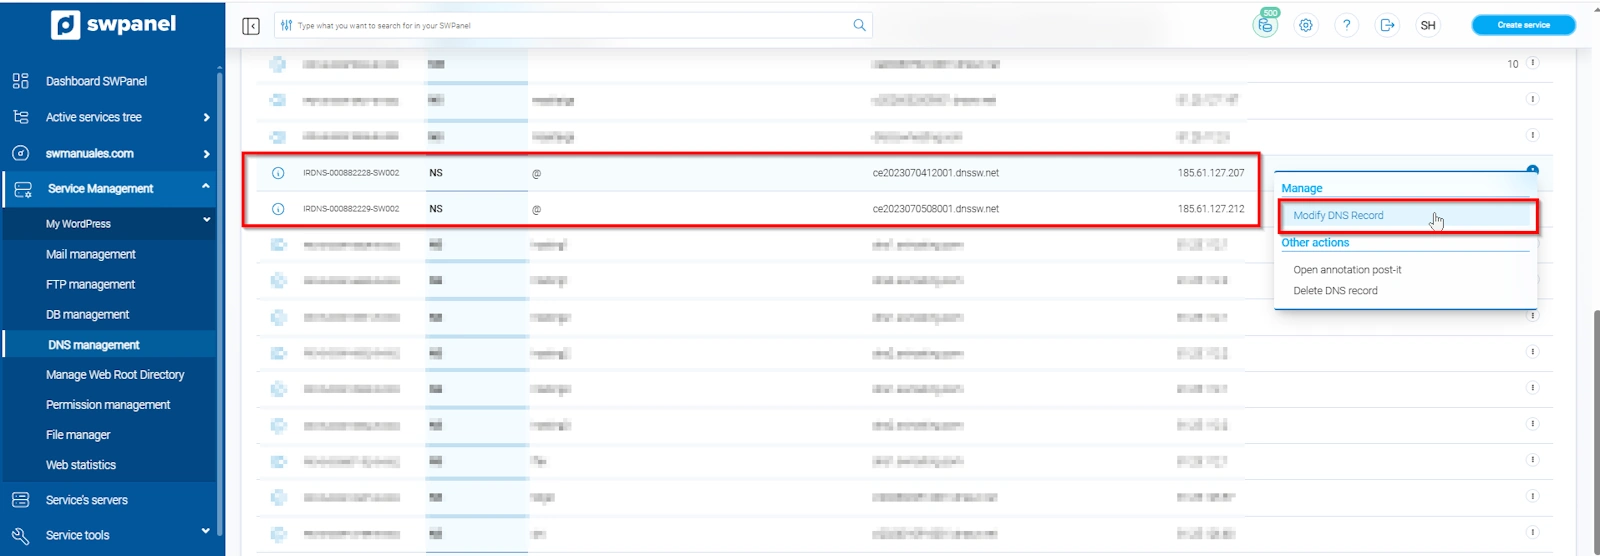
4.2 Modify NS records
Click on the right side menu ("...") and select Modify DNS Record.
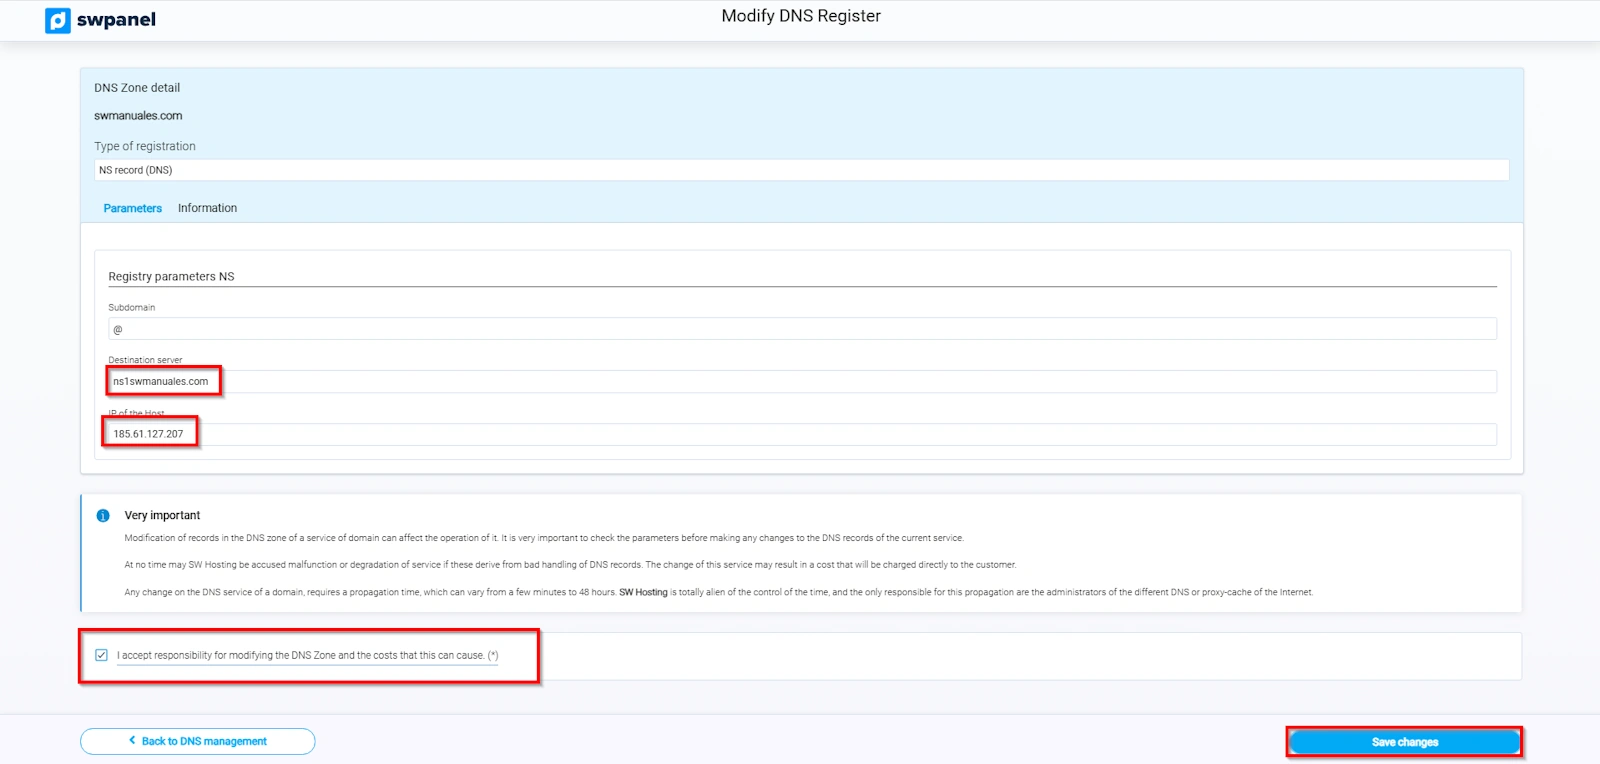
- Subdomain: leave blank if it is for the root domain.
- Destination server: ns1.swmanuales.com
- Host IP: IP assigned to the Hostname
danger You must accept responsibility before saving the changes.
4.3 Application and propagation
Changes are applied within minutes, but global propagation may take several hours.
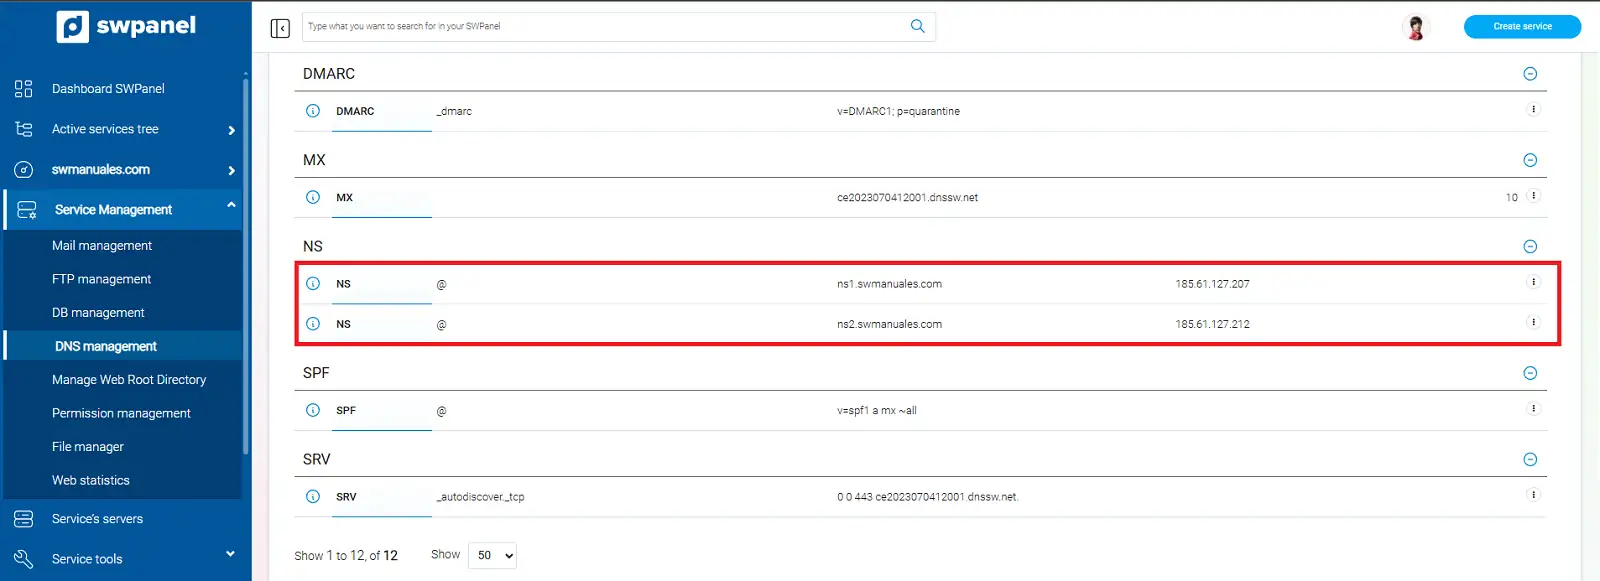
You can use What's My DNS to monitor the status.
5. Change the domain's nameservers
5.1 Go to Domain Portfolio
From the SWPanel Dashboard, go to:
Domains and SSL > Domain Portfolio
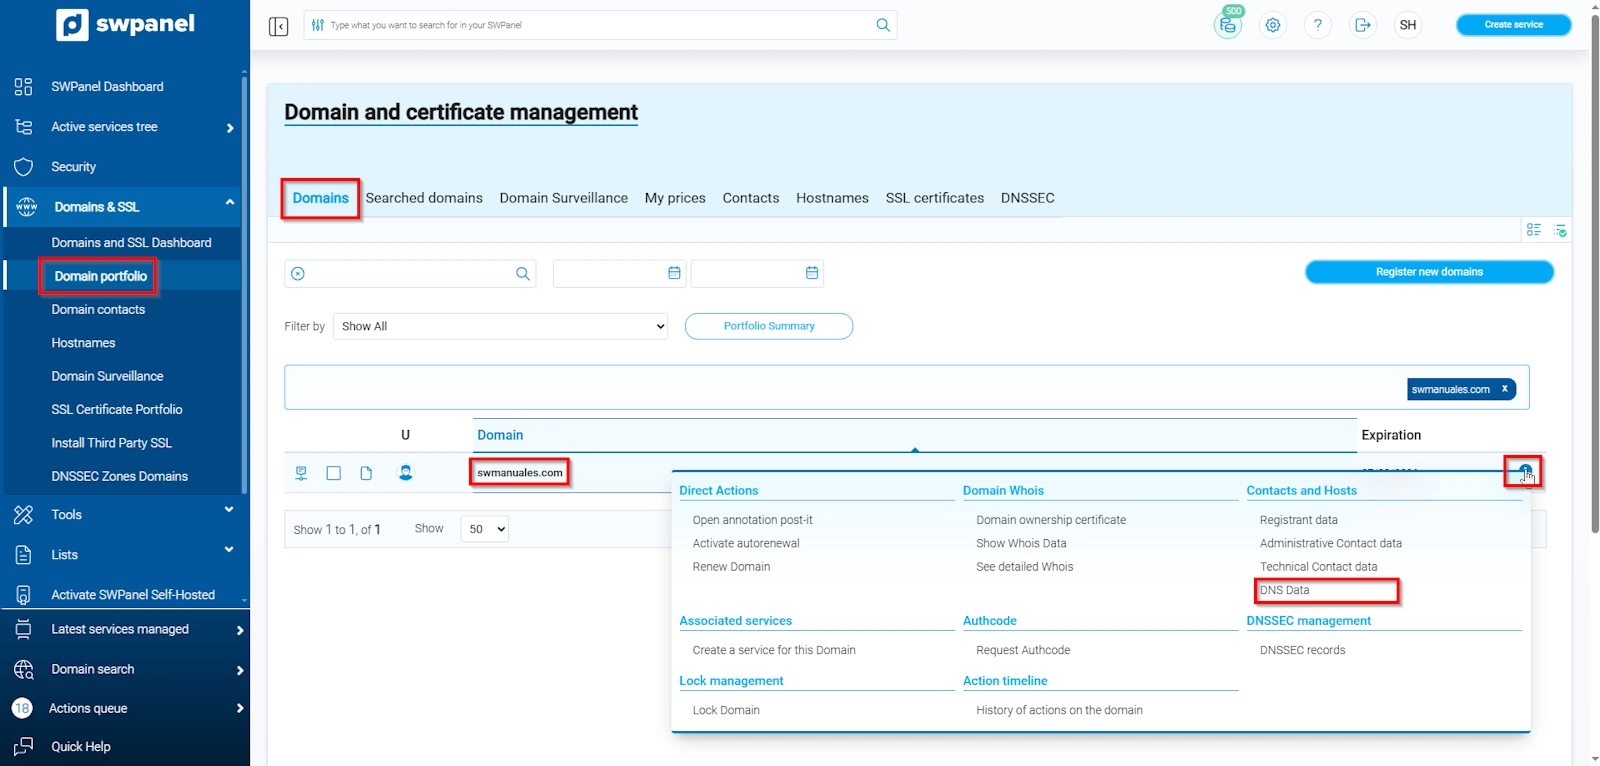
Open the side menu ("...") and select DNS Data.
5.2 Change DNS
In the new window, define the new name servers:
- DNS1: ns1.swmanuales.com
- DNS2: ns2.swmanuales.com
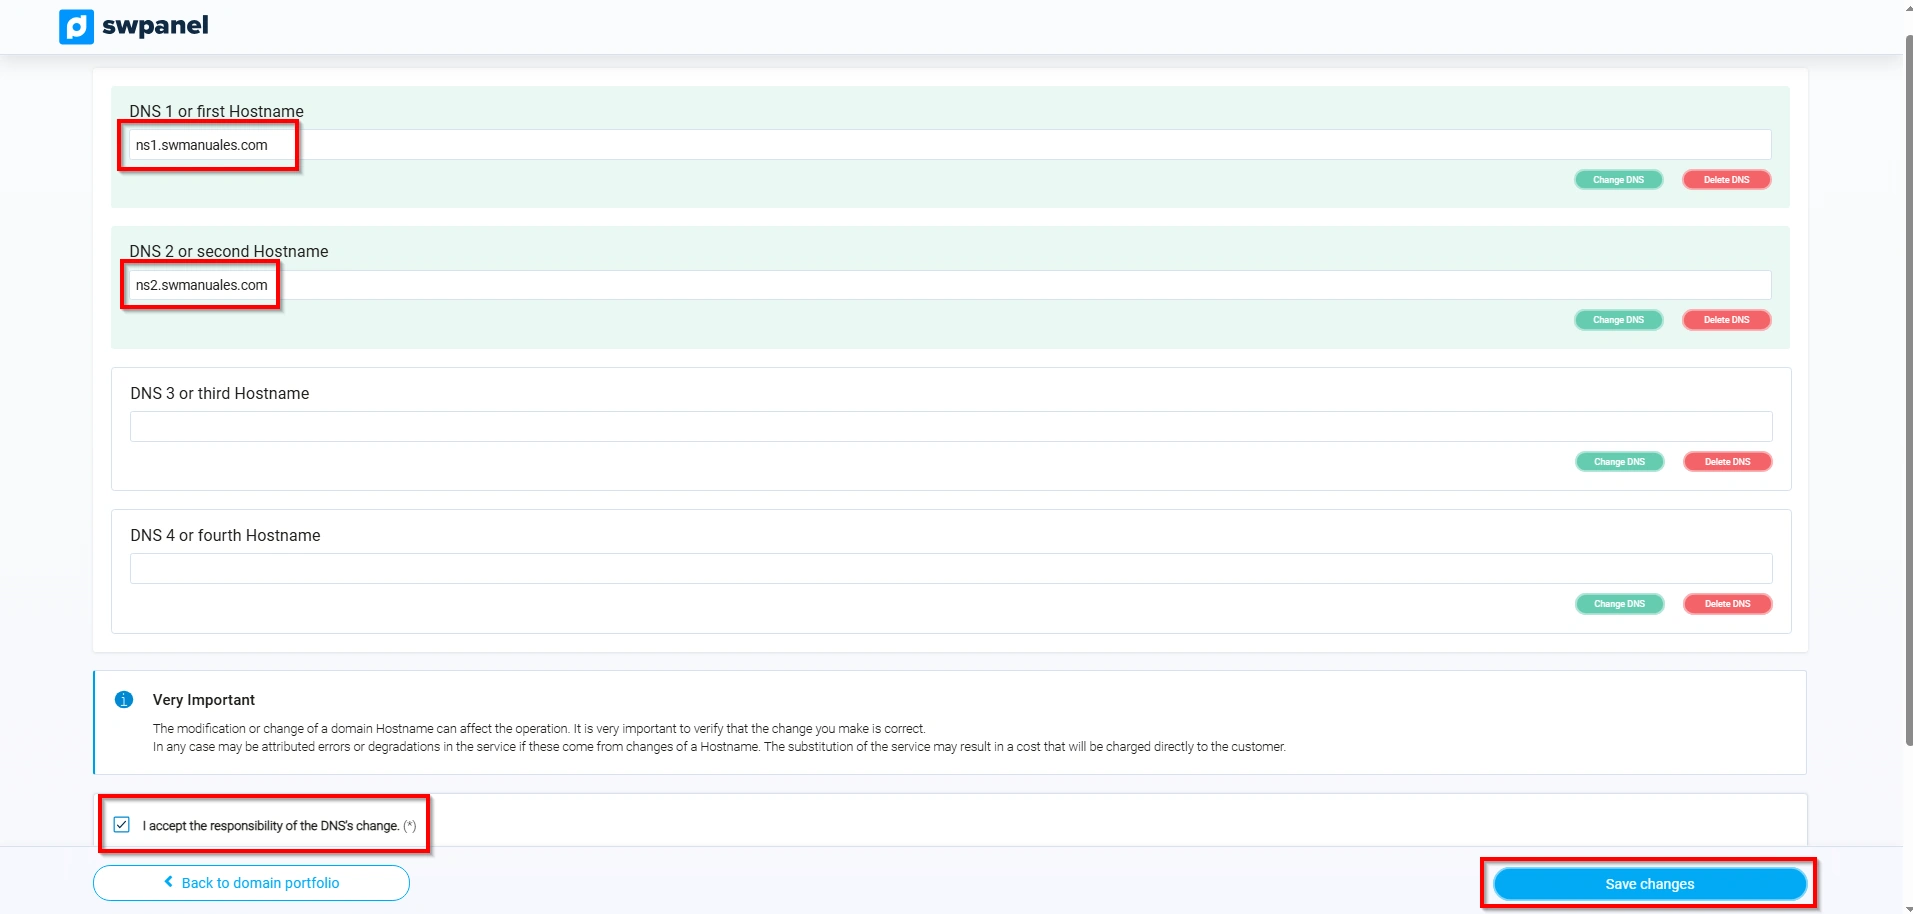
Please note that in DNS1 and DNS2 you must specify the same names as the NameServers of the domain previously modified. These NameServers were modified in step 4.
To make this modification, simply click on Change DNS, then enter the desired value and press Enter.
Confirm the changes and accept responsibility before saving.