
Install WordPress on VestaCP with SSL (Let's Encrypt)
Installing WordPress on one of our clouds using VestaCP is fast and simple. By following this step-by-step manual, you will have your WordPress site ready in a few minutes.
Prerequisites:
- An active cloud.
- A registered domain, which is the one you will use to manage WordPress.
Step 1: Access to VestaCP
-
Open your preferred web browser.
-
Enter your cloud's IP address followed by port
8083in the address bar.
Example:https://TU_IP_DEL_CLOUD:8083/Note: Your cloud IP was sent to your email when you contracted the service.
-
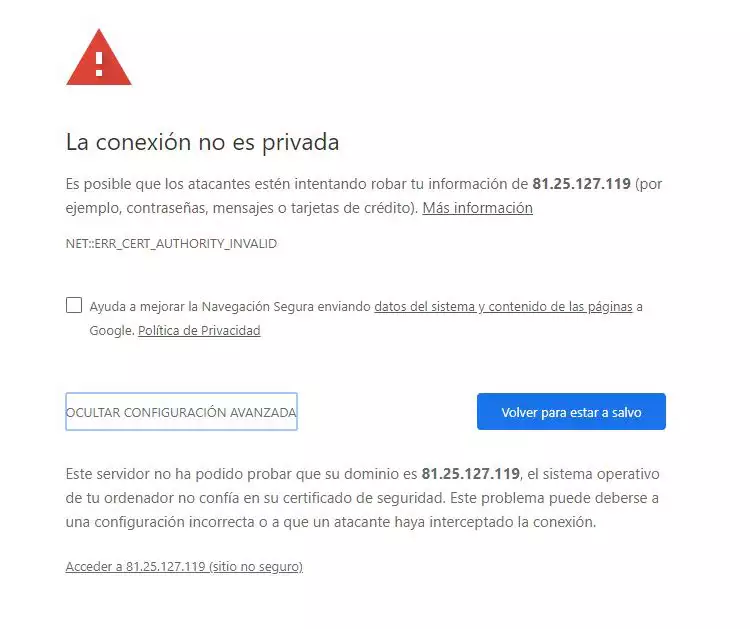
If you use Google Chrome, an insecure site warning may appear. To continue:
- Click on 'Advanced settings'.
- Then select 'Proceed to TU_IP_DEL_CLOUD (unsafe site)'.
Step 2: Modify the Admin user
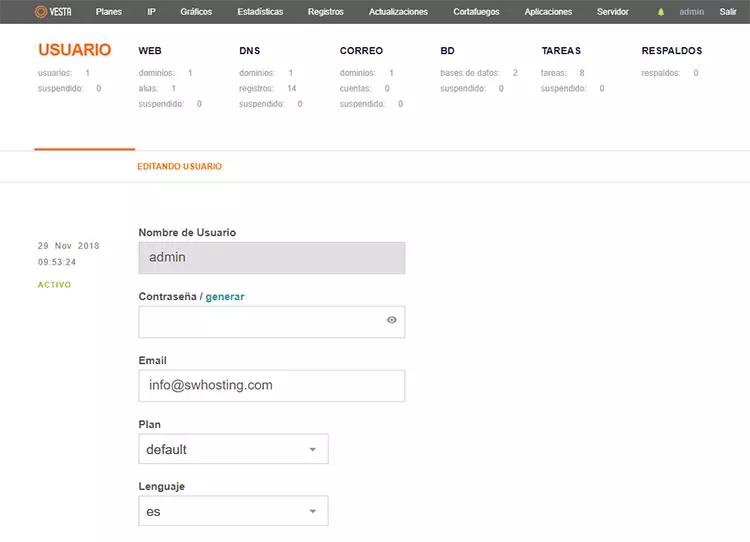
Once inside VestaCP, it is recommended to update the Admin user information:
- Navigate to: User > Admin > Edit.
- Change the email account to one that is active.
- Also take the opportunity to change the panel language if you wish.
This ensures that important notifications reach your email and that the interface is in your preferred language.
Step 3: Add your domain
To associate your domain with the cloud in VestaCP:
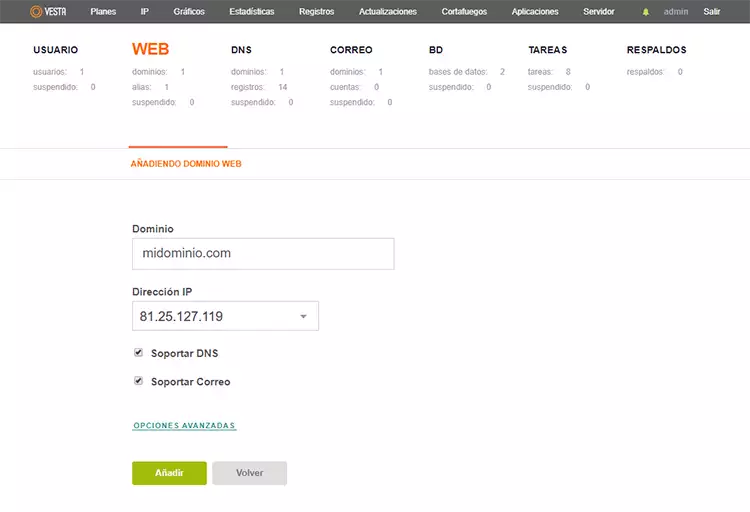
- Go to Web > Add Web Domain.
- Enter the domain name you will use to manage WordPress.
- Configure additional options according to your needs (optional, such as redirects or SSL certificates).
Make sure your domain is already registered and points correctly to your cloud's IP to avoid problems during the WordPress installation.
Step 4: Configure the FTP account
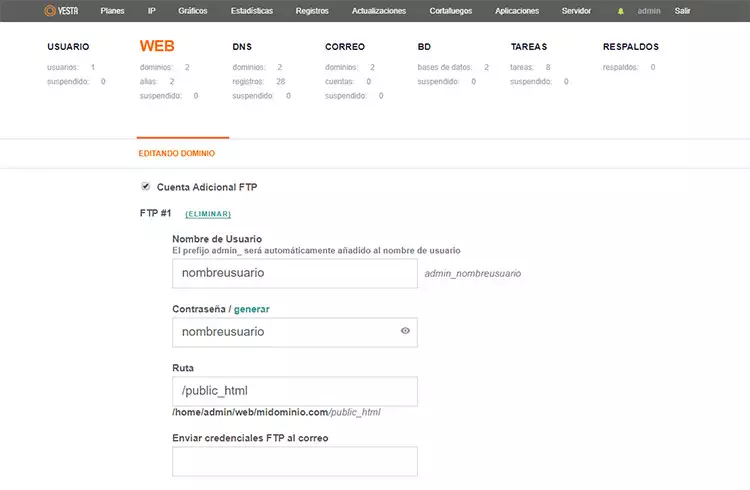
To upload WordPress files, you will need a configured FTP account:
- Go to Web > Domain.
- Select the domain you added in the previous step.
- Edit or create the FTP account with a secure username and password.
- Save the changes.
With this FTP account, you can manage your WordPress files directly from your computer using any FTP client such as FileZilla or WinSCP.
Step 5: Create the database and the user
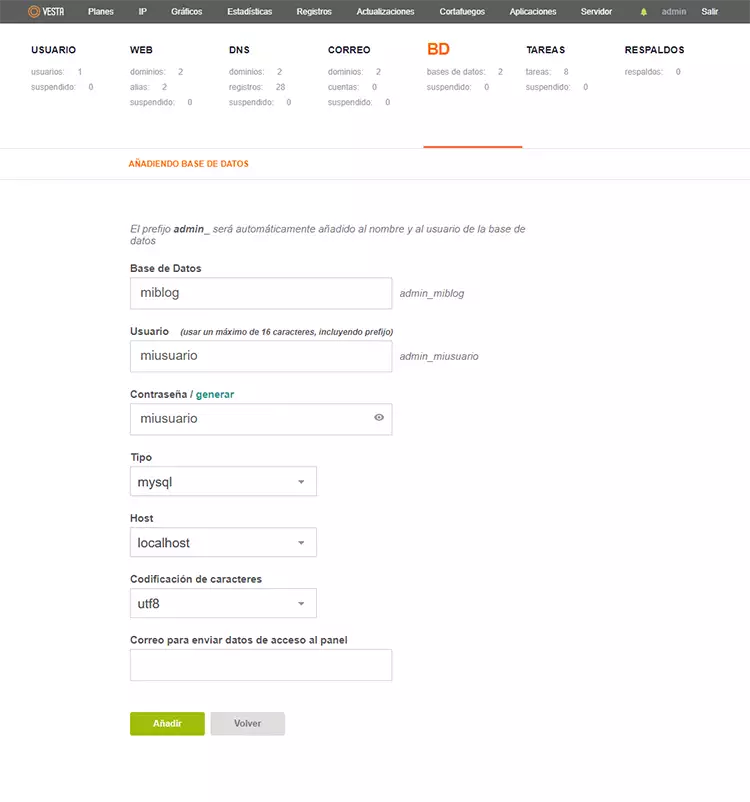
WordPress needs a database to store all your site's information. To create it in VestaCP:
- Go to DB > Add database.
- Enter a database name.
- Create a user associated with that database with a secure password.
- Save the changes.
Note down the database name, user, and password, as you will need them during the WordPress installation.
Step 6: Upload WordPress files to the server
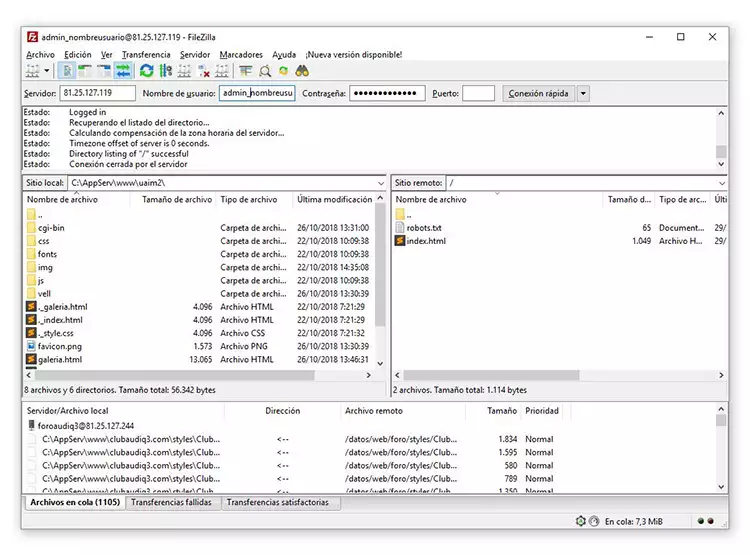
To install WordPress, we must first upload its files to the server via FTP:
- Open your preferred FTP client (for example, FileZilla).
- Connect to the server using the FTP account data created previously:
- Server: Your cloud IP (e.g.,
TU_IP_DEL_CLOUD) - User: Include the
admin_prefix before the username, for example:admin_username - Password: The one you configured in the previous step
- Server: Your cloud IP (e.g.,
- Once connected, upload all WordPress files to your domain's root directory (usually
public_htmlor the corresponding folder).
Make sure all files have been uploaded correctly before continuing with the installation.
Step 8: Prepare the server folder
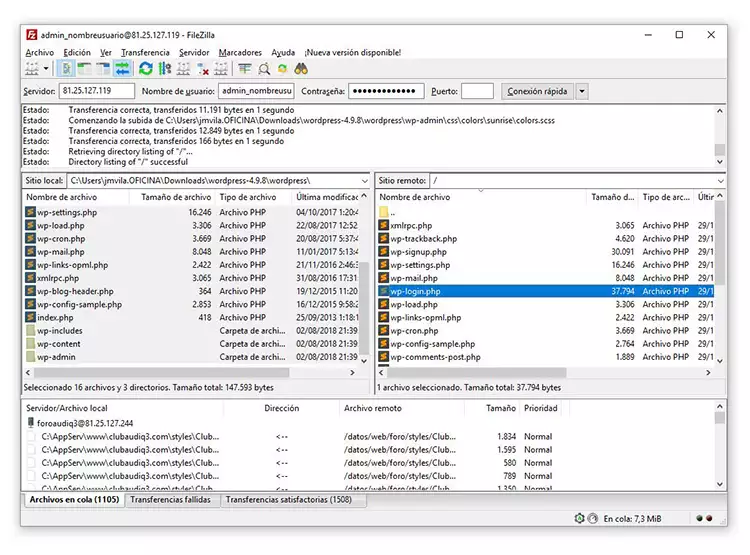
Before installing WordPress, we must ensure that the domain folder is ready:
- Access the server path corresponding to your domain:
/home/admin/web/TUDOMINIO/public_html - Delete the
index.htmlfile that comes by default. - Copy all WordPress files into this folder (if you didn't do so in the previous step).
This ensures that WordPress loads correctly when you access your domain from the browser.
Step 8: Install WordPress
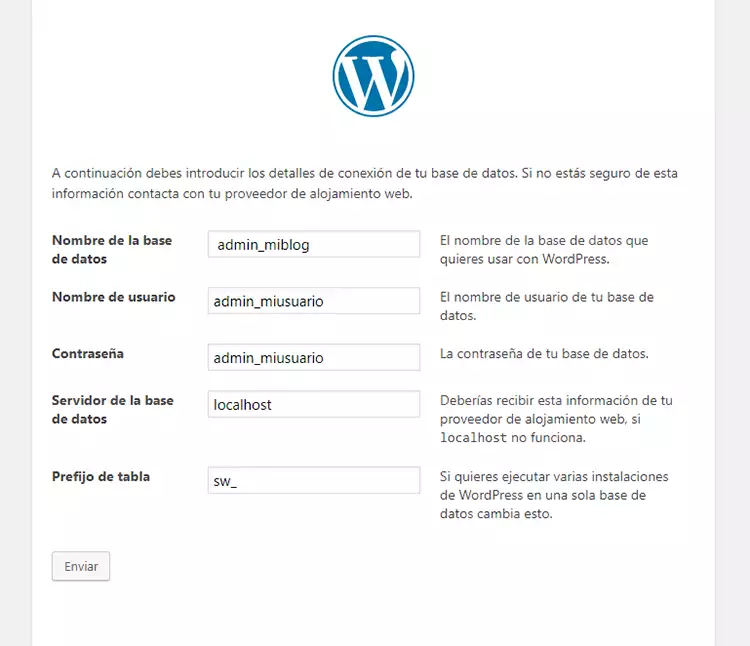
Now we will perform the WordPress installation through the web installer:
- Open your browser and access your domain. The WordPress installer will appear.
- When you reach the database configuration section, enter the previously created data:
- Database name: the one you configured, for example
admin_myblog - Username: the one you created, for example
admin_myuser - Password: the one used during the creation of the database
- Database server:
localhost - Table prefix: optional, you can change it to increase database security (e.g.,
wp_for another custom prefix)
- Database name: the one you configured, for example
- Run the installation.
- In the following steps, WordPress will ask you for:
- Site title
- Administrator user details (username, password, and email)
Once this process is completed, your WordPress will be ready to use, and you can access the administration panel with the administrator user details.
Step 9: Access the WordPress panel
Once the installation is complete, your WordPress will already be working. To enter the administration panel:
- Open your browser and visit:
http://TUDOMINIO.com/wp-admin - Log in with the username and password you configured during the installation.
From here, you can manage your entire site: content, themes, plugins, and settings.
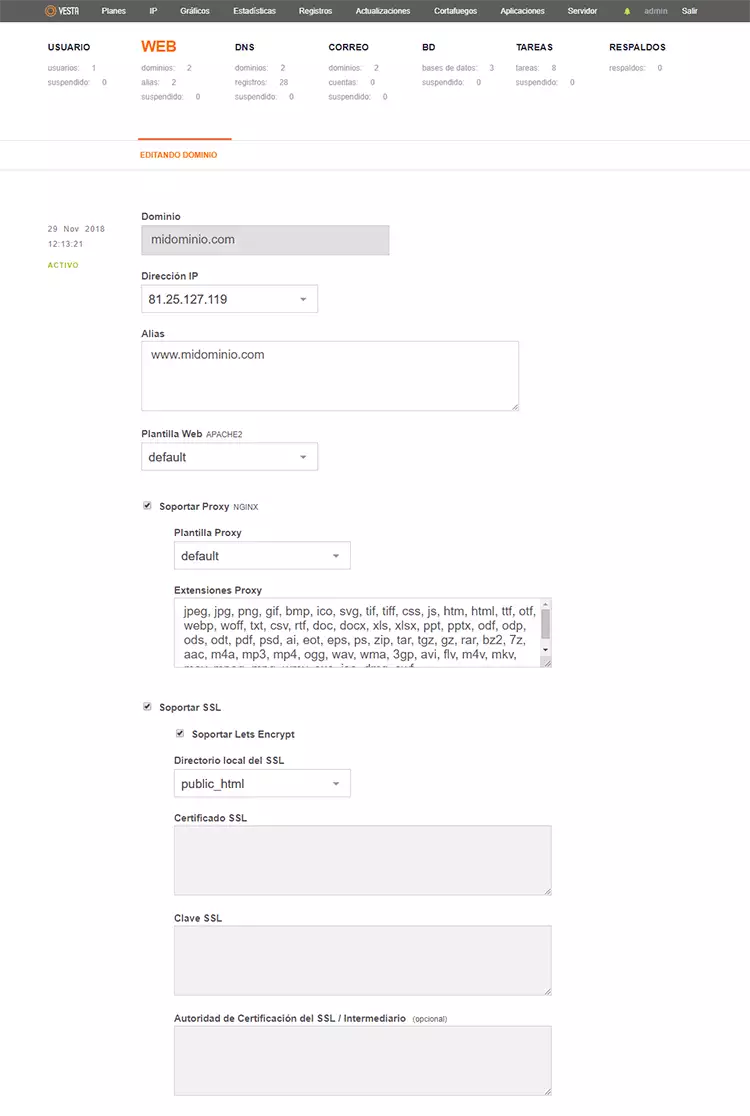
Step 10: Activate SSL in WordPress
To secure your site with HTTPS using Let's Encrypt:
- Access VestaCP > Web > Edit for the corresponding domain.
- Check the options:
- Support SSL
- Support Let's Encrypt
- Save the changes.
The SSL certificate will be activated in approximately 5 minutes. Once active, your site will be securely accessible via
https://.
Step 11: Configure WordPress to use HTTPS
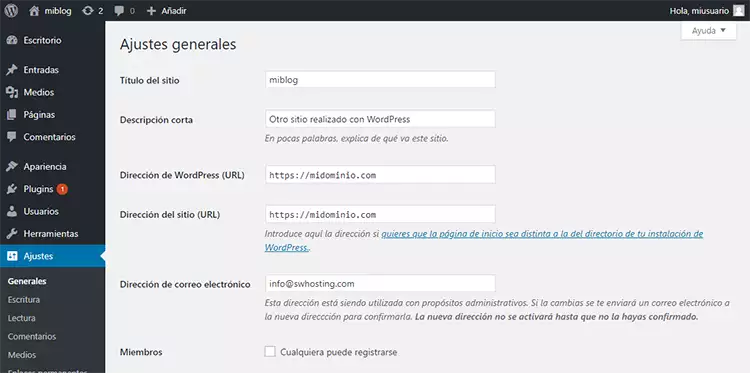
To complete the SSL activation and ensure the entire site uses HTTPS:
- Access the WordPress administration panel.
- Go to: Settings > General.
- Modify the site addresses:
- Change
http://tohttps://in the WordPress Address (URL) and Site Address (URL) fields.
- Change
- Save the changes.
This ensures that all your site's pages and resources are loaded securely via HTTPS.
With this, your WordPress will be installed in VestaCP with an active SSL certificate and ready to manage your site securely!