
Restore a backup in my Cloud
Backup Restoration Manual in SWPanel
1. Introduction
The time has come. You have contracted backup services for any unforeseen event... and now it's time to recover data!
2. Procedure
Within your SWPanel, use the top search bar to locate your Cloud. In our case, it is called Manuales-server, but yours will have a different name. Once you find it, select it.
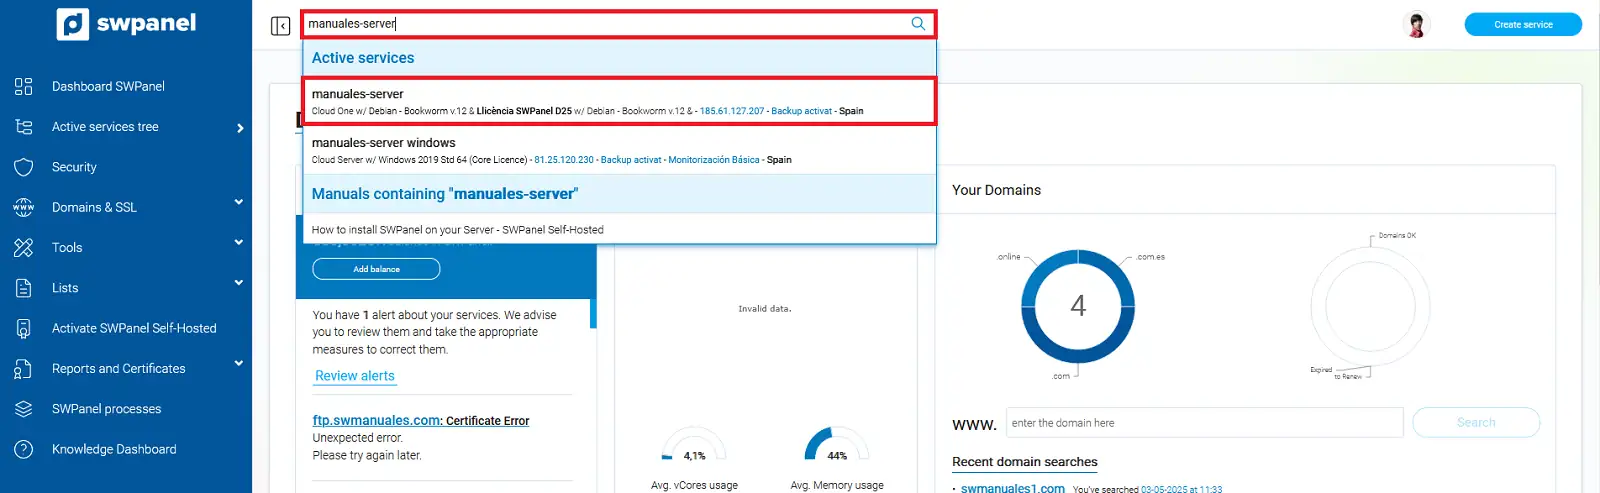
info_capture The screenshot is for guidance only. It was taken in version 2025.02.0002 on 11/03/2025. It may differ from what is shown in the current version of SWPanel.
Go to Preserve and recover my data > Backups > Backup Management (left menu):
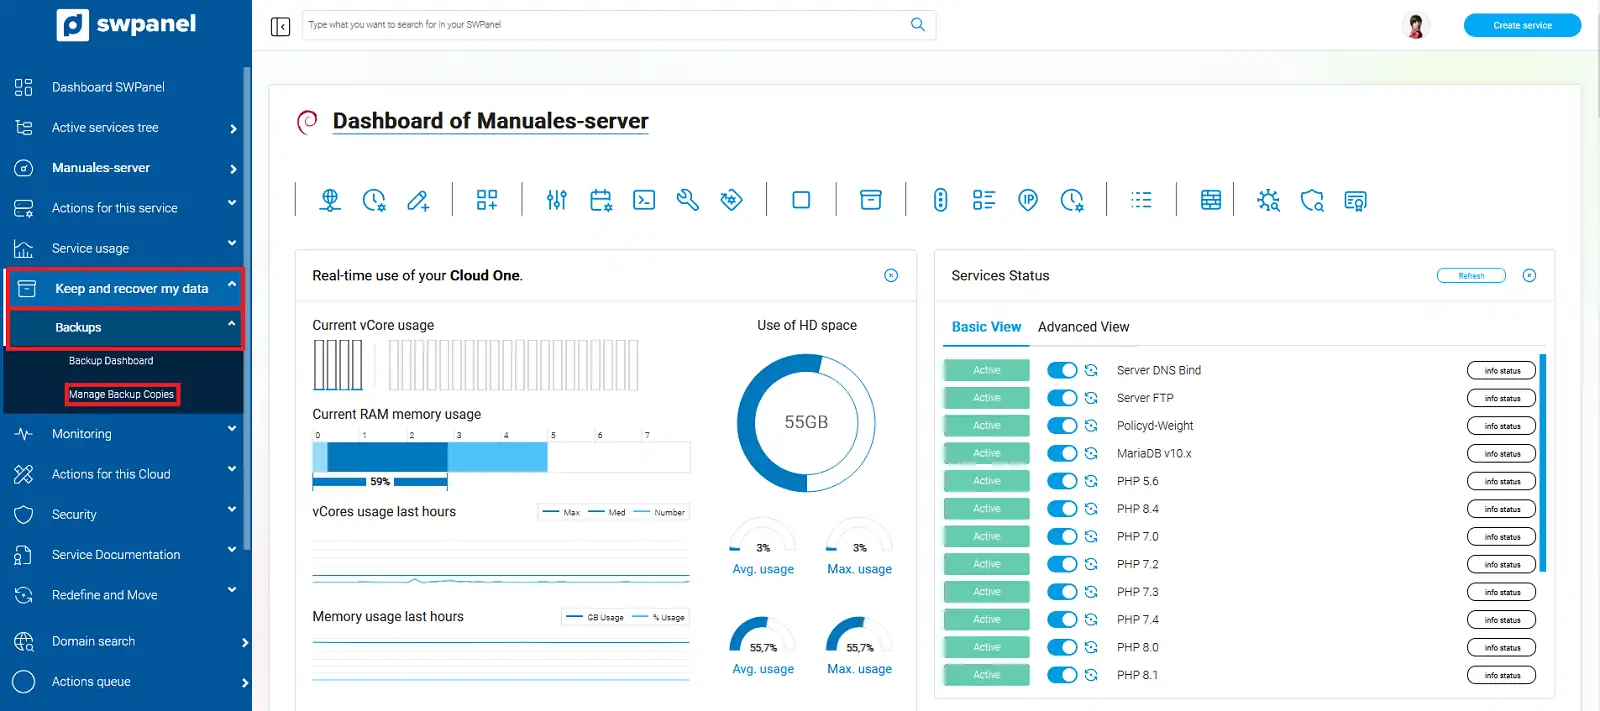
info_capture The screenshot is for guidance only. It was taken in version 2025.02.0002 on 11/03/2025. It may differ from what is shown in the current version of SWPanel.
A list of the most recent backups will appear. Click on Restore Backup:
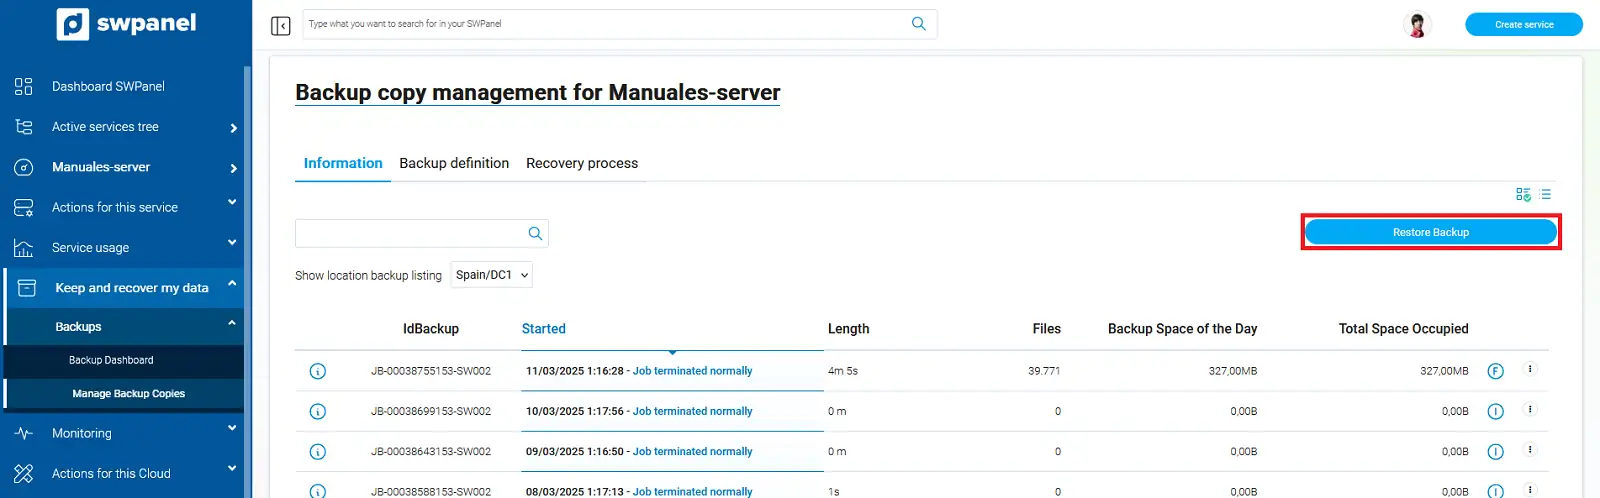
info_capture The screenshot is for guidance only. It was taken in version 2025.02.0002 on 11/03/2025. It may differ from what is shown in the current version of SWPanel.
Upon clicking this button, the following screen will appear:
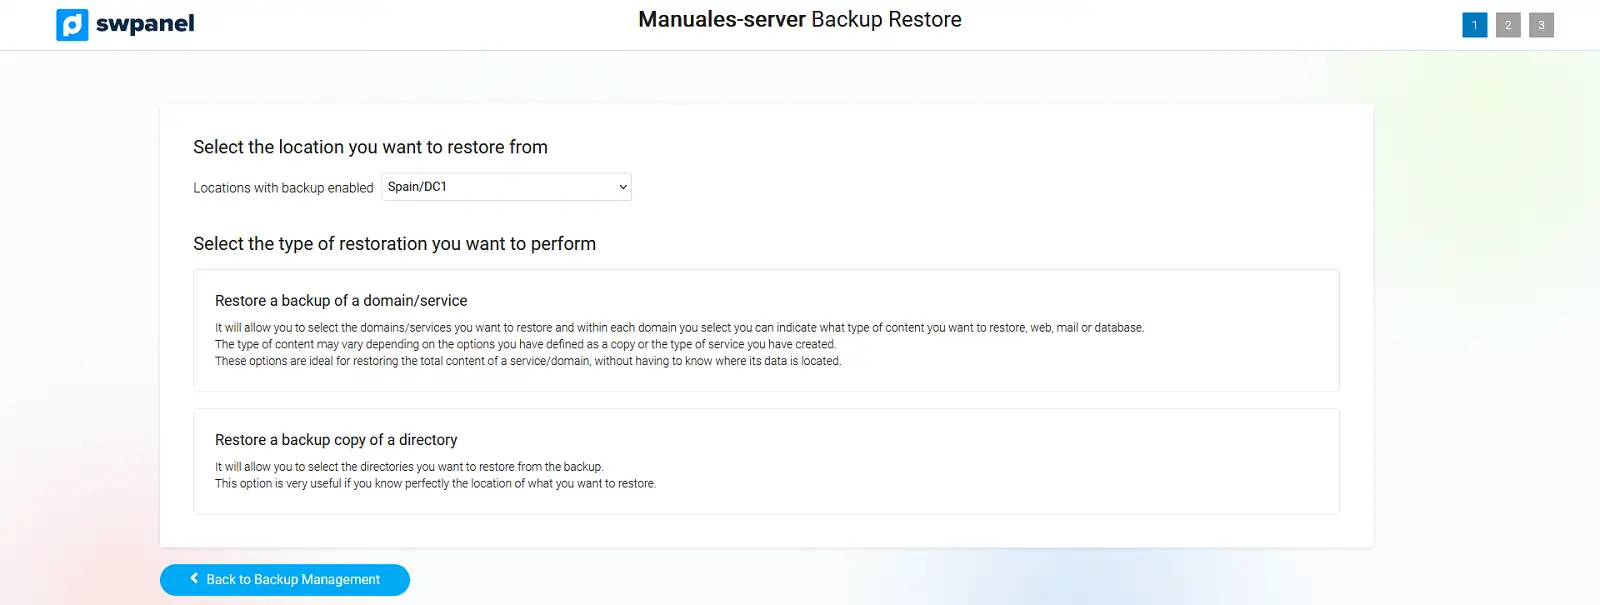
info_capture The screenshot is for guidance only. It was taken in version 2025.02.0002 on 11/03/2025. It may differ from what is shown in the current version of SWPanel.
3. Restore a Backup of a Domain or Service
This option allows you to restore a domain or a complete service. You can choose from the different available backup dates and select the content to restore (web, email, or database):
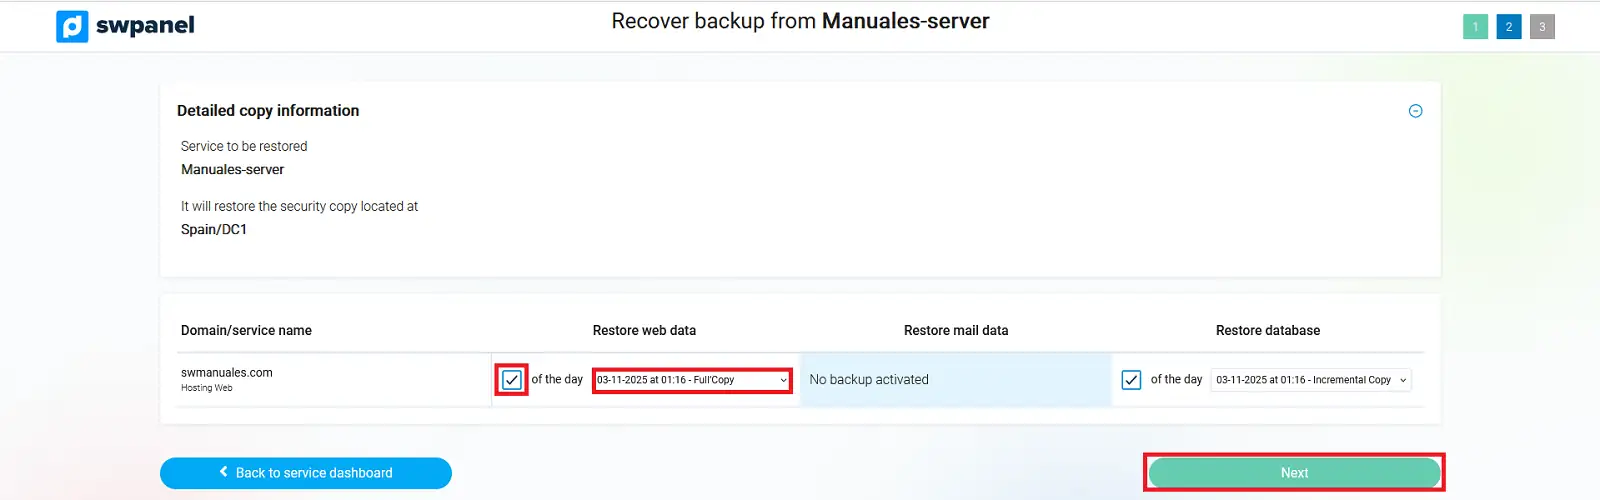
info_capture The screenshot is for guidance only. It was taken in version 2025.02.0002 on 11/03/2025. It may differ from what is shown in the current version of SWPanel.
After selecting the backups, you must decide whether you wish to overwrite the files in the original directory or recover them in a different directory.
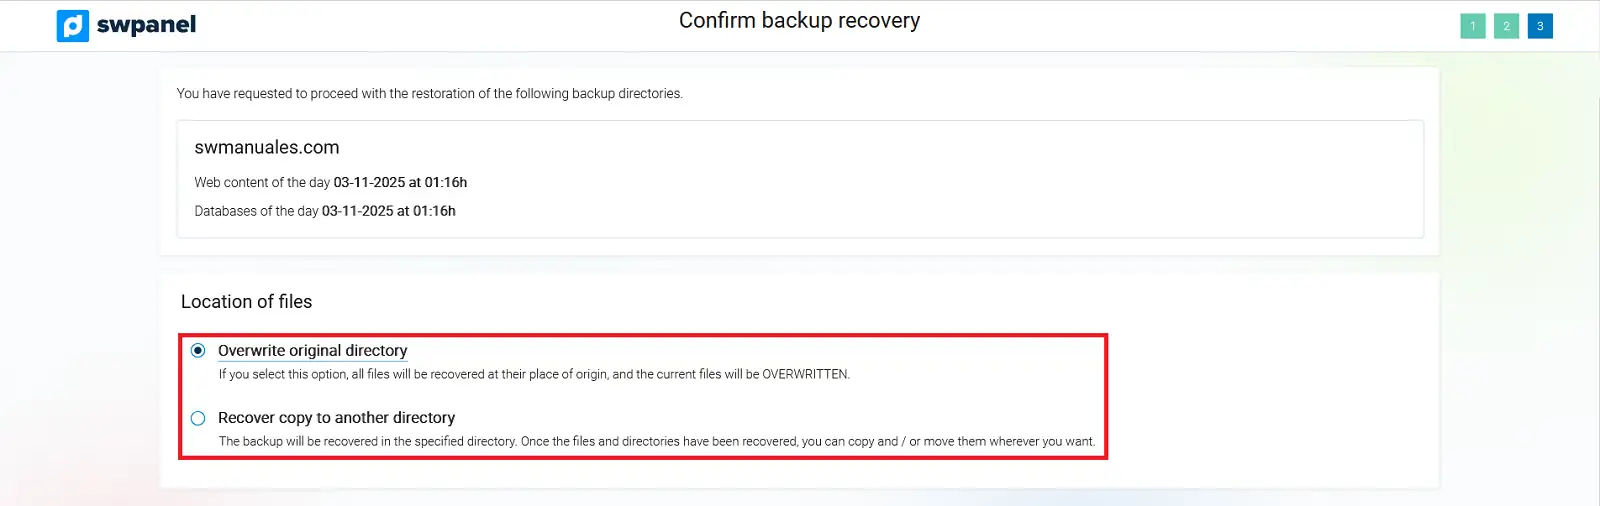
info_capture The screenshot is for guidance only. It was taken in version 2025.02.0002 on 11/03/2025. It may differ from what is shown in the current version of SWPanel.
To start the restoration, click on Start Restoration.
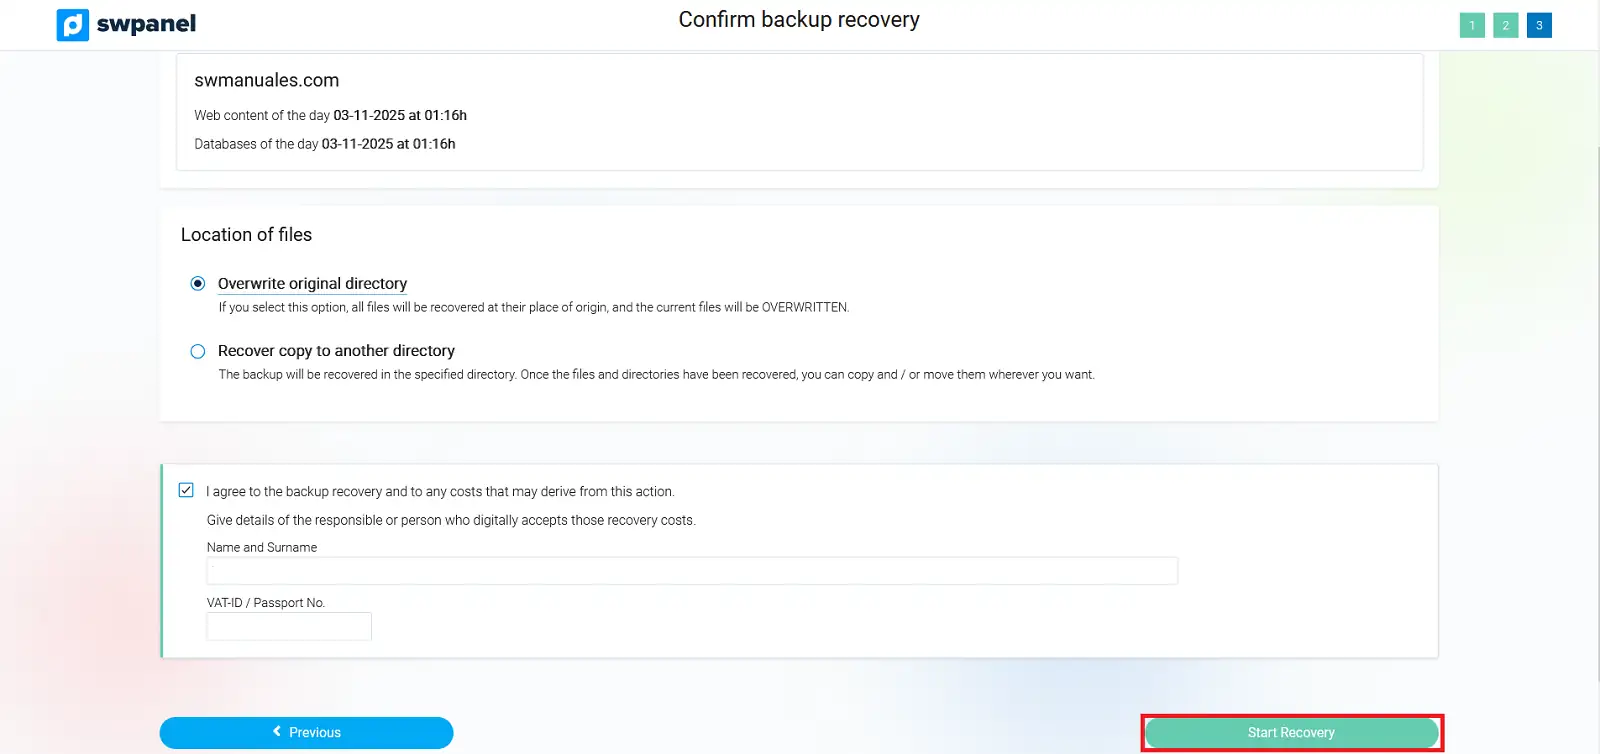
info_capture The screenshot is for guidance only. It was taken in version 2025.02.0002 on 11/03/2025. It may differ from what is shown in the current version of SWPanel.
4. Restore a Backup of a Directory
This option allows you to restore a complete directory, choosing from different available backup dates. Once the directories and the date have been selected, click Next.
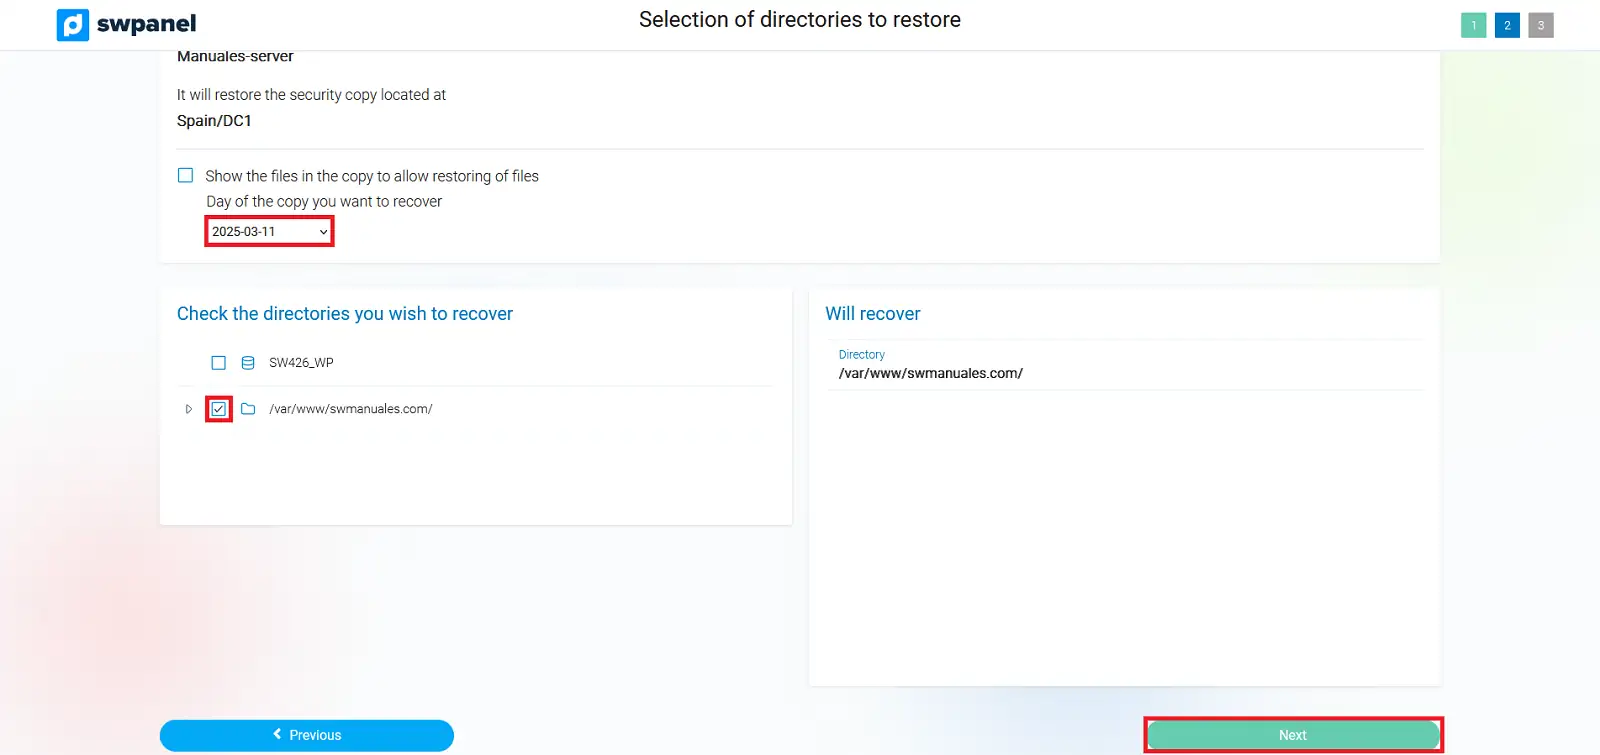
info_capture The screenshot is for guidance only. It was taken in version 2025.02.0002 on 11/03/2025. It may differ from what is shown in the current version of SWPanel.
4.1. Location of Restored Files
- Backups of all databases are located in
/var/backupmysql/. Each restored database will be saved as a.sqlfile, which must be imported manually. - Email backups are located in
/var/spool/postfix/busties/. Within this directory, there is a folder per domain and, within each domain, a folder per email account. You can restore all email, a complete domain, or a specific account.
On the following screen, a summary will be displayed with the directories to be restored, the backup date, and the location of the recovered files:
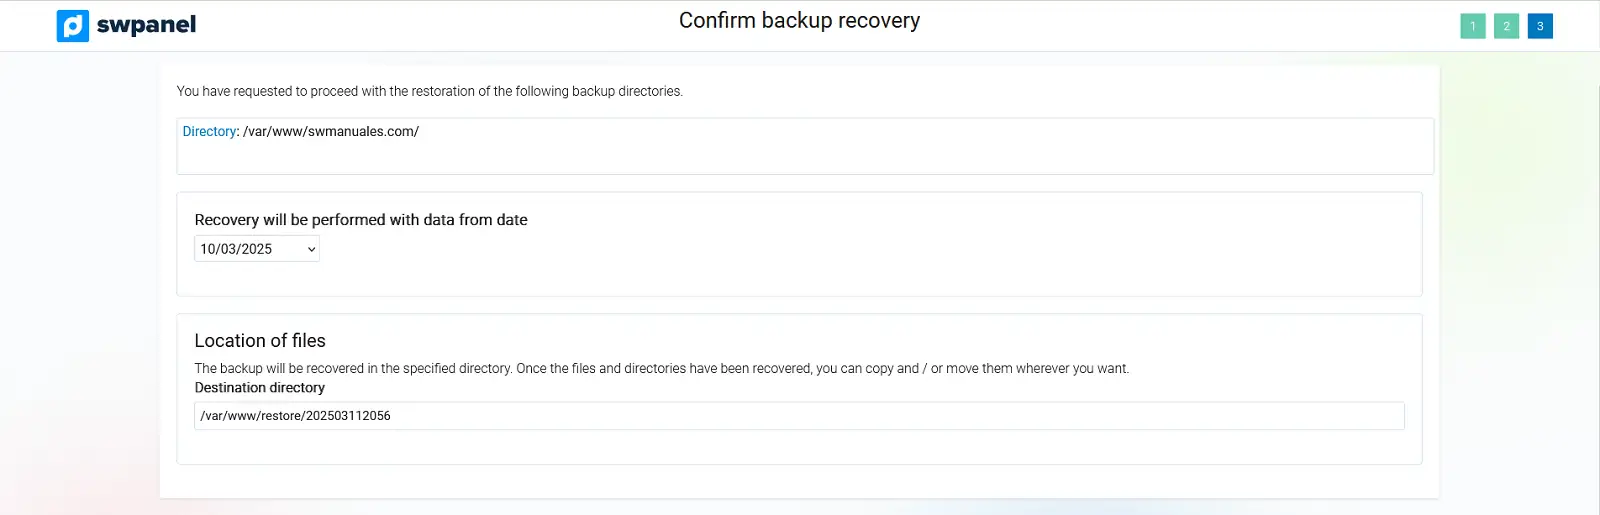
info_capture The screenshot is for guidance only. It was taken in version 2025.02.0002 on 11/03/2025. It may differ from what is shown in the current version of SWPanel.
Note: Backups are performed daily starting at 01:00 hours.
To start the restoration, scroll to the bottom of the page and click on Start Restoration.
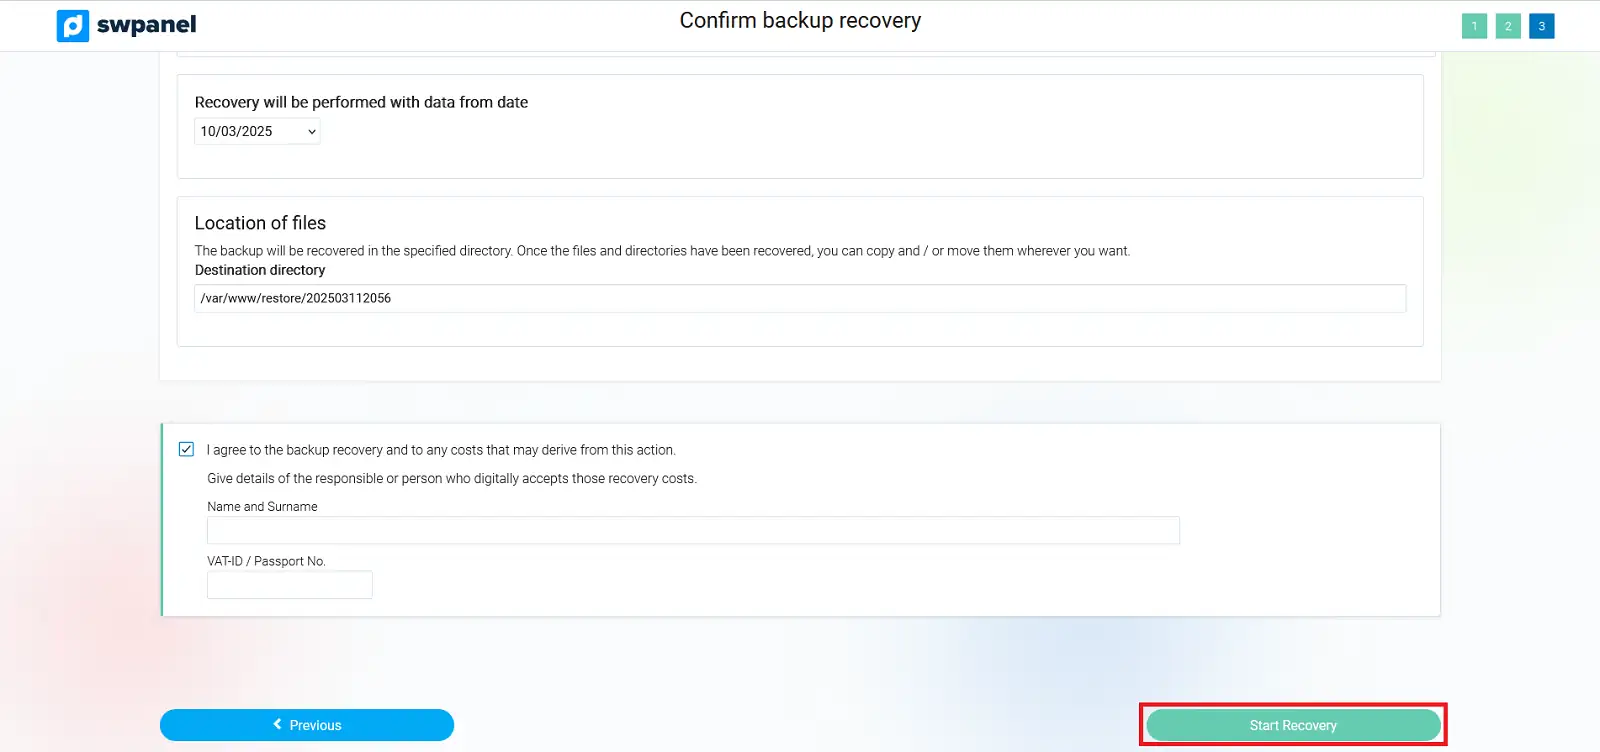
info_capture The screenshot is for guidance only. It was taken in version 2025.02.0002 on 11/03/2025. It may differ from what is shown in the current version of SWPanel.
In a few minutes, the data will be restored to the specified directory. You can access them via FTP or SSH. It is recommended to keep the original permissions and users to avoid operational issues.
For database restoration, you can use phpMyAdmin at the following address:
https://Your_cloud_IP/phpmyadmin
The access credentials for phpMyAdmin correspond to the database username and password.