Configure Cloud Storage on Windows 10
In this manual, we will teach you how to configure Windows 10 so that it detects your Cloud Storage as just another folder on your computer.
What is a Cloud Storage?
A Cloud Storage, or cloud storage, is a data storage model based on computer networks, conceived in the 1960s, where data is hosted in virtualized storage spaces.
Basically, we can have a secure space in the cloud where we can store different files, videos, photos, etc.
Signing up for your Cloud Storage
The first step is to sign up for your Cloud Storage. If you are not an SW Hosting customer, you can sign up through the following link: https://www.swhosting.com/es/cloud and if you are a customer, you can sign up by following the following manual ? Manual: ##título##.
Once you have signed up, you will receive an email with the authentication credentials; it is very important to have them at hand when performing the configuration.
Configuring your Cloud Storage in Windows 10
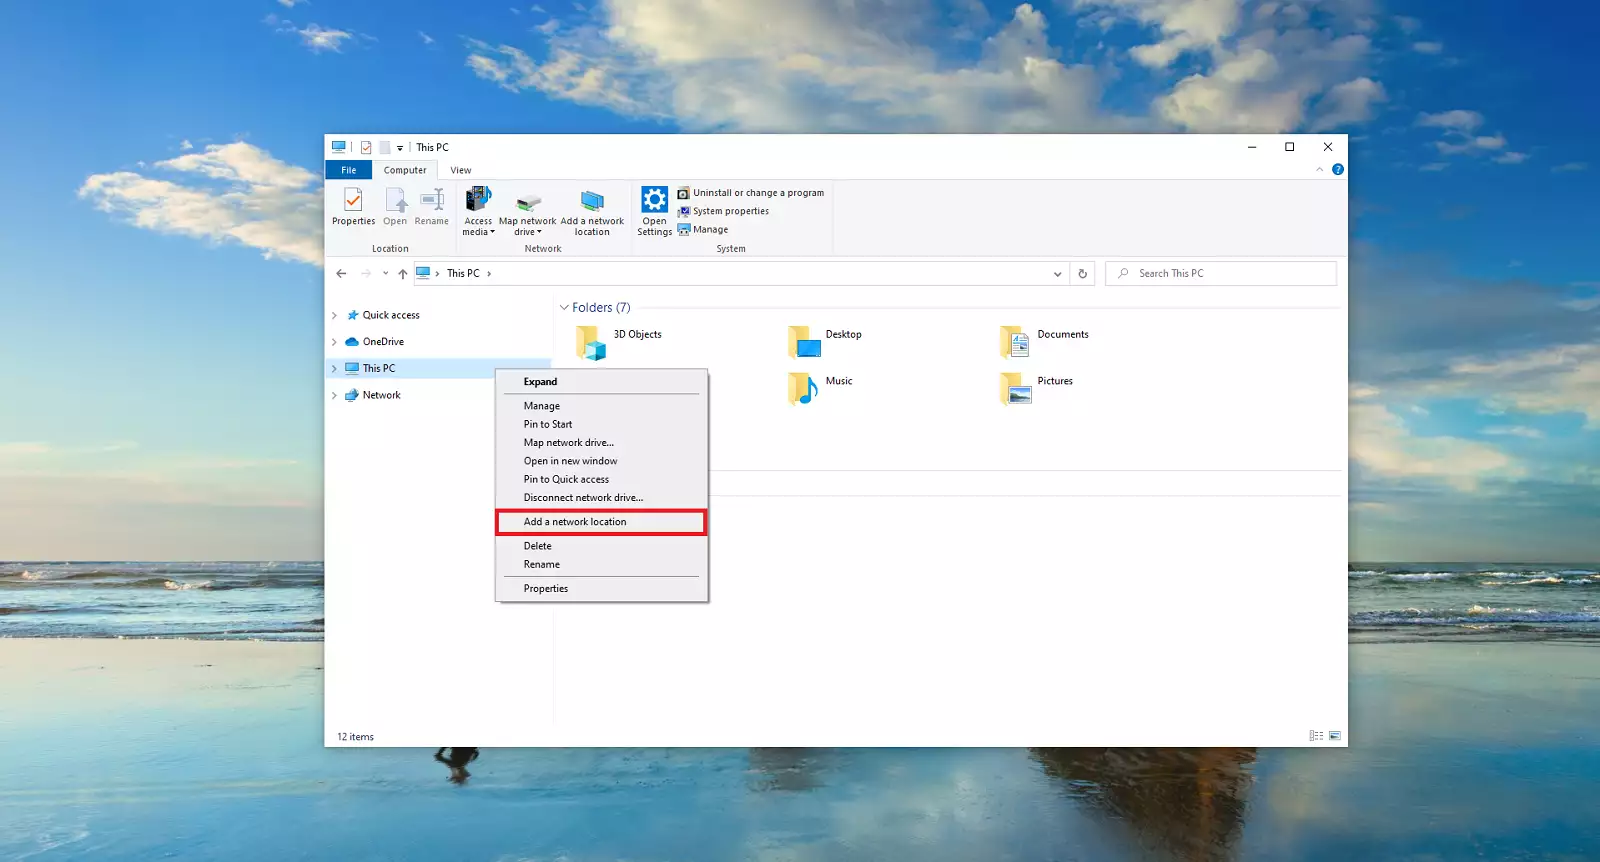
To configure your Cloud Storage in Windows 10 as if it were just another folder on your computer, open the file explorer, right-click on 'This PC' and click on the option 'Add a network location'.
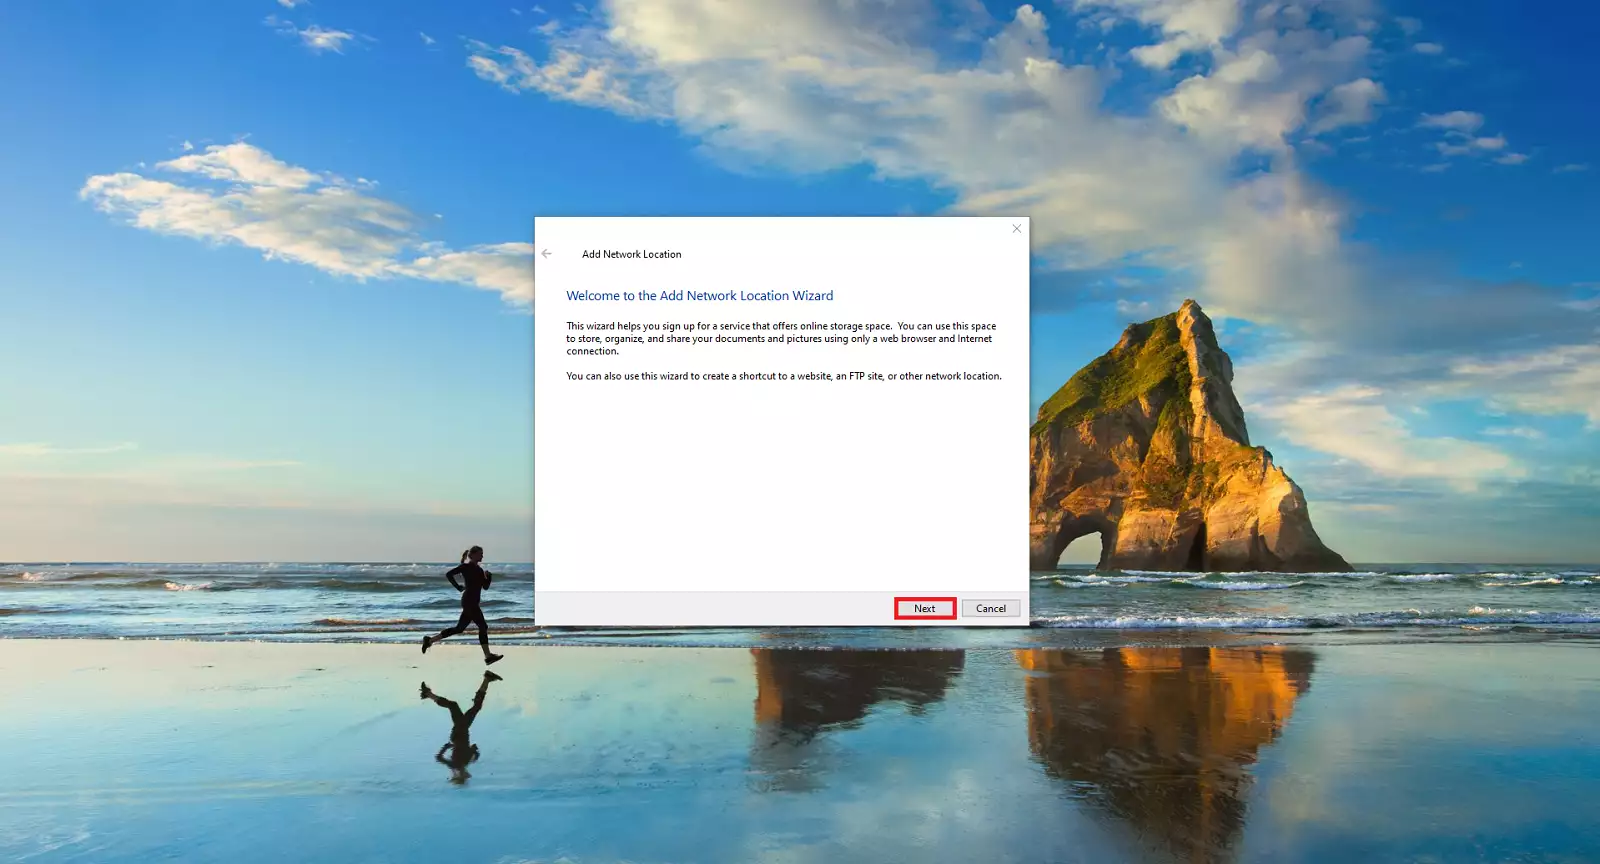
Next, a pop-up window will open with the wizard to configure your network location; click on the 'Next' button.
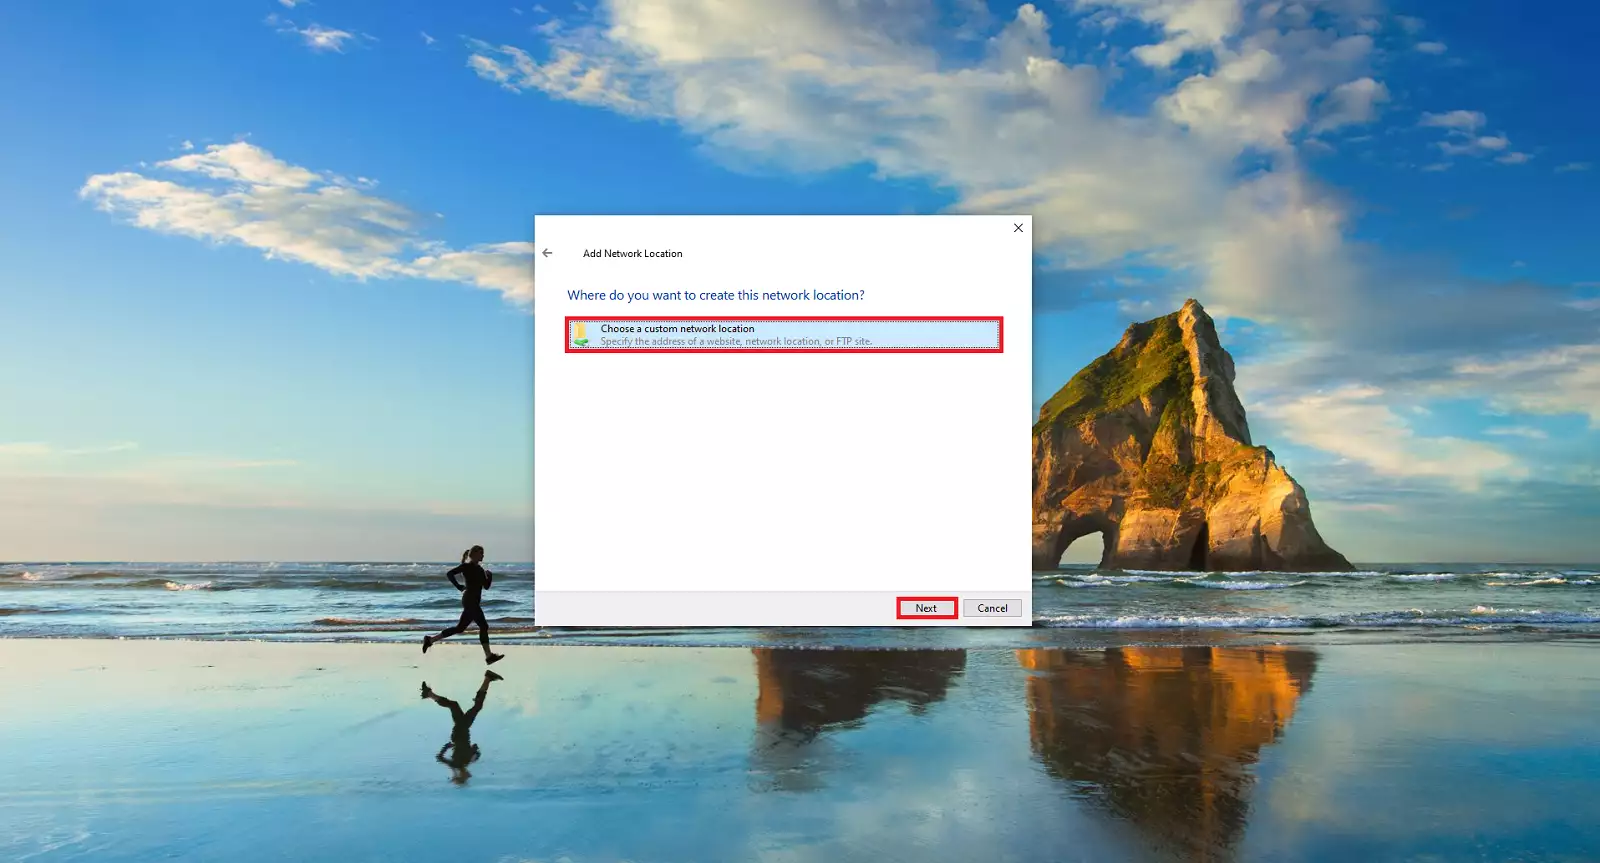
It will ask you where the network location is; select 'Choose a custom network location' and click 'Next'.
It will ask you to specify the network location address; you can find it in the email you received with the credentials, you only have to add 'ftp://' before the server. In this example, the complete address is: 'ftp://storage2.swhosting.com'. Enter it and click 'Next'.
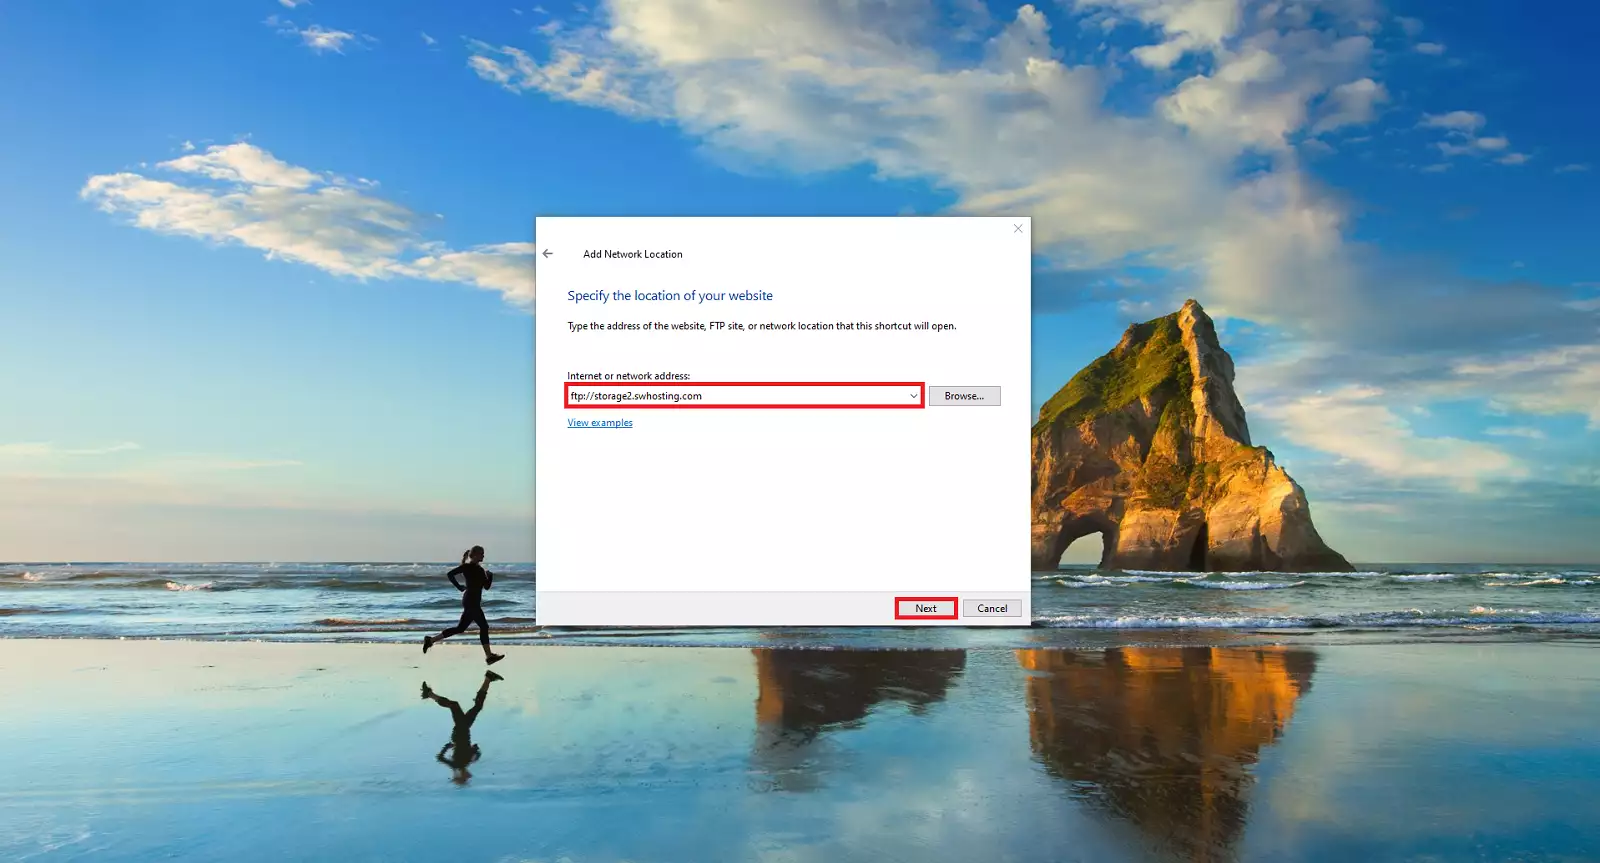
In the next step, it will ask for the username to connect to the Cloud Storage; you can find it in the credentials email you received when creating the service (it will ask for the password later when you connect for the first time). Uncheck the 'Log on anonymously' checkbox, enter the username and click the 'Next' button.
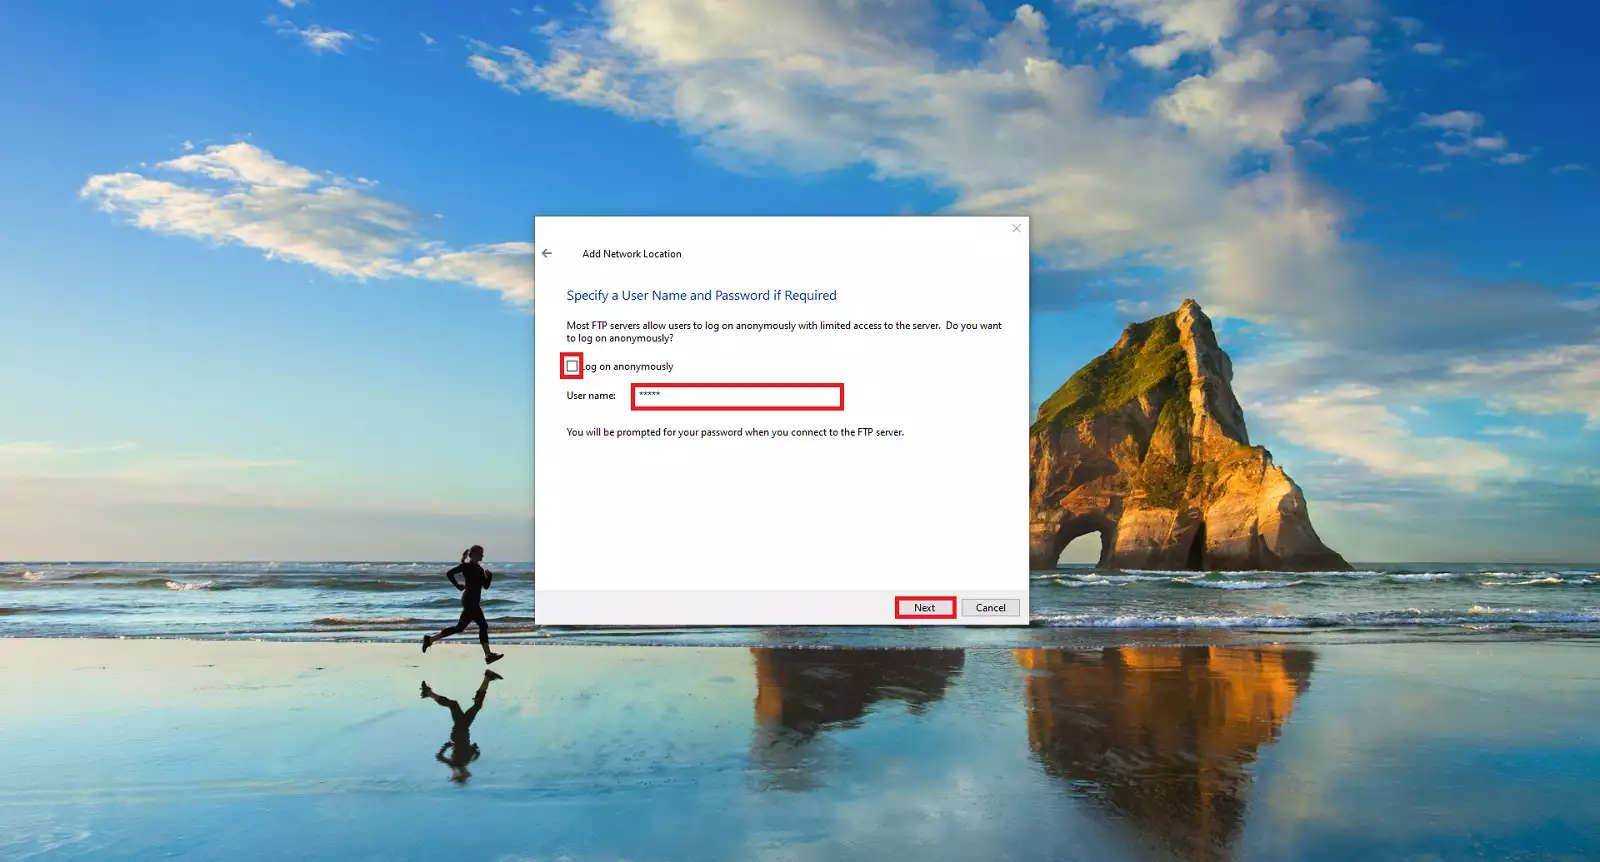
Afterward, it will ask for a name for the network location; you can give it any name you want; in our example, we have used 'swhosting'. Once the desired name is set, click the 'Next' button.
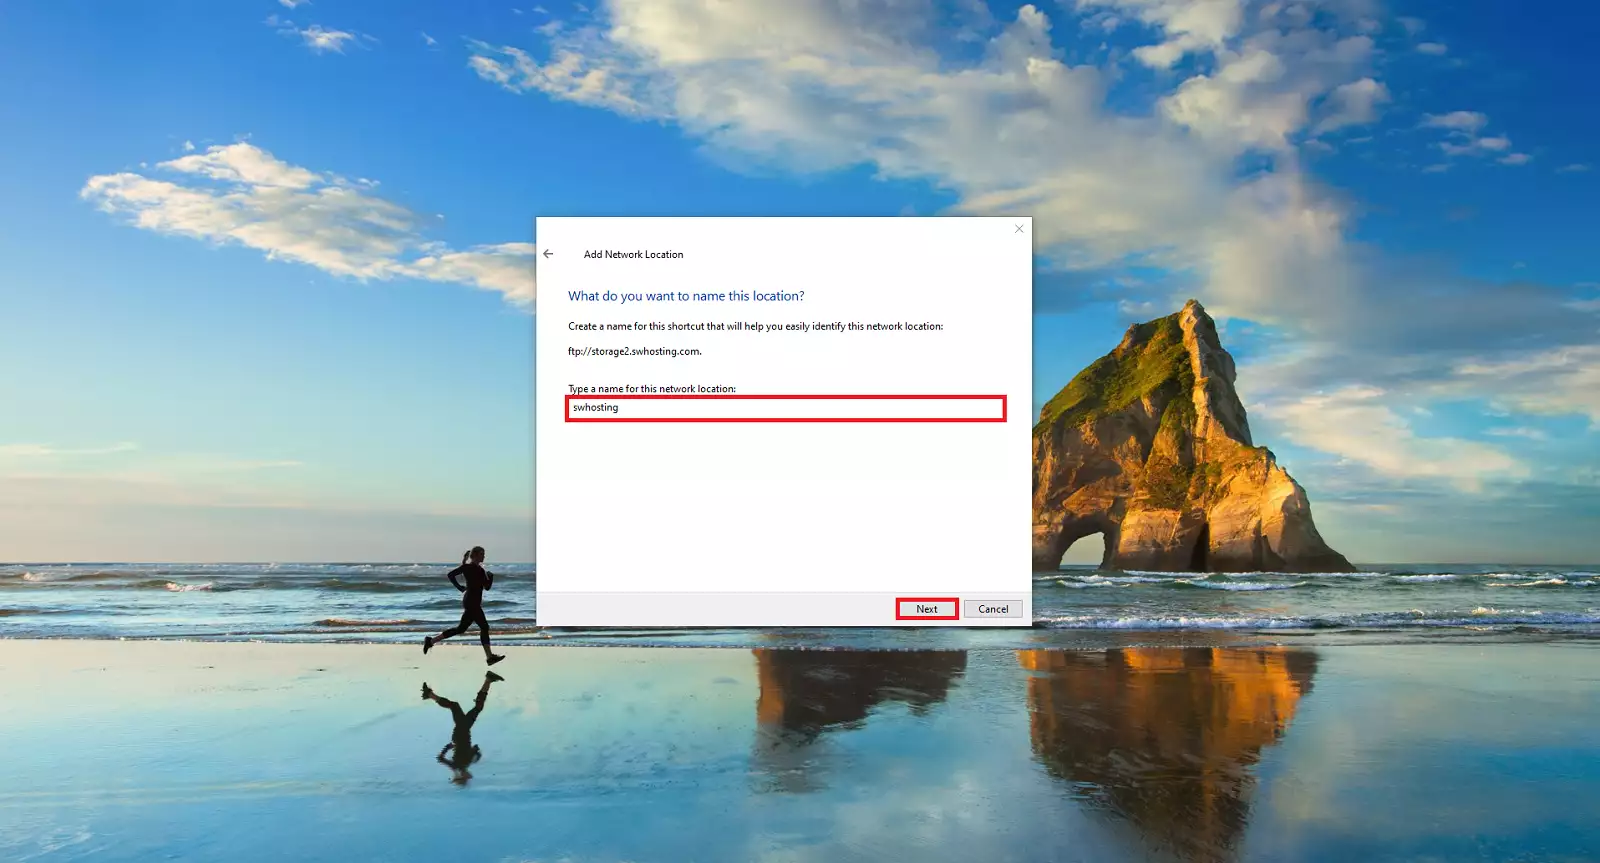
Finally, it will inform you that the network location has been created successfully; you must ensure that the 'Open this network location when I click Finish' checkbox is selected and click 'Finish'.
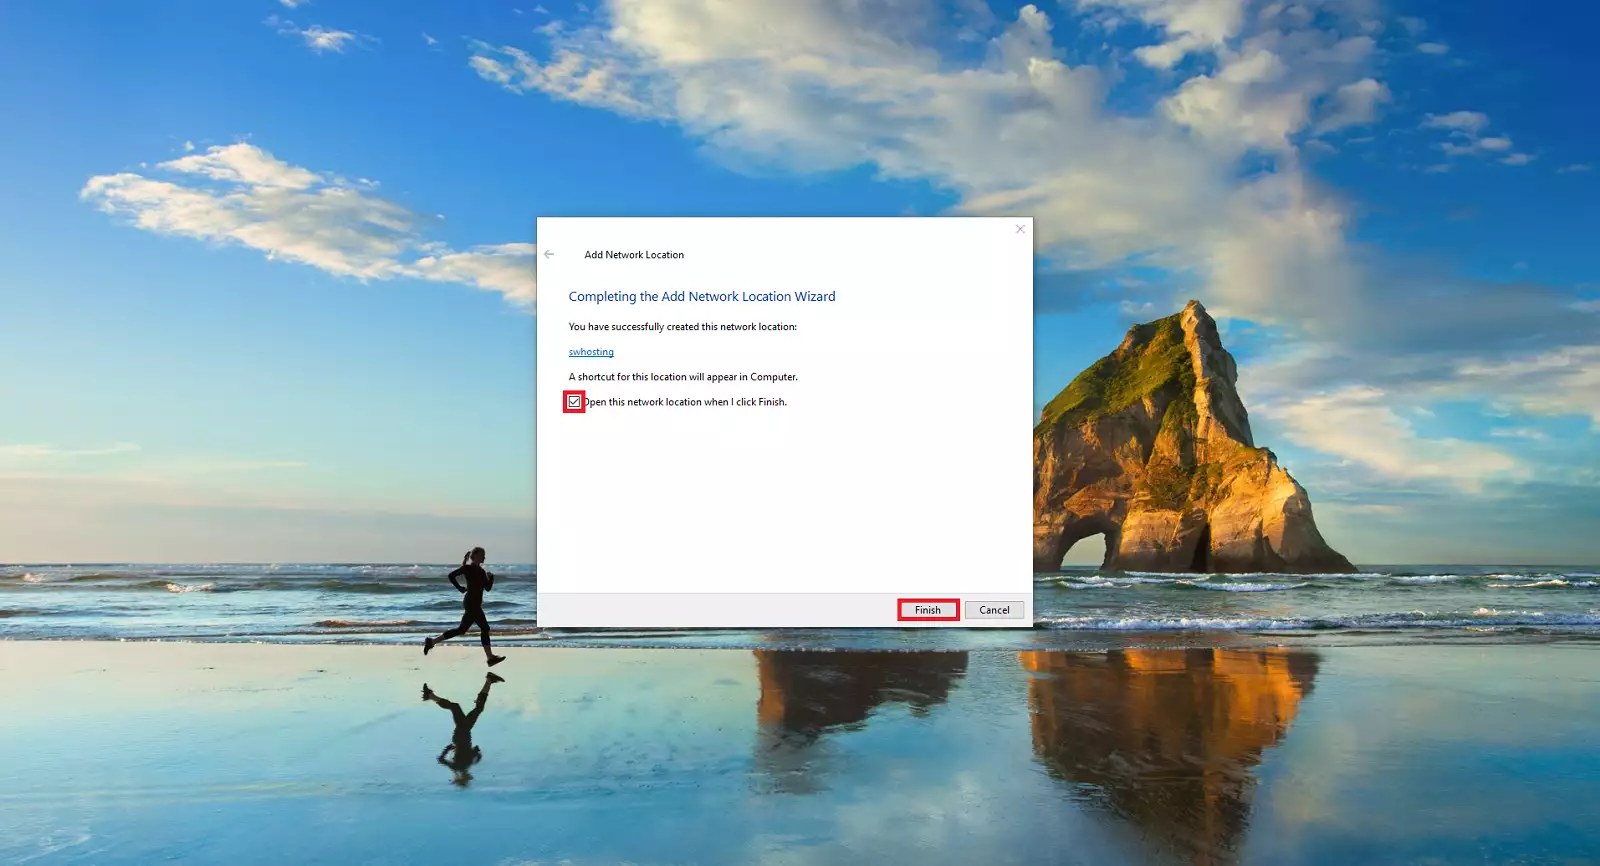
Immediately after, the cloud folder of your Cloud Storage will open and it will ask for the password (which is in the email with the credentials); enter it, select the 'Save password' checkbox, and your folder is now created.
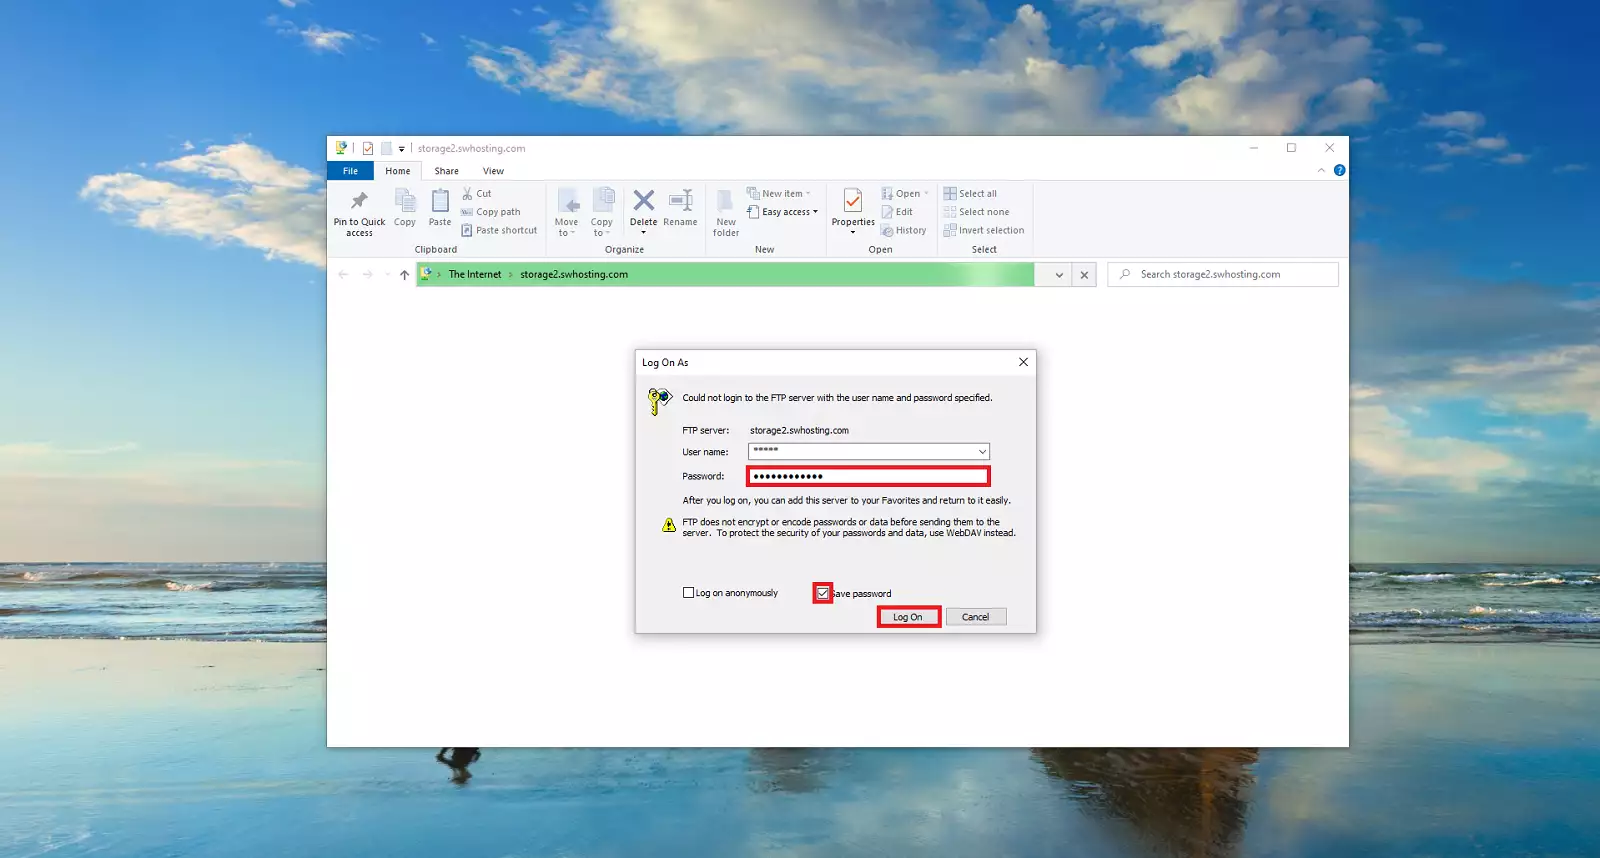
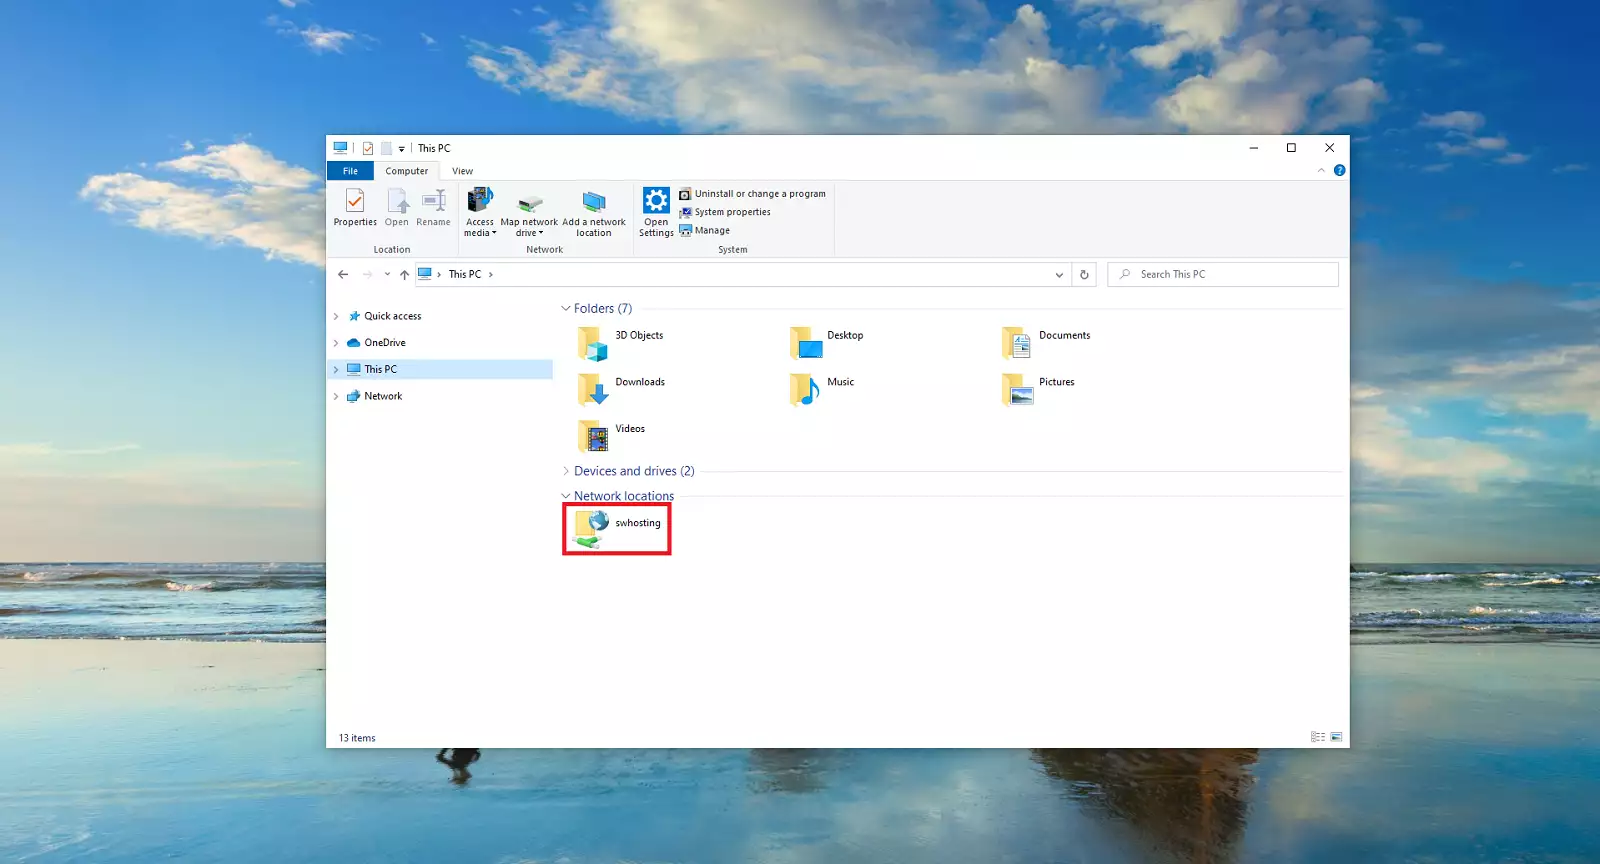
From now on, whenever you turn on your computer, open your file explorer and click on 'This PC', you will have the 'swhosting' cloud folder.