
How to activate and use the Manageable Fail2Ban of my Cloud server with SWPanel
What is Managed Fail2Ban?
The Fail2Ban service is an intelligent analysis system applied to your server that acts in a managed way, according to the configuration you have applied, to restrict erroneous or illicit access attempts against your service.
How can I activate the Fail2Ban system in my cloud?
Within your SWPanel, in the top search box, enter the name of the Cloud in which you want to activate Fail2Ban. Once the service is located, you can click on its name to access its Dashboard.
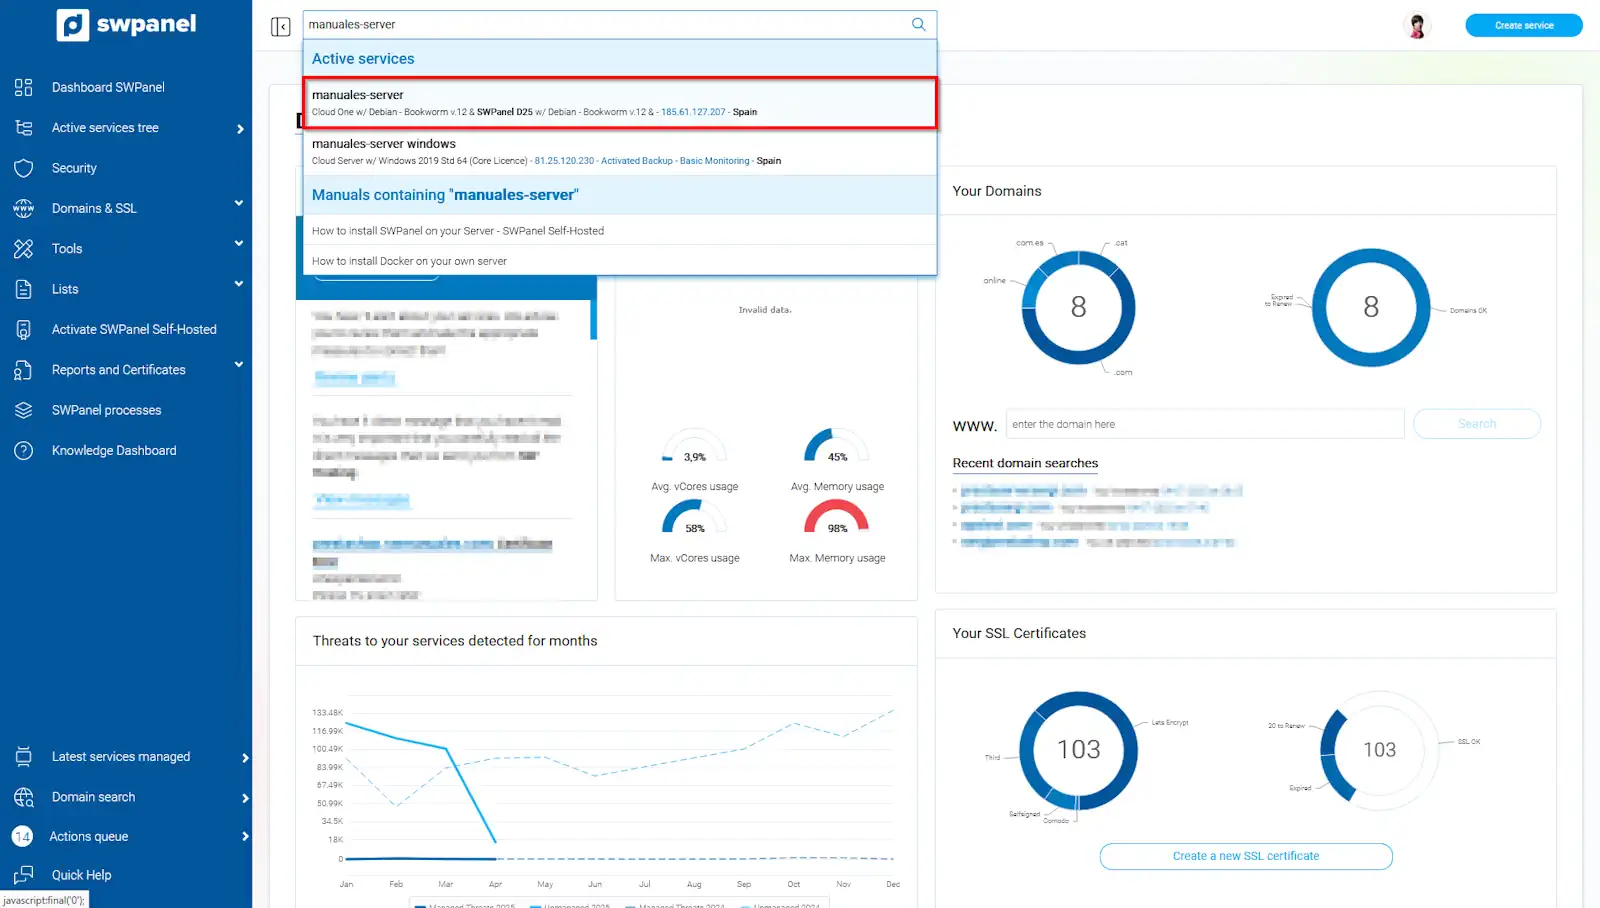
info_ESpture The screenshot is for illustrative purposes. It was taken using version 2025.003.0006 dated 08/04/2025. It may differ from what the current version of SWPanel shows.
Once inside your cloud, go to the Available Improvements section on the right side of the dashboard, and there you will find the Managed Fail2Ban option.
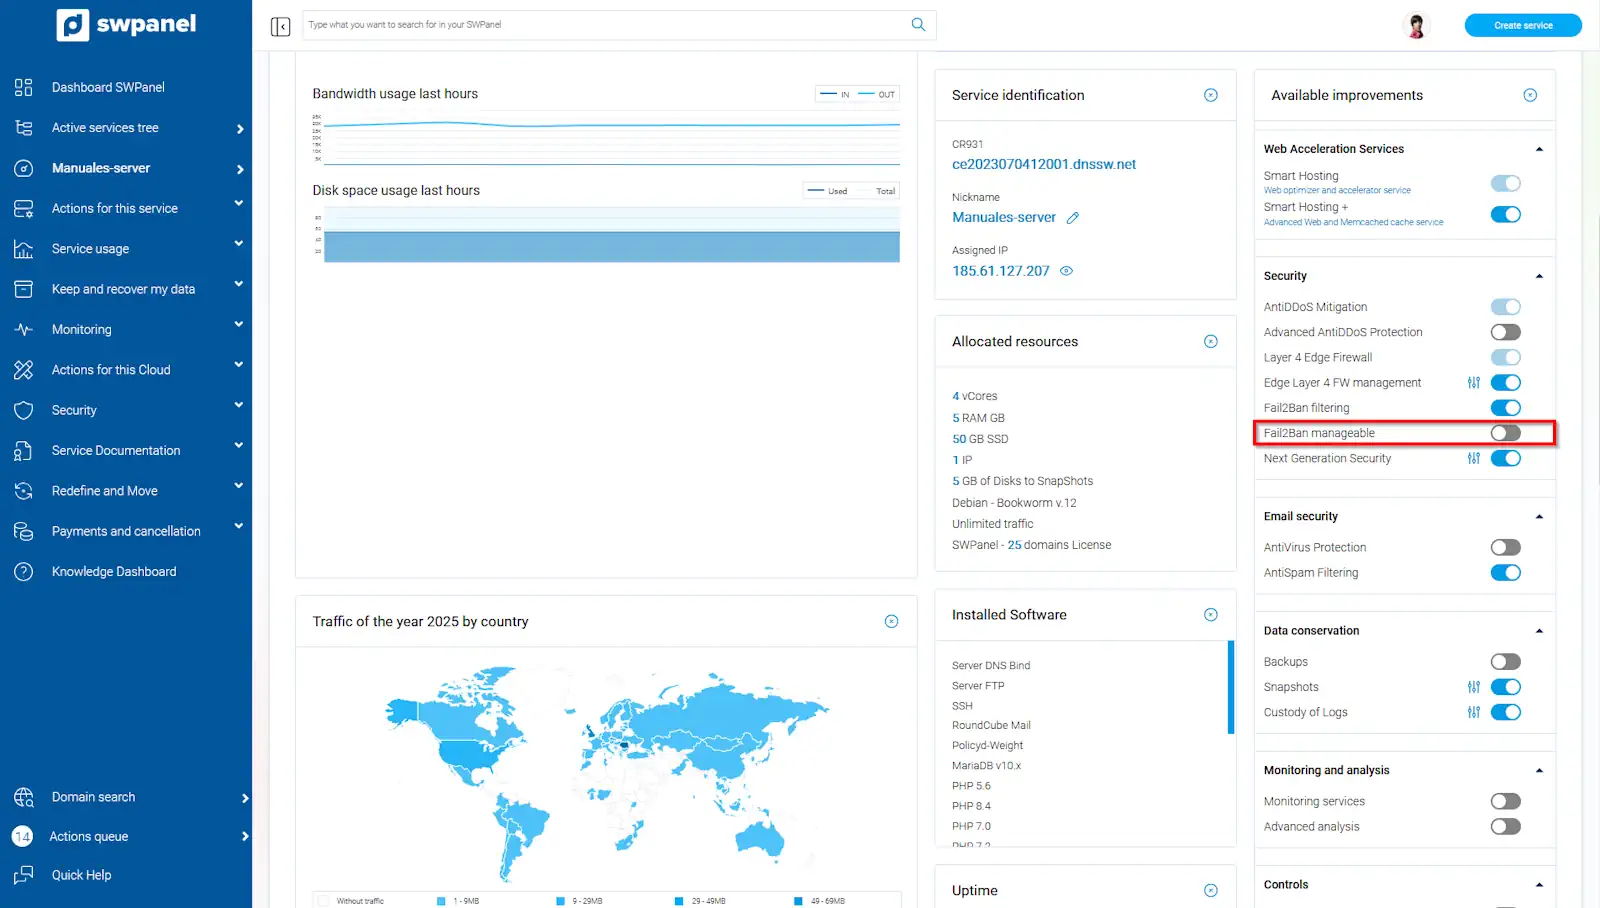
info_capture The screenshot is for illustrative purposes. It was taken using version 2025.003.0006 dated 08/04/2025. It may differ from what the current version of SWPanel shows.
Upon clicking the activation button, you will be automatically redirected to the activation section. In this section, you will find information about what you can manage with your Fail2Ban, and you can activate it by clicking the Activate Managed Fail2Ban in my Cloud checkbox and accepting the contract.
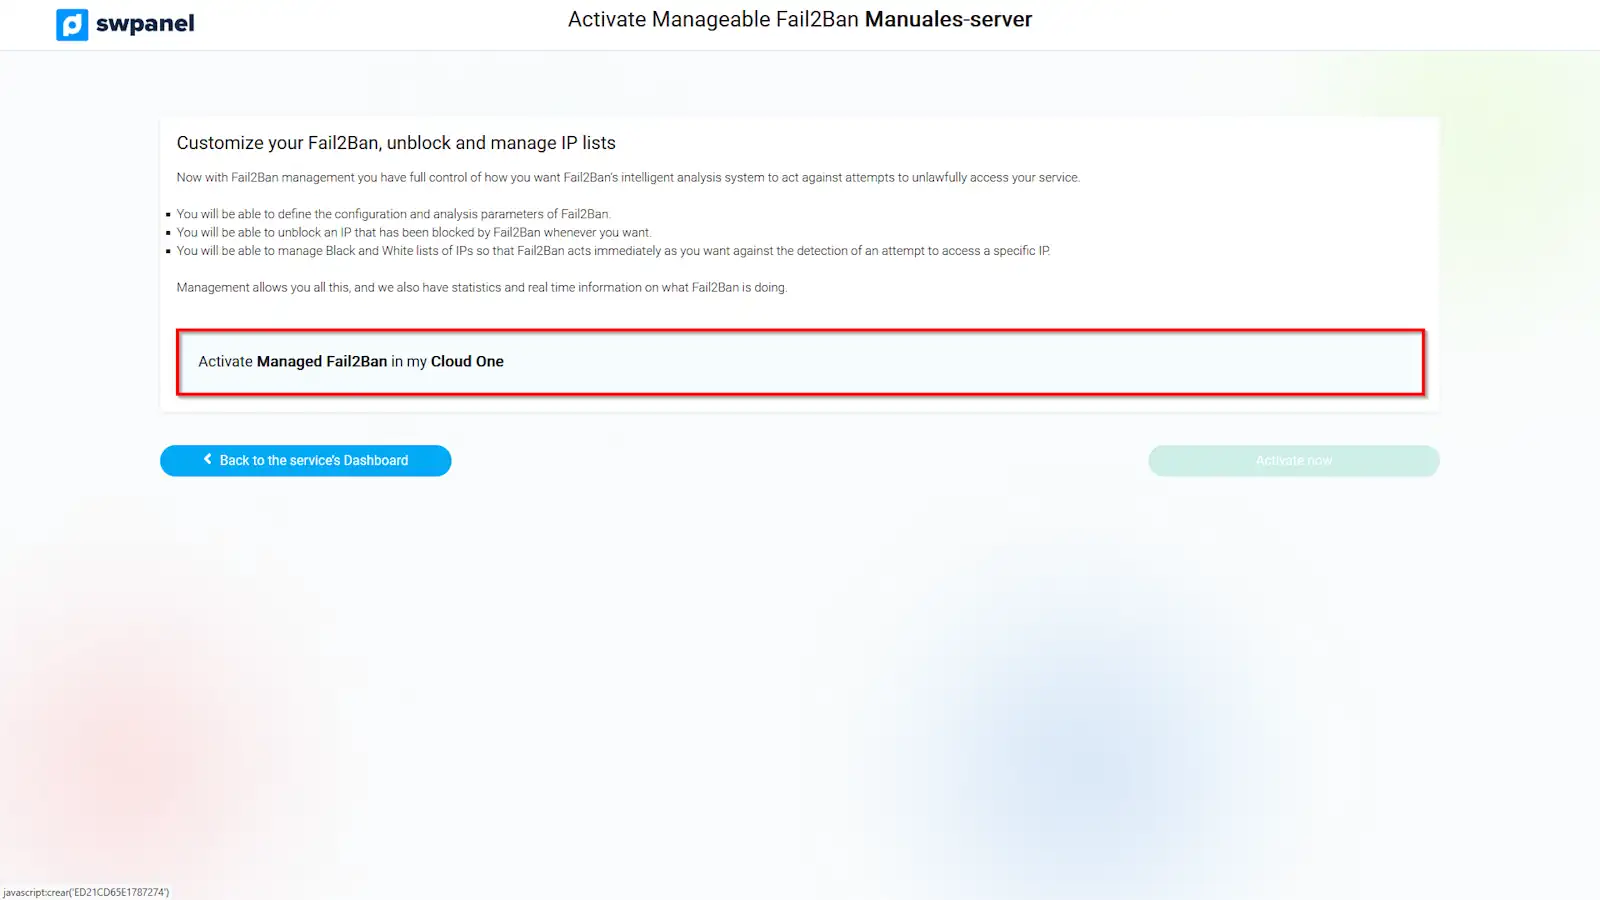
info_capture The screenshot is for illustrative purposes. It was taken using version 2025.003.0006 dated 08/04/2025. It may differ from what the current version of SWPanel shows.
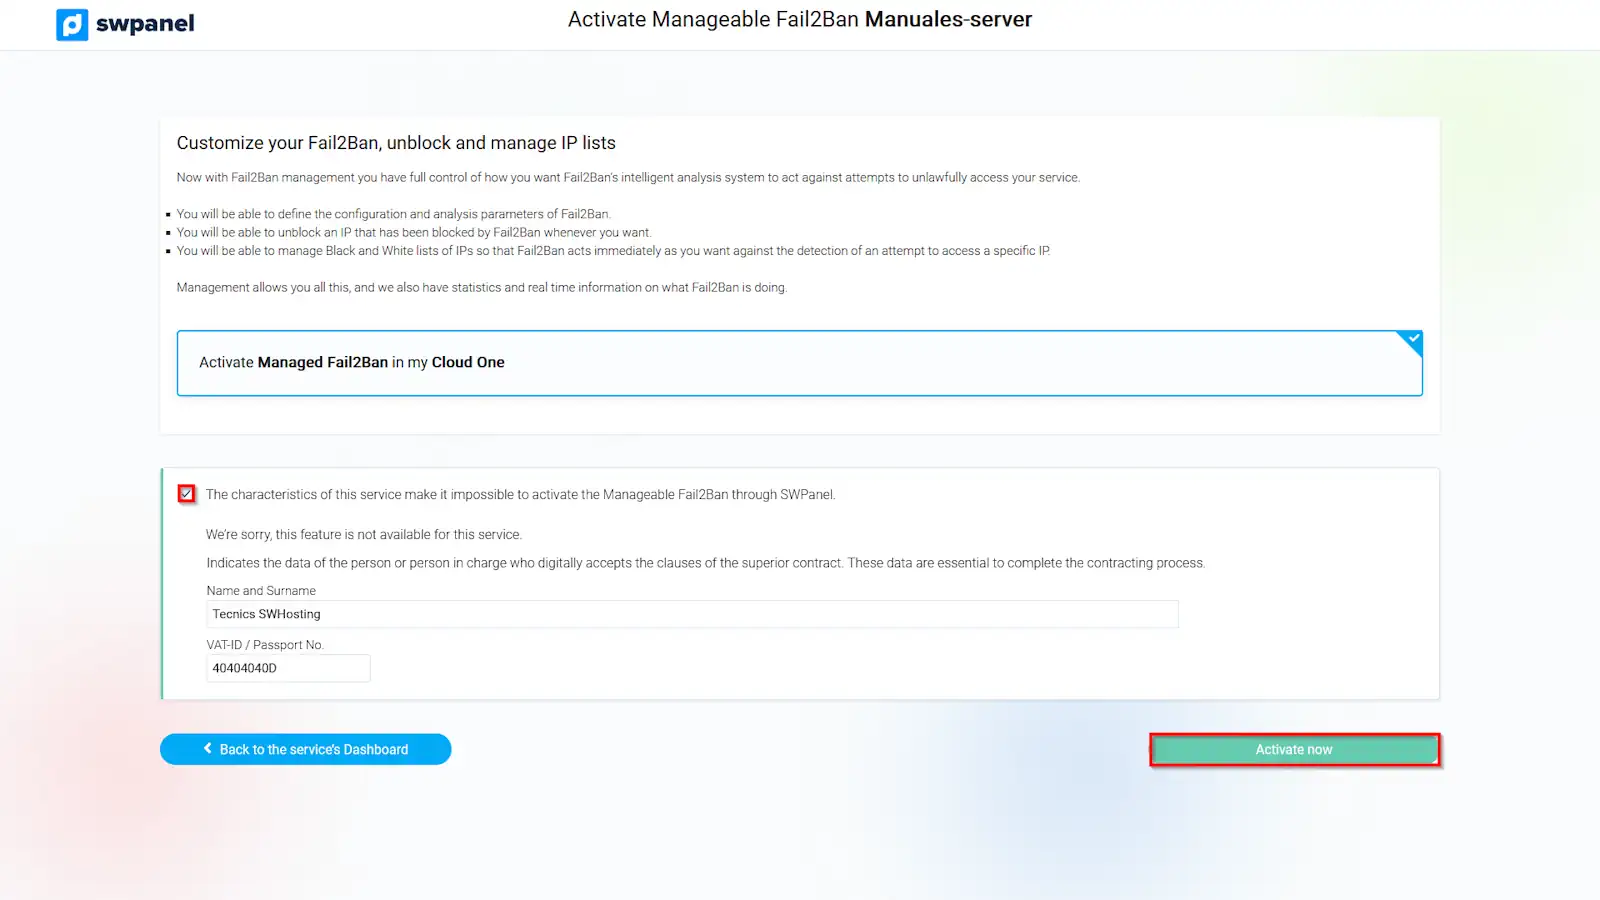
info_capture The screenshot is for illustrative purposes. It was taken using version 2025.003.0006 dated 08/04/2025. It may differ from what the current version of SWPanel shows.
Which parameters can I configure in my Fail2Ban and how?
To modify the configurable parameters of your Fail2Ban, go to your cloud dashboard, and within the same Available Improvements section where you performed the activation, you will see the Managed Fail2Ban option, this time with an extra icon that will allow you to configure the parameters.
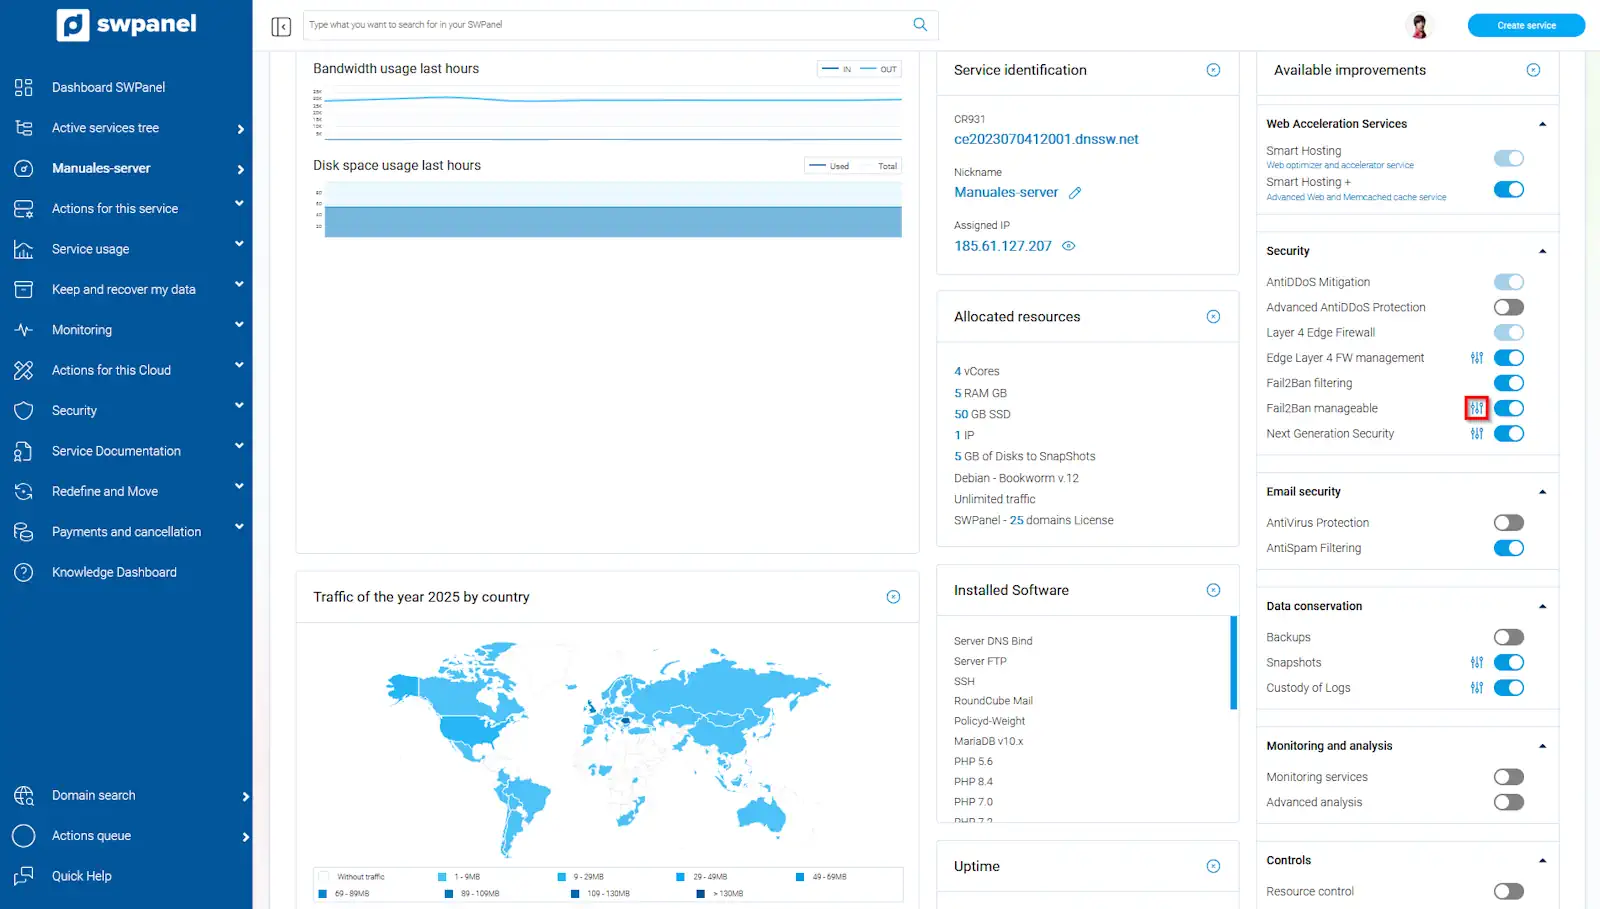
info_capture The screenshot is for illustrative purposes. It was taken using version 2025.003.0006 dated 08/04/2025. It may differ from what the current version of SWPanel shows.
Fail2Ban Settings
In this section, you can configure the blocking parameters applied to failed access attempts:
- Bantime: The duration of the block once applied. The value must be entered in seconds. By default, it is 36,000 seconds, i.e., 10 hours.
- Findtime: The time window during which failed attempts are counted. That is, the period in which, if more failed requests are made, the block will be applied. By default, it is 60 seconds (1 minute).
- Maxretry: The number of failed attempts that must not be exceeded during the Findtime, otherwise, the block will be applied. By default, it is 10 attempts.
(The combination of Maxretry and Findtime determines how many attempts in a given period trigger the activation of the block.)
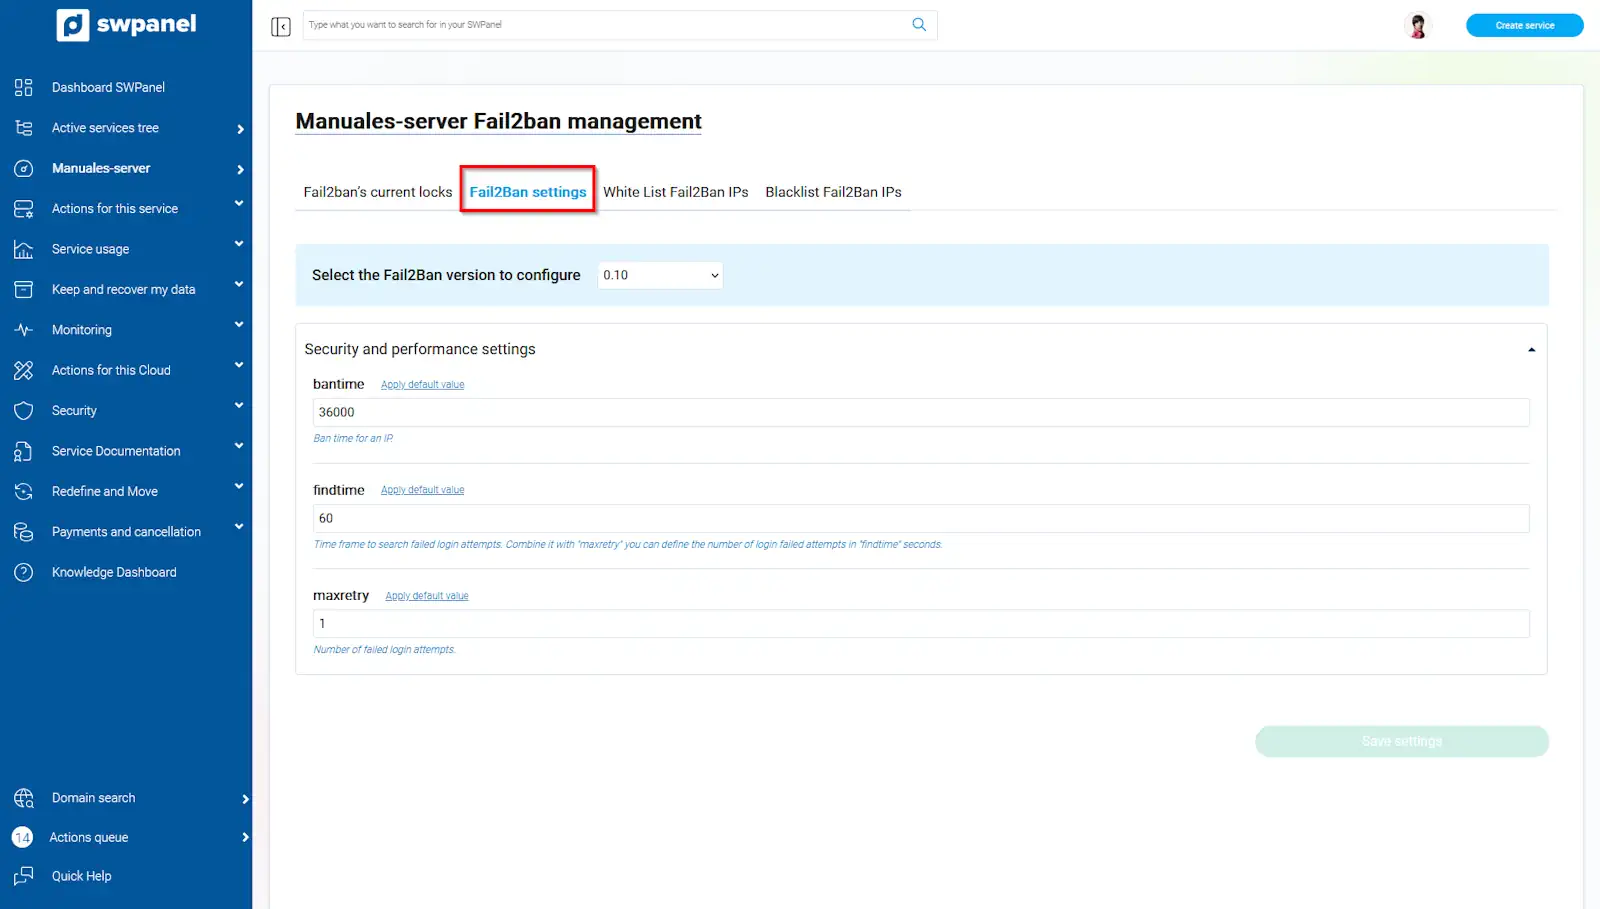
info_capture The screenshot is for illustrative purposes. It was taken using version 2025.003.0006 dated 08/04/2025. It may differ from what the current version of SWPanel shows.
Fail2Ban IP Whitelist
In this section, you can add IPs that you do not want the Fail2Ban system block to apply to, regardless of failed attempts. To add IPs to the whitelist, click the blue Add an IP now button located on the right.
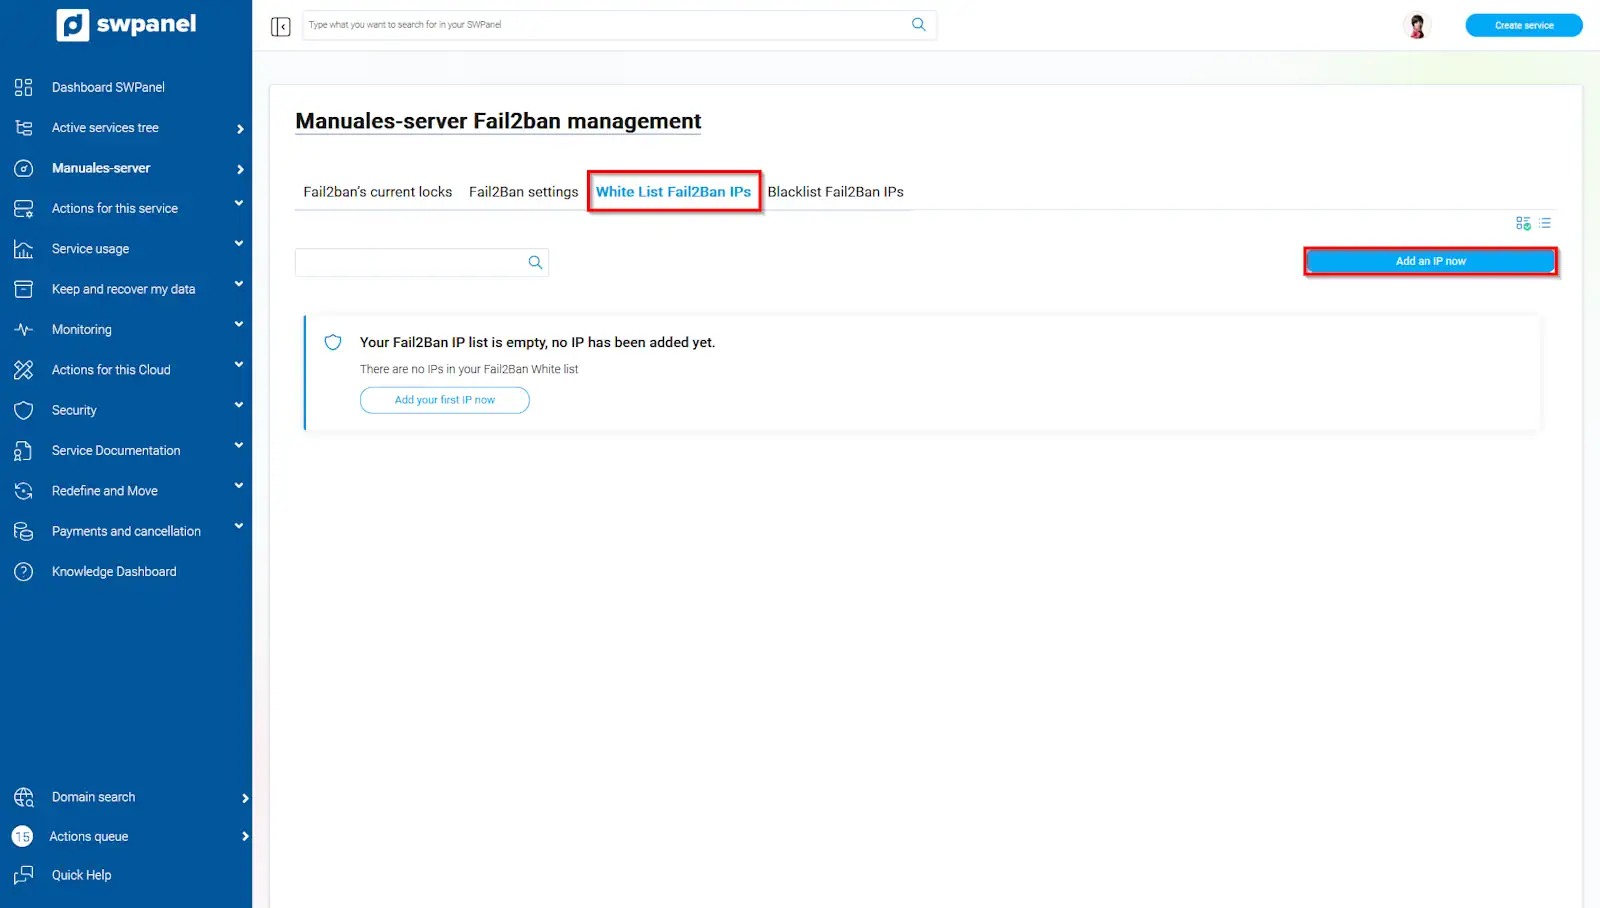
info_capture The screenshot is for illustrative purposes. It was taken using version 2025.003.0006 dated 08/04/2025. It may differ from what the current version of SWPanel shows.
When clicking the button, a window will open where you can enter the IPs in the text box.
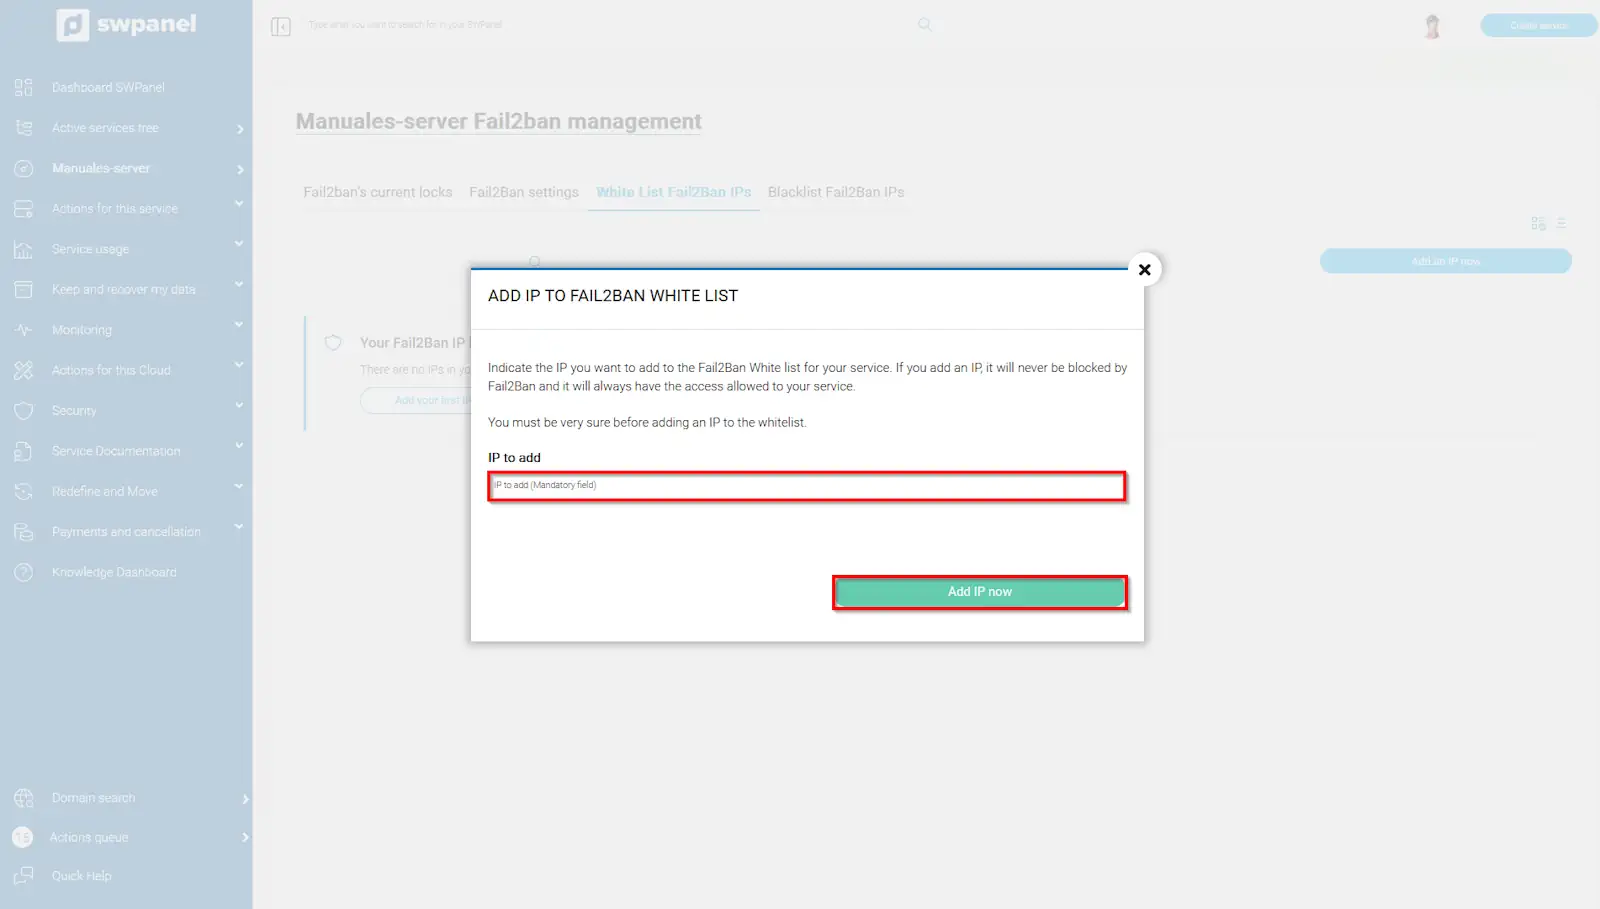
info_capture The screenshot is for illustrative purposes. It was taken using version 2025.003.0006 dated 08/04/2025. It may differ from what the current version of SWPanel shows.
Fail2Ban IP Blacklist
In this section, you can add IPs to which you want to apply the Fail2Ban system block, regardless of failed attempts. To do this, click the blue Add an IP now button located on the right.
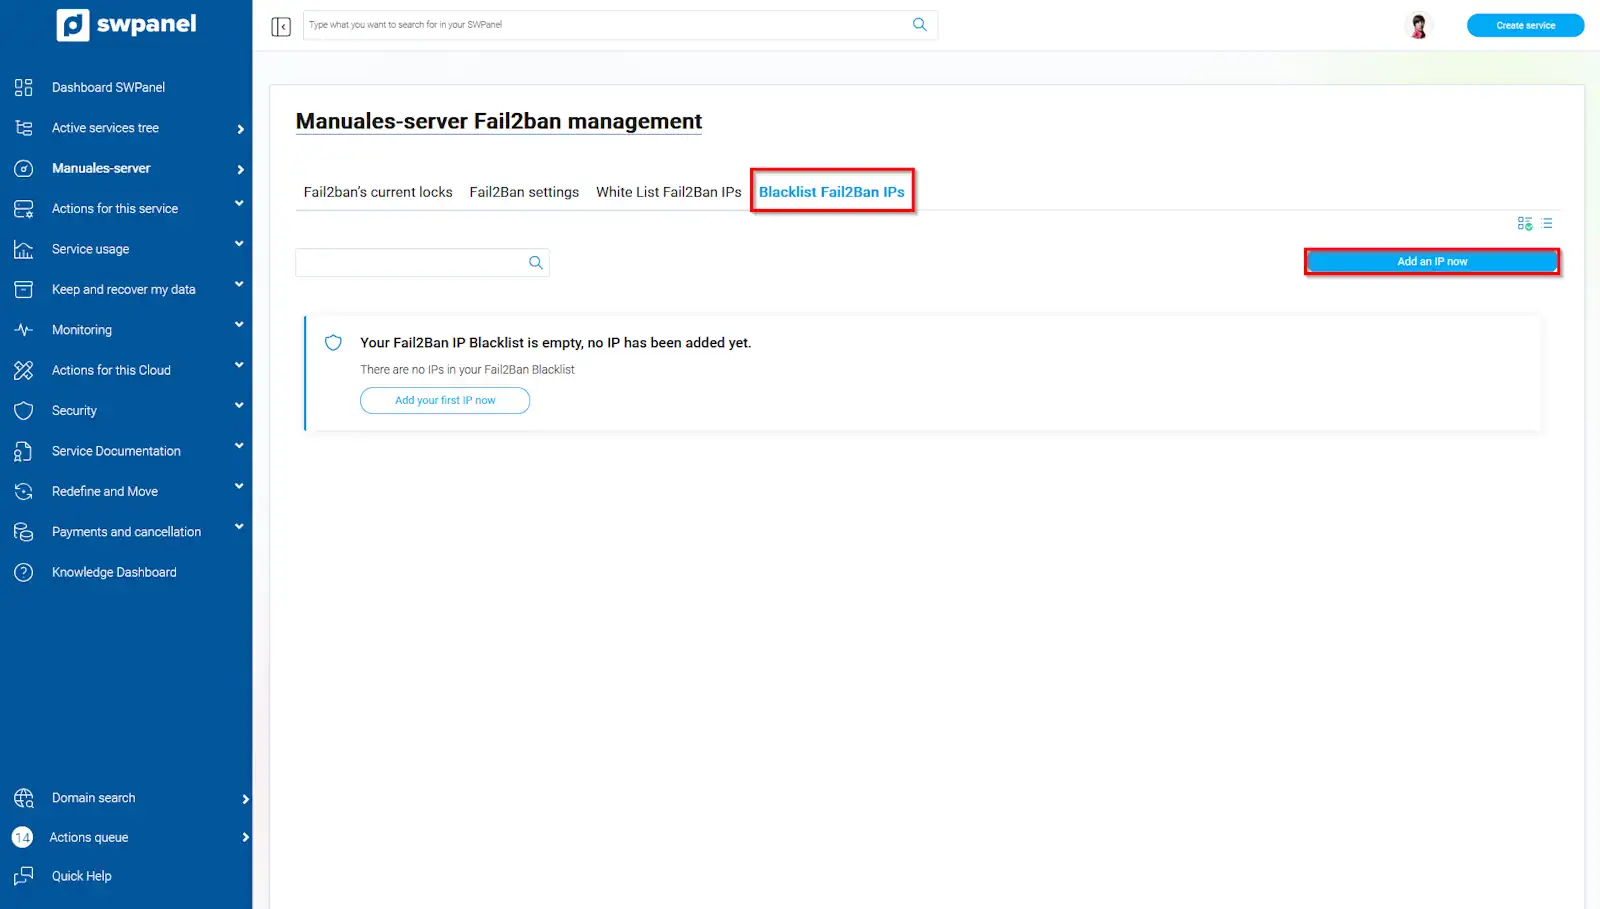
info_capture The screenshot is for illustrative purposes. It was taken using version 2025.003.0006 dated 08/04/2025. It may differ from what the current version of SWPanel shows.
When selecting the button, a window identical to the whitelist one will open where you can enter the IPs in the text box.
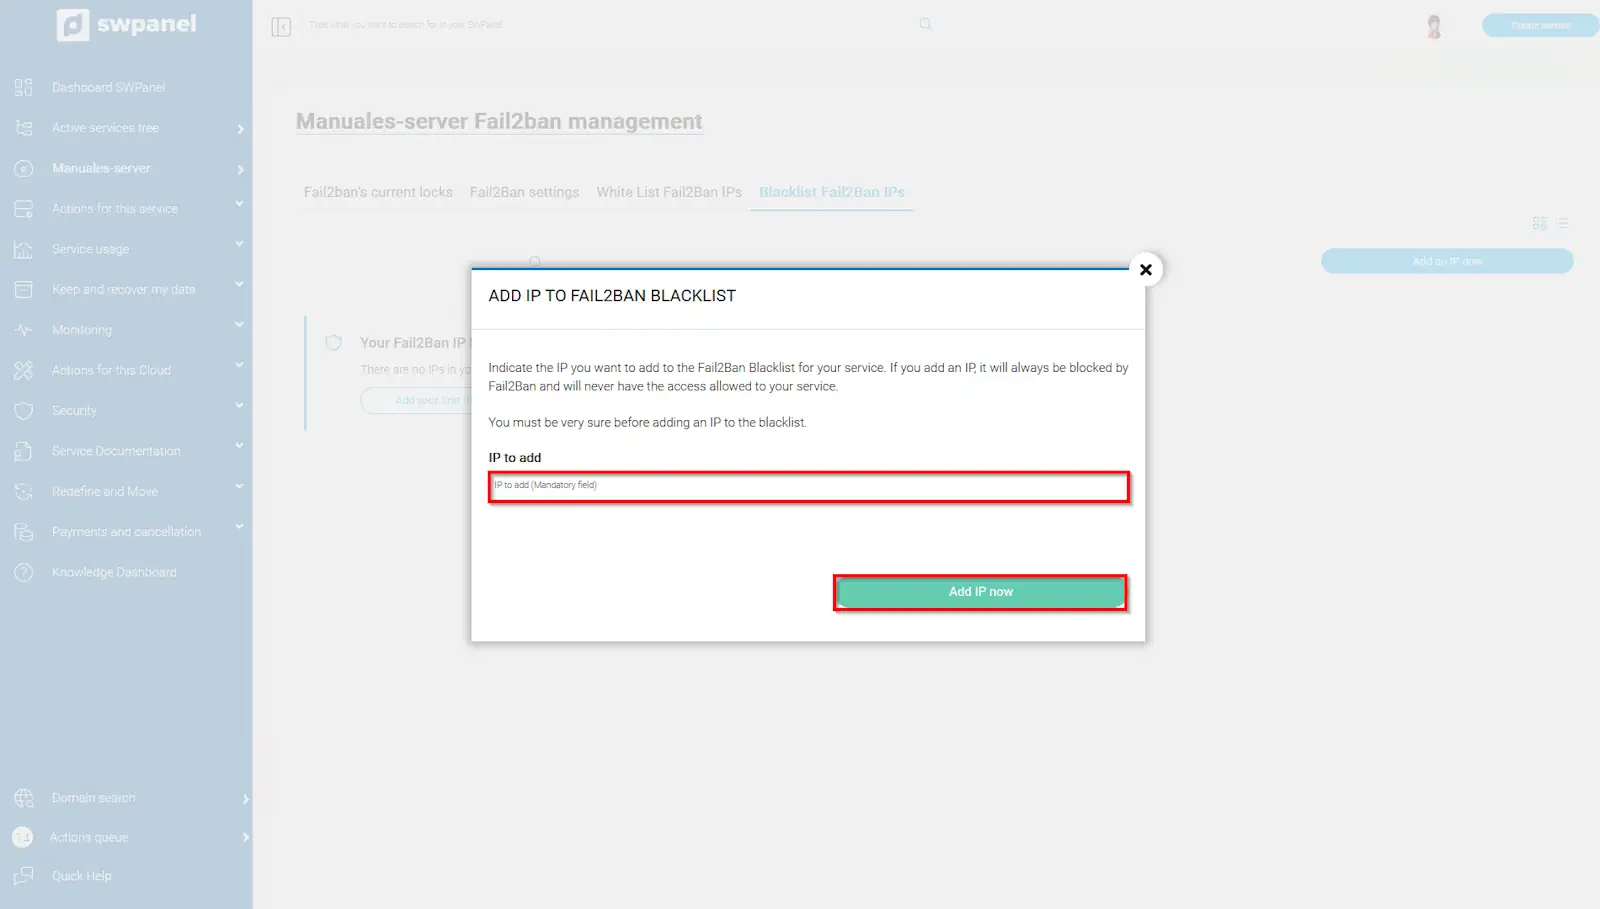
info_capture The screenshot is for illustrative purposes. It was taken using version 2025.003.0006 dated 08/04/2025. It may differ from what the current version of SWPanel shows.
Current Fail2Ban Blocks
In this section, you can monitor the IPs that your Fail2Ban system has been blocking according to the previous configuration in the Fail2Ban Settings section.
You can view the IPs according to the filter you prefer: the Creation date of the block, the IP code, the Country from which the IP is attempting to access, the Status of the block, the connection Protocol used, or the Date of the last update regarding the IP.
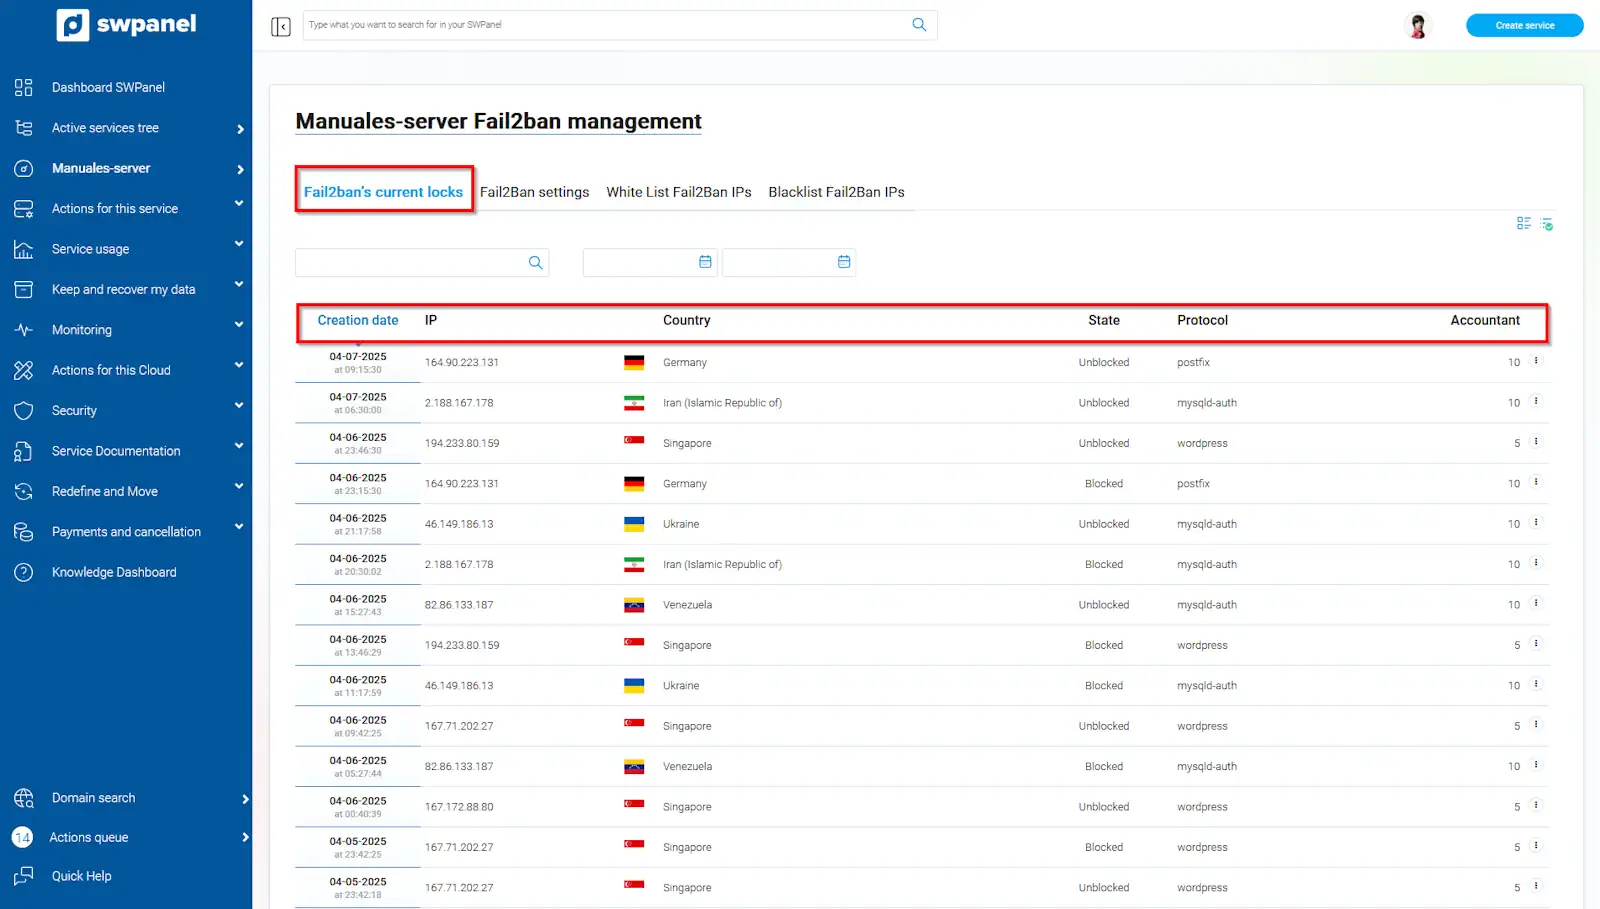
info_capture The screenshot is for illustrative purposes. It was taken using version 2025.003.0006 dated 08/04/2025. It may differ from what the current version of SWPanel shows.
In addition to monitoring blocked IPs, you can also manage them conveniently from this same section. You will have the options to Unblock them, add them to the Whitelist, or add them to the Blacklist.
To do this, hover over the "..." dropdown menu that you will find to the right of any IP and select the desired option.
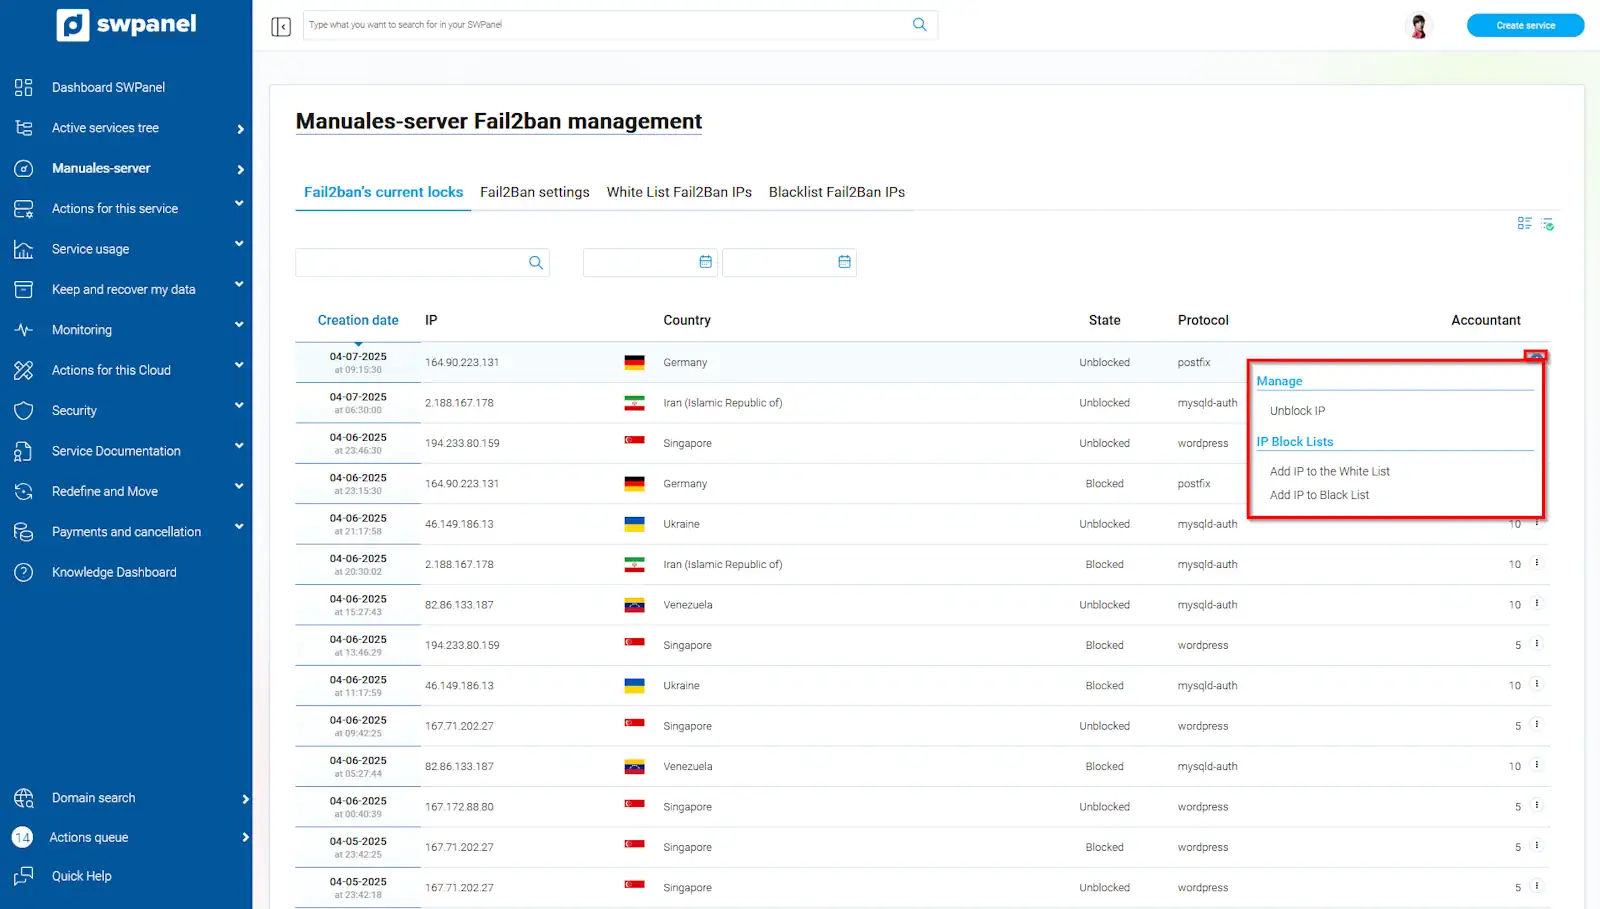
info_capture The screenshot is for illustrative purposes. It was taken using version 2025.003.0006 dated 08/04/2025. It may differ from what the current version of SWPanel shows.
Unblock IP
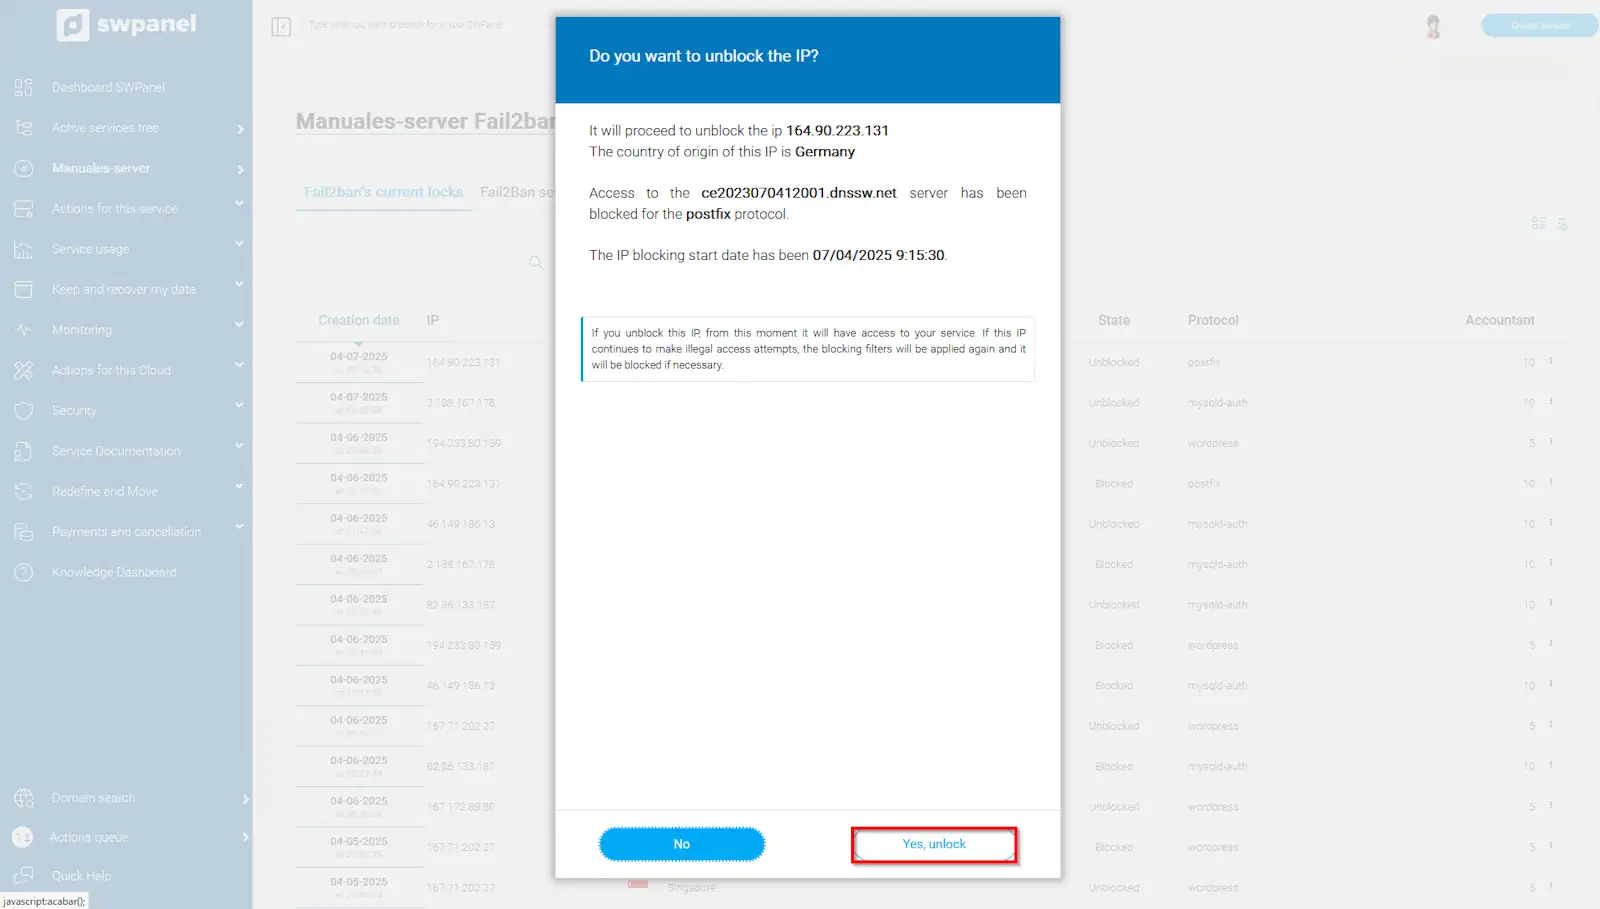
When you select the Unblock IP option, the following confirmation window will be displayed, where, if you wish, you only need to confirm the unblock action.
info_capture The screenshot is for illustrative purposes. It was taken using version 2025.003.0006 dated 08/04/2025. It may differ from what the current version of SWPanel shows.
Warning
As indicated in the confirmation box, unblocking an IP does not imply that it will not be blocked again in the future. This is a temporary unblock. If it meets the blocking conditions again, the Fail2Ban system will block it again. To avoid this, it must be added to the Whitelist.
Add IP to Whitelist
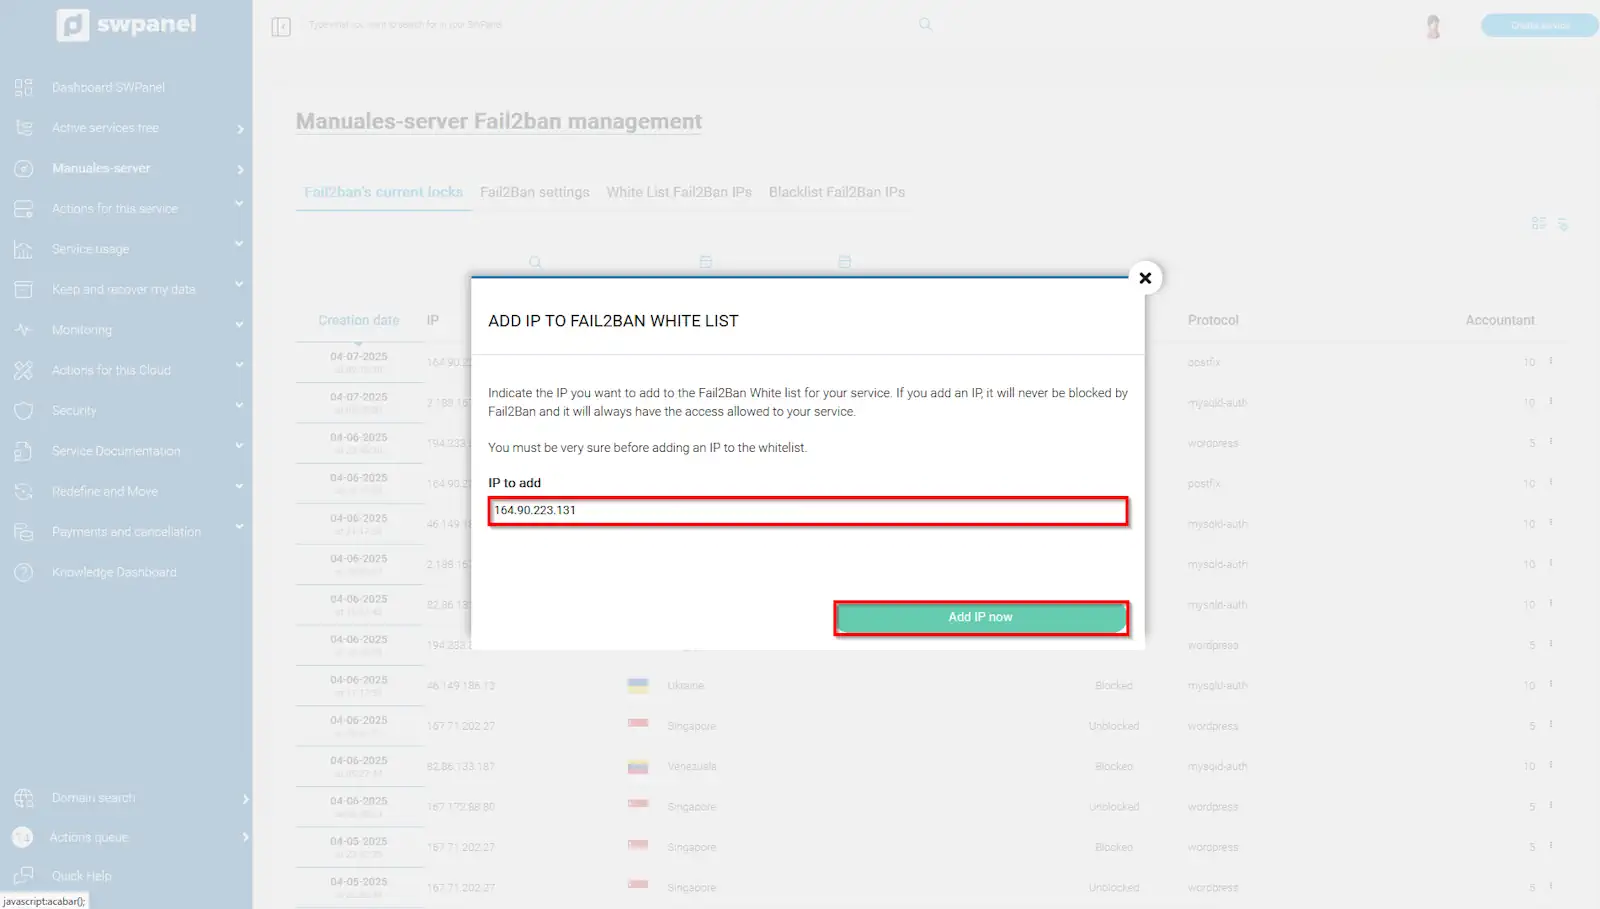
If you decide to add the IP to the Whitelist, this window will be displayed with the text box containing the selected IP:
info_capture The screenshot is for illustrative purposes. It was taken using version 2025.003.0006 dated 08/04/2025. It may differ from what the current version of SWPanel shows.
You can modify the IP in the text box, but it doesn't make much sense, as the goal is to add the IP you are managing.
Add IP to Blacklist
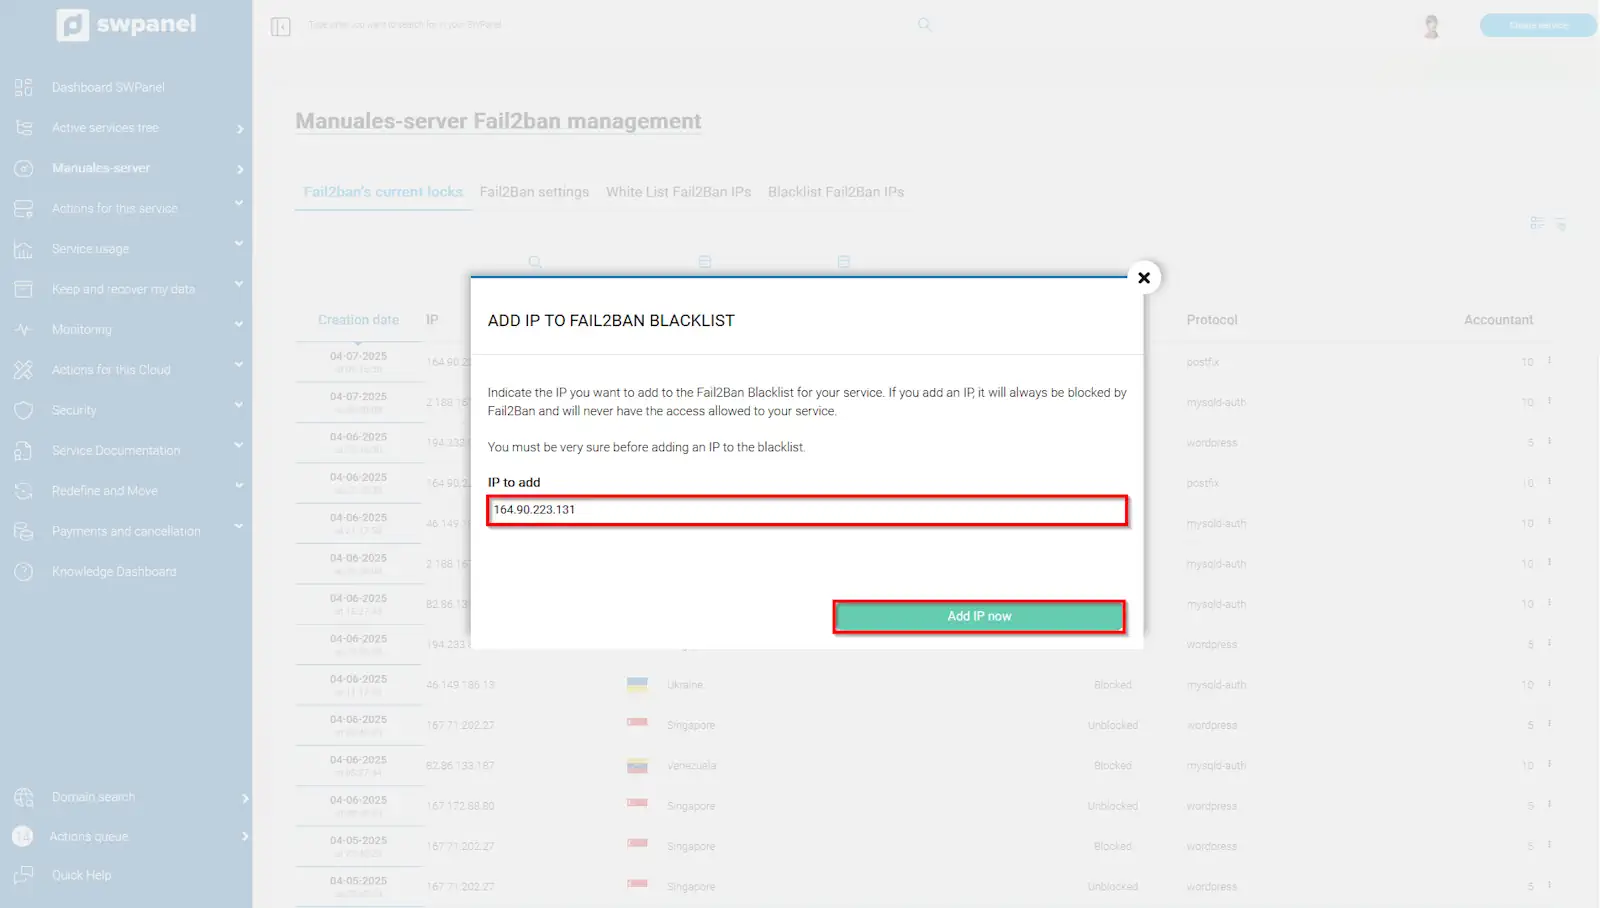
If you want to add the IP to the Blacklist so that it cannot connect again, a window identical to the previous one will open with the selected IP in the text box:
info_capture The screenshot is for illustrative purposes. It was taken using version 2025.003.0006 dated 08/04/2025. It may differ from what the current version of SWPanel shows.
You can also modify the IP, but again, it doesn't make much sense, as it is about adding the IP in question to the blacklist.