
How to register on SWPanel
User Registration Manual in SWPanel
1. Summary and Introduction
This manual aims to guide the user step by step through the process of creating an account in SWPanel, a comprehensive cloud services management platform. The manual explains two main registration methods:
- Registration via SWPanel's own form
- Registration using a Google account
What is SWPanel?
SWPanel is a web platform developed for the complete management of hosting services, cloud servers, domains, and associated tools. It offers an intuitive, dynamic, and customizable environment for both individual users and companies.
Available registration methods
- SWPanel registration form: Traditional registration using an email address, name or company, country, and a secure password.
- Google Account: Quick registration through authentication with an existing Google account.
2. Registration via the SWPanel form
Step 1: Access to the registration form
Access the official SWPanel site via the following registration link and click on "Sign Up".
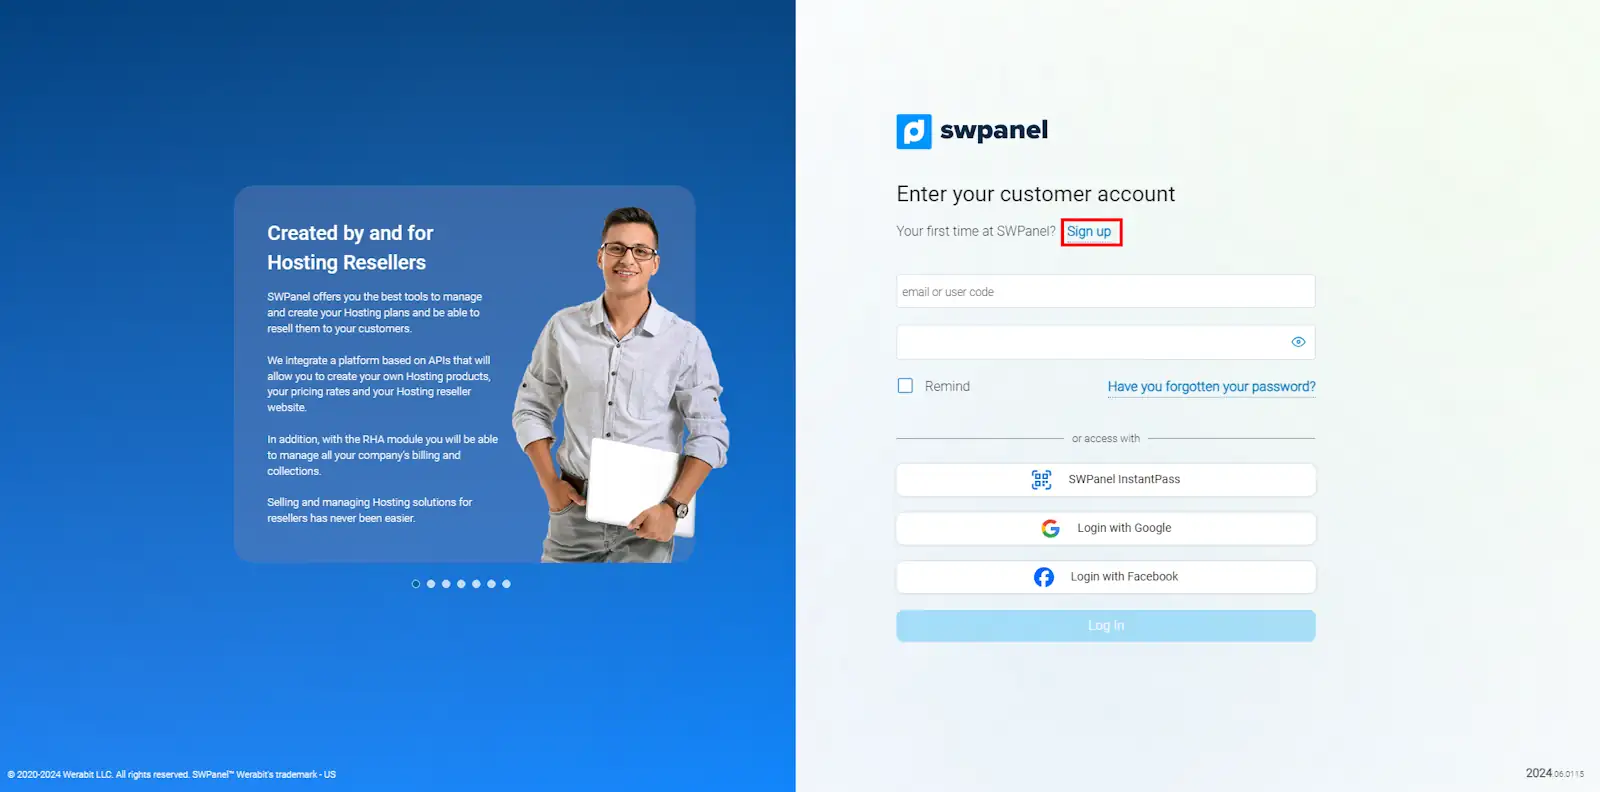
info_capture The screenshot is for guidance. It was taken using version 2025.03.0003 dated 03/26/2025. It may differ from what the current version of SWPanel shows.
Image explanation: The welcome home page is shown, where the “Sign Up” button is located in the top right.
Step 2: Entering initial credentials
Enter your email address and choose a secure password. Then click on "Register Now".
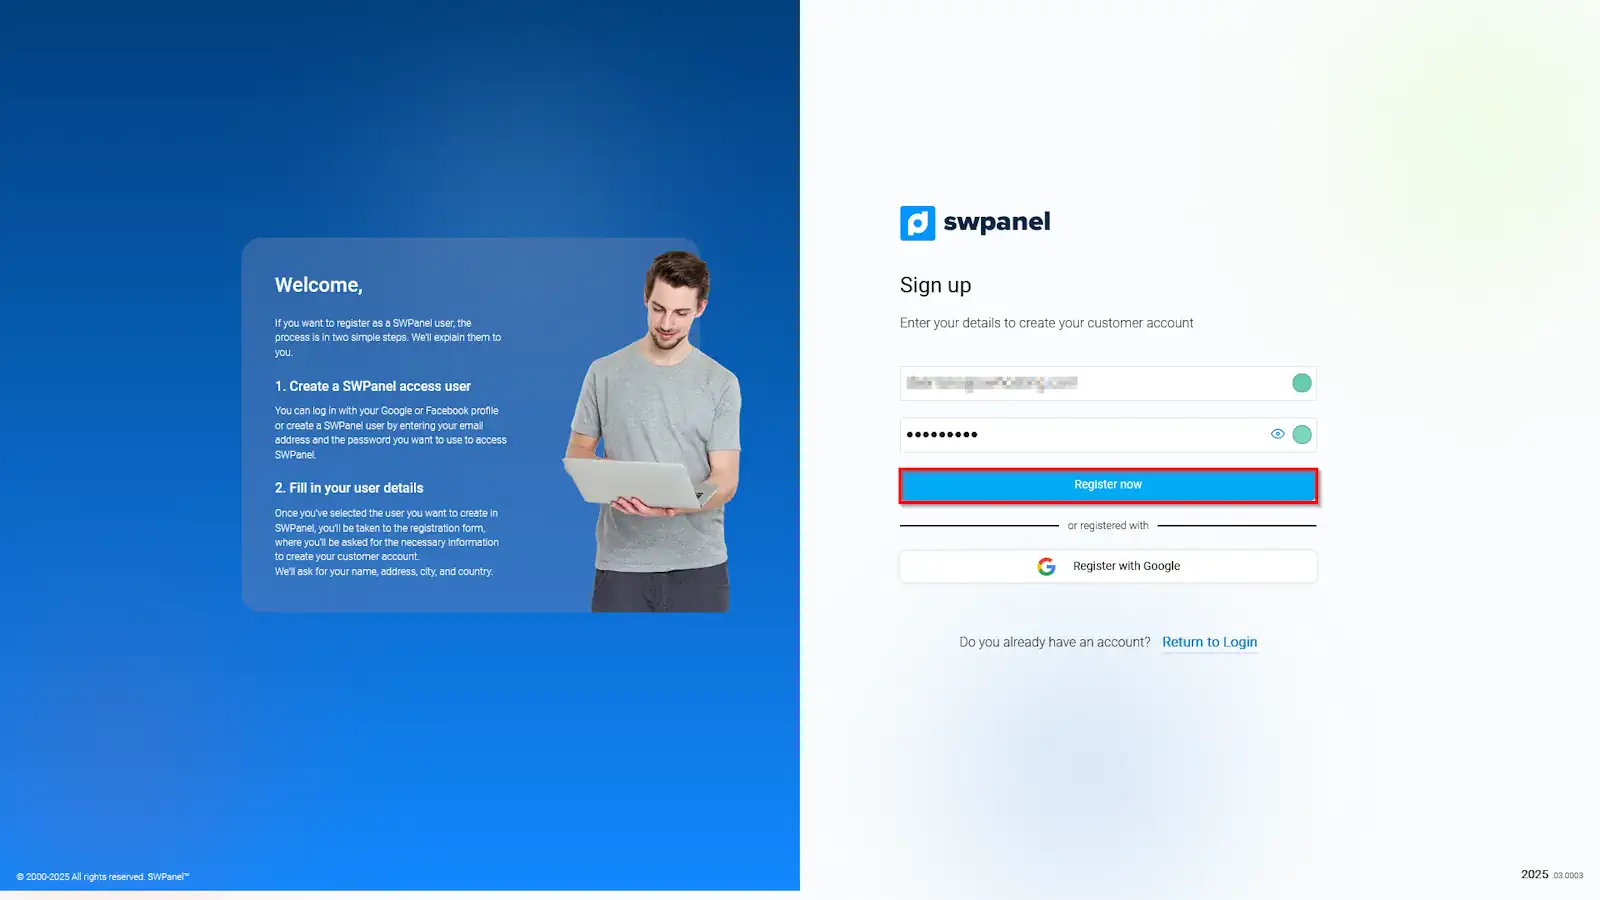
info_capture The screenshot is for guidance. It was taken using version 2025.03.0003 dated 03/26/2025. It may differ from what the current version of SWPanel shows.
Detail: The password should be unique, preferably containing letters, numbers, and special characters to improve security.
Step 3: Personal or corporate data
Complete the required fields, such as your full name or the company name, and select your country of residence.
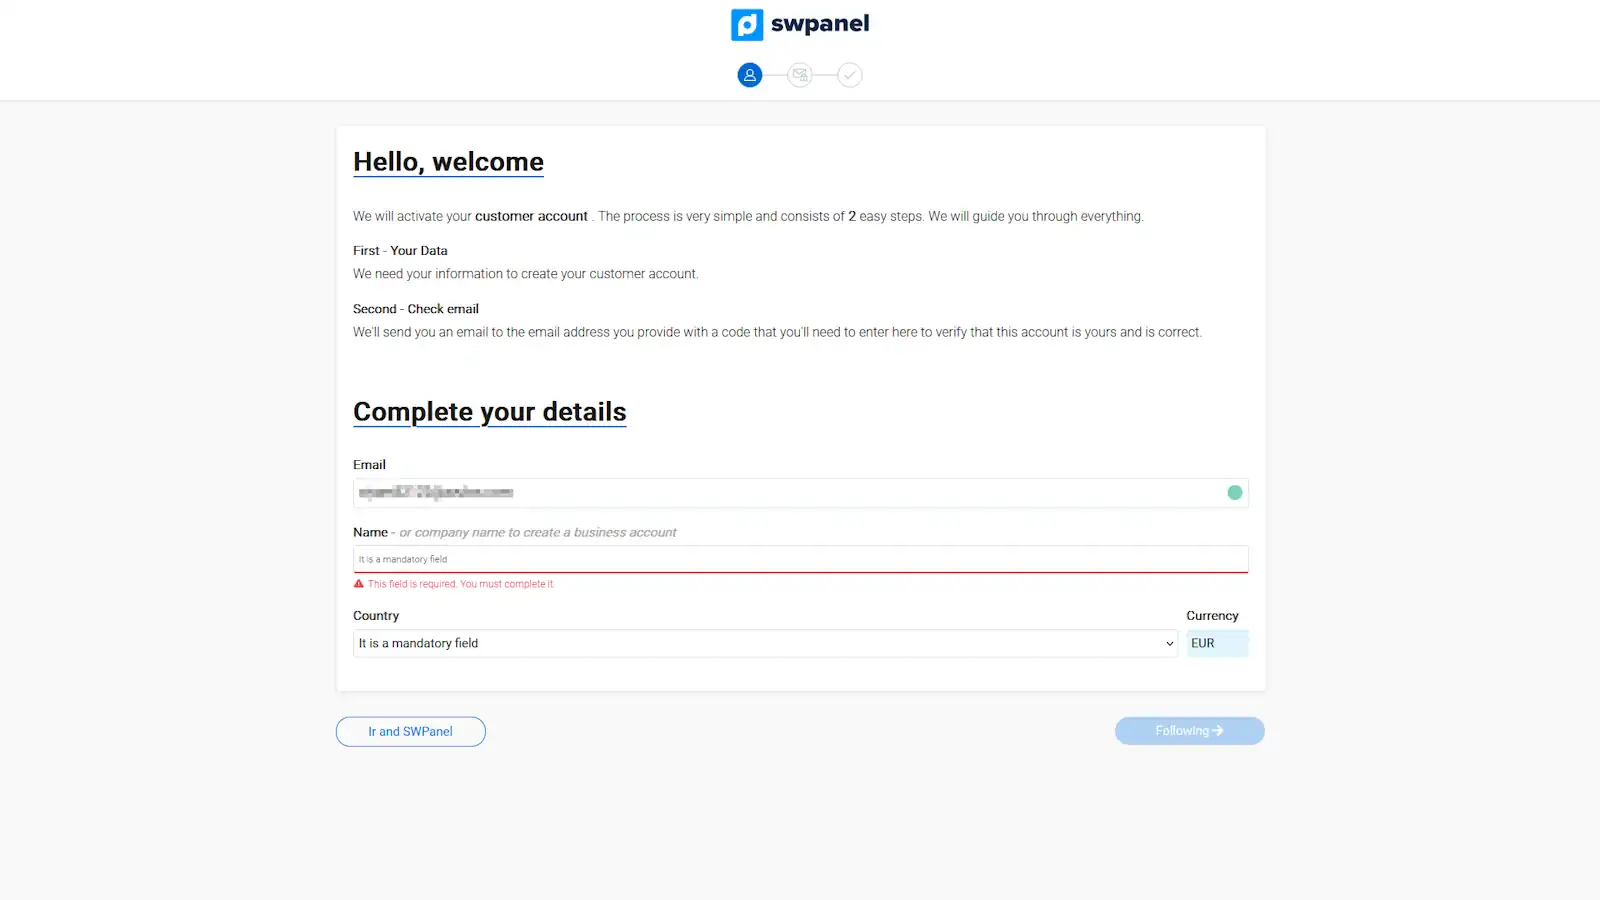
info_capture The screenshot is for guidance. It was taken using version 2025.03.0003 dated 03/26/2025. It may differ from what the current version of SWPanel shows.
Step 4: Additional information and registration continuation
Enter the additional information requested by the form and click "Next" to continue.
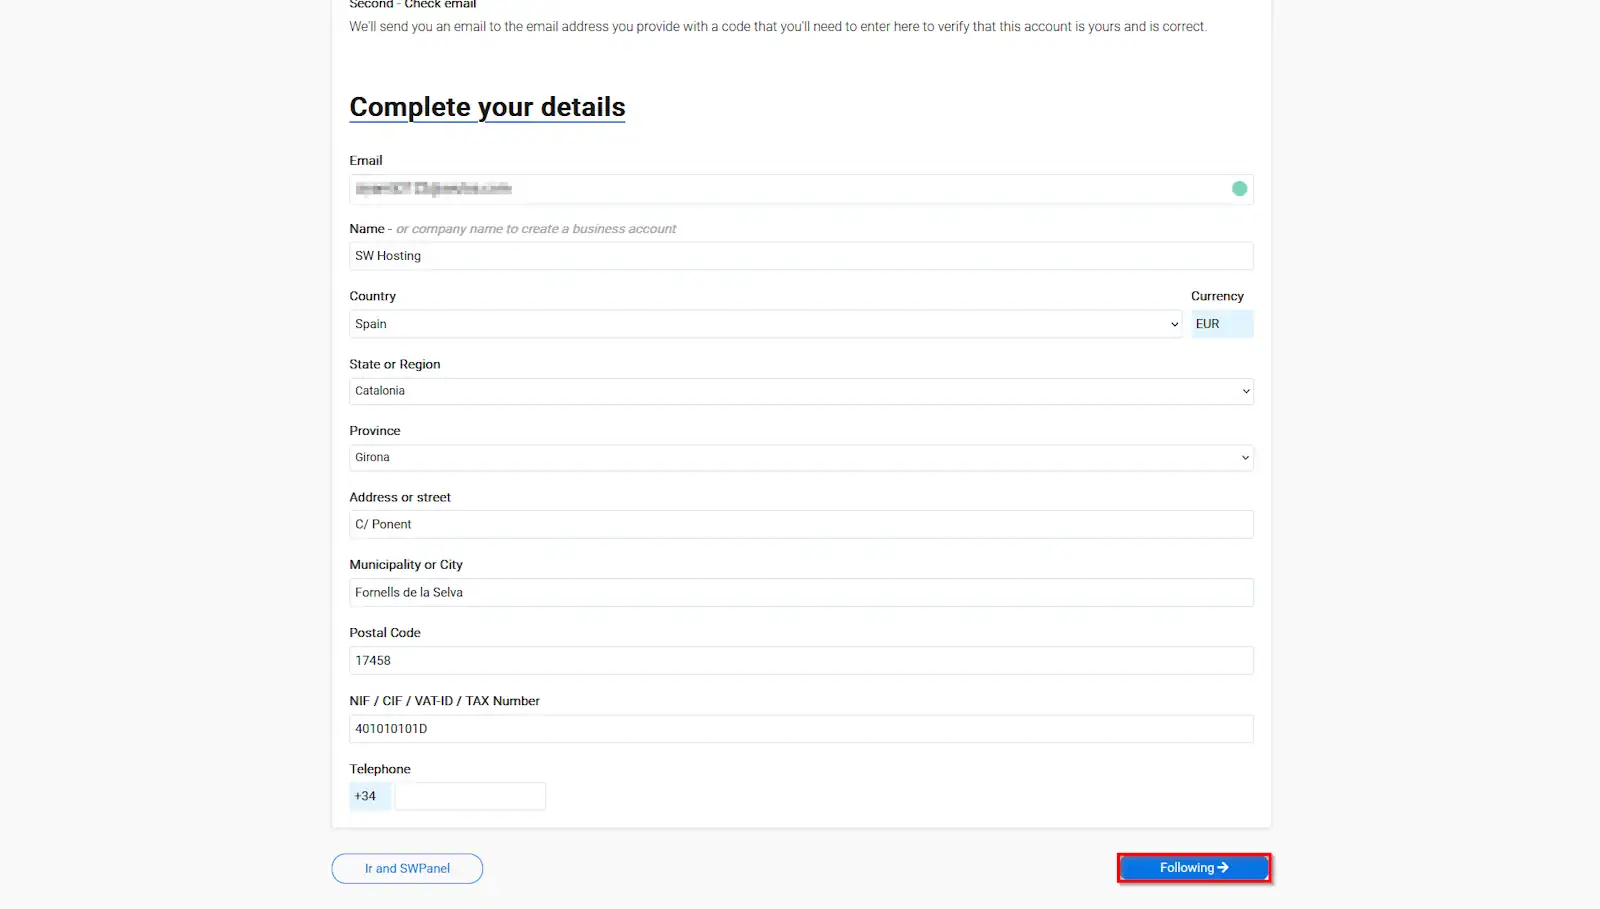
info_capture The screenshot is for guidance. It was taken using version 2025.03.0003 dated 03/26/2025. It may differ from what the current version of SWPanel shows.
Step 5: Email verification
Check your inbox and enter the verification code sent by SWPanel to confirm your identity.
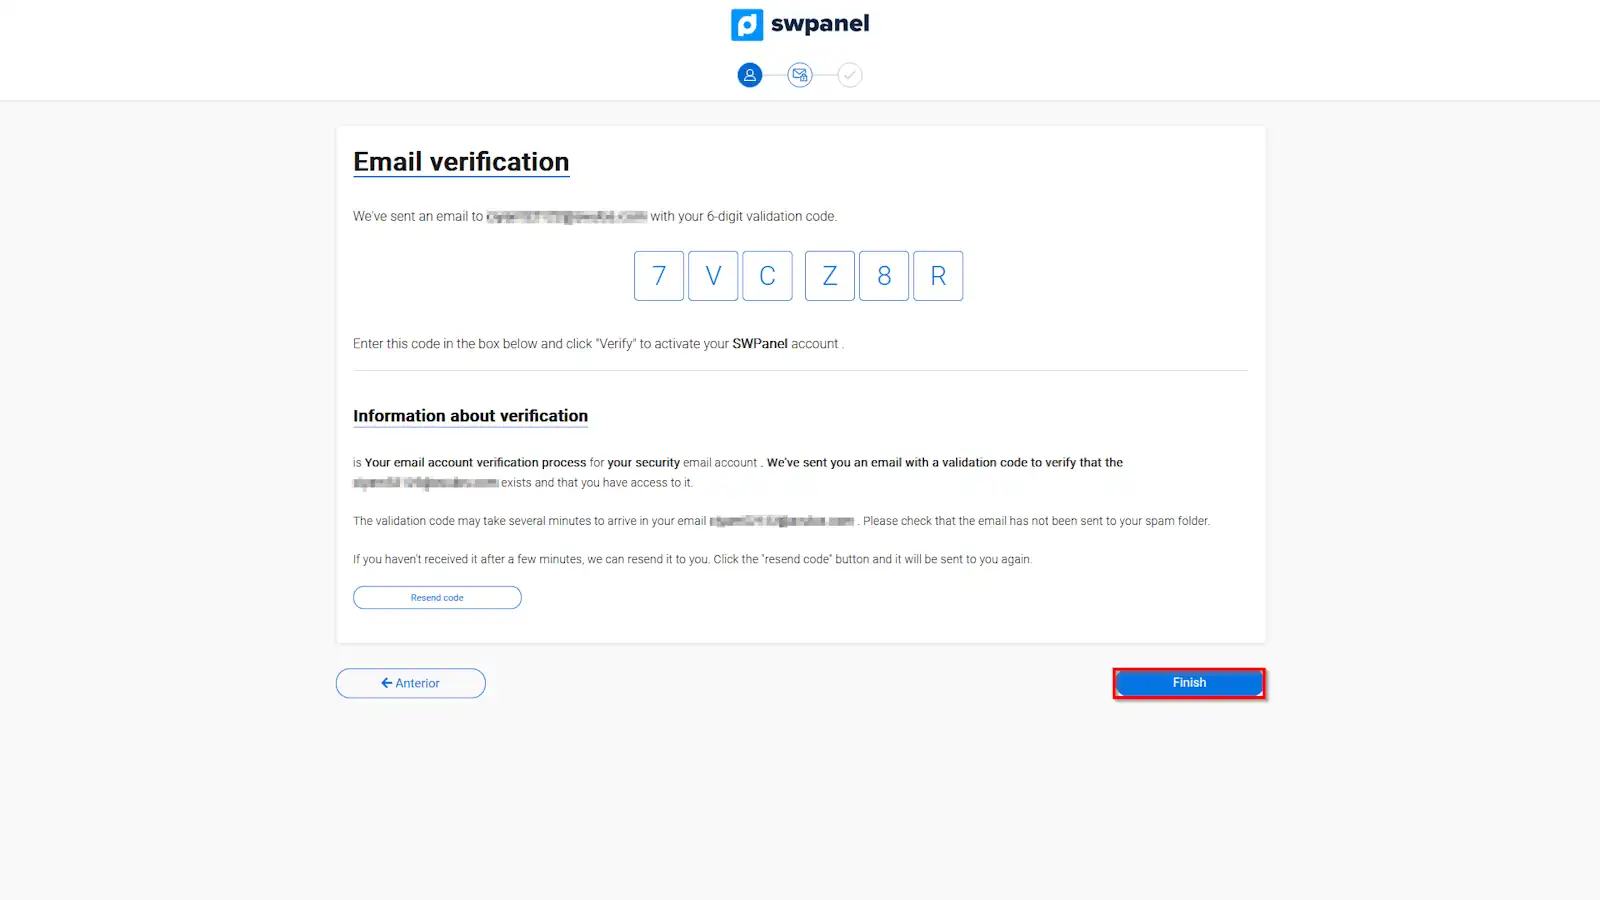
info_capture The screenshot is for guidance. It was taken using version 2025.03.0003 dated 03/26/2025. It may differ from what the current version of SWPanel shows.
Step 6: Environment customization
Choose from the different SWPanel operating modes, such as beginner, advanced, or professional user, depending on your experience level.
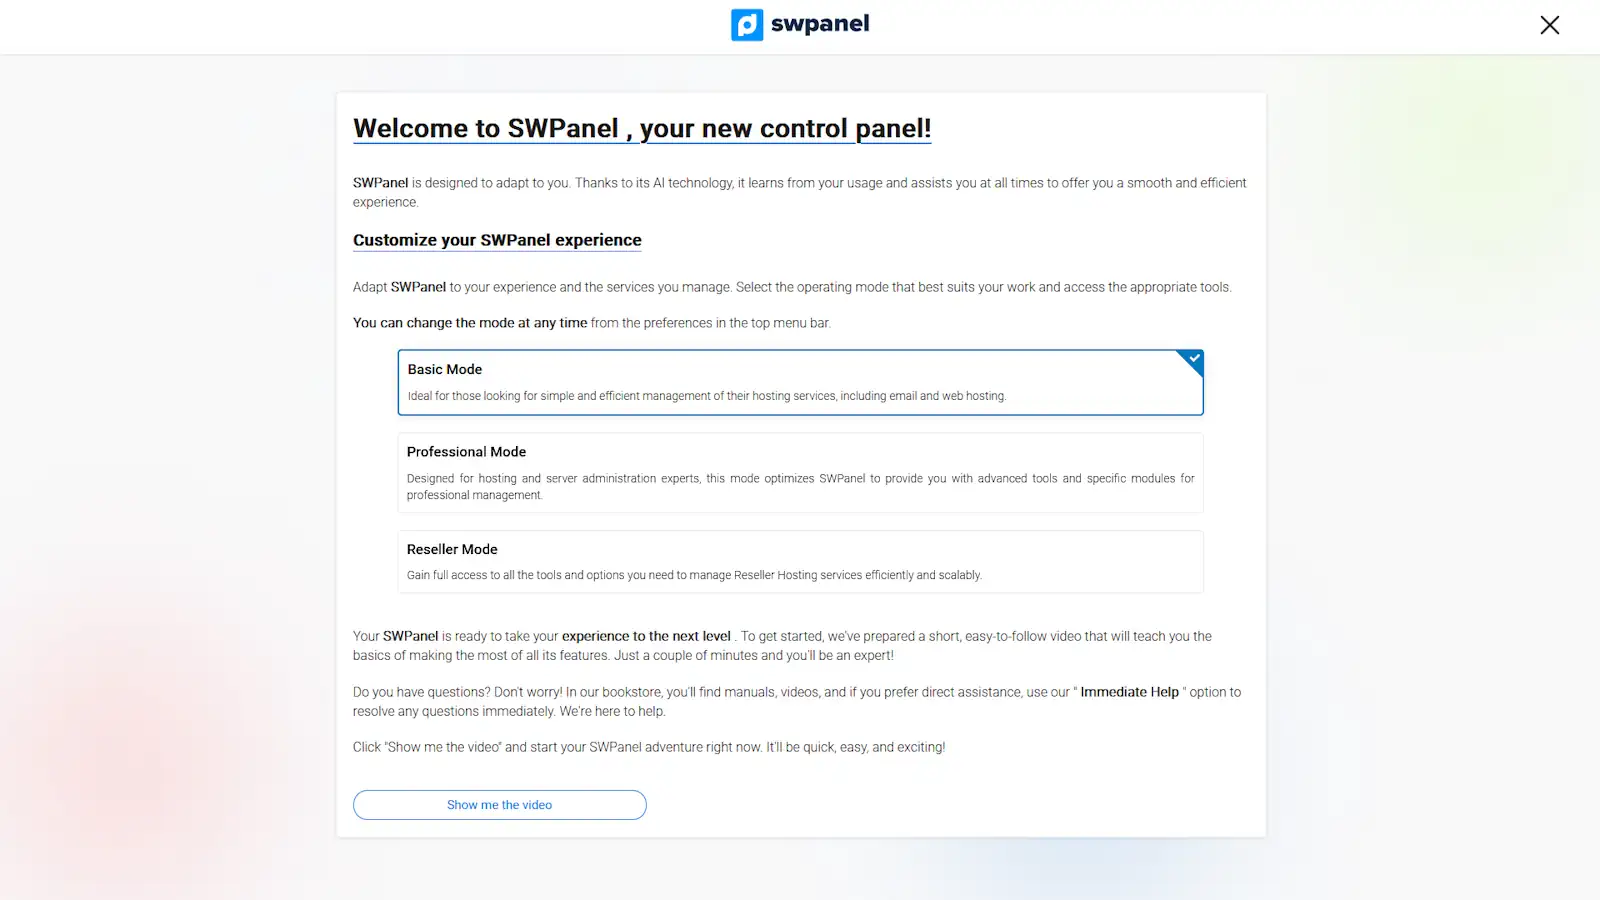
info_capture The screenshot is for guidance. It was taken using version 2025.03.0003 dated 03/26/2025. It may differ from what the current version of SWPanel shows.
Step 7: Introduction to the platform
SWPanel provides a brief introductory video with the main functionalities you can use. It is recommended to watch it to familiarize yourself with the environment.
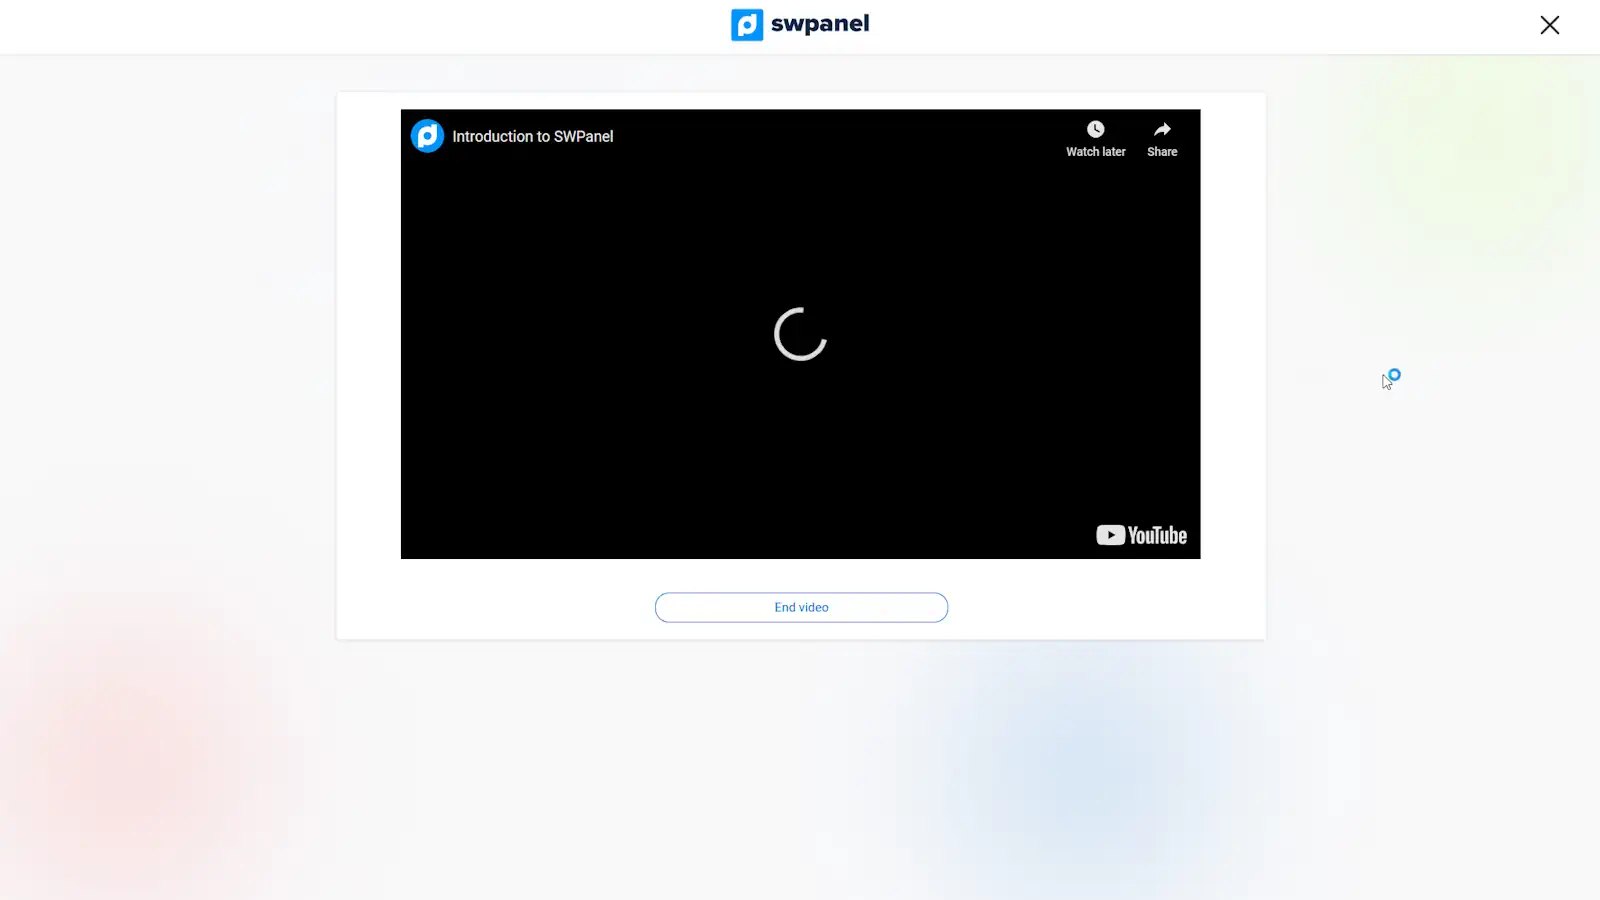
info_capture The screenshot is for guidance. It was taken using version 2025.03.0003 dated 03/26/2025. It may differ from what the current version of SWPanel shows.
Step 8: Access to the Dashboard
Once all the previous steps have been completed, click on "Go to SWPanel Dashboard" to access your account.
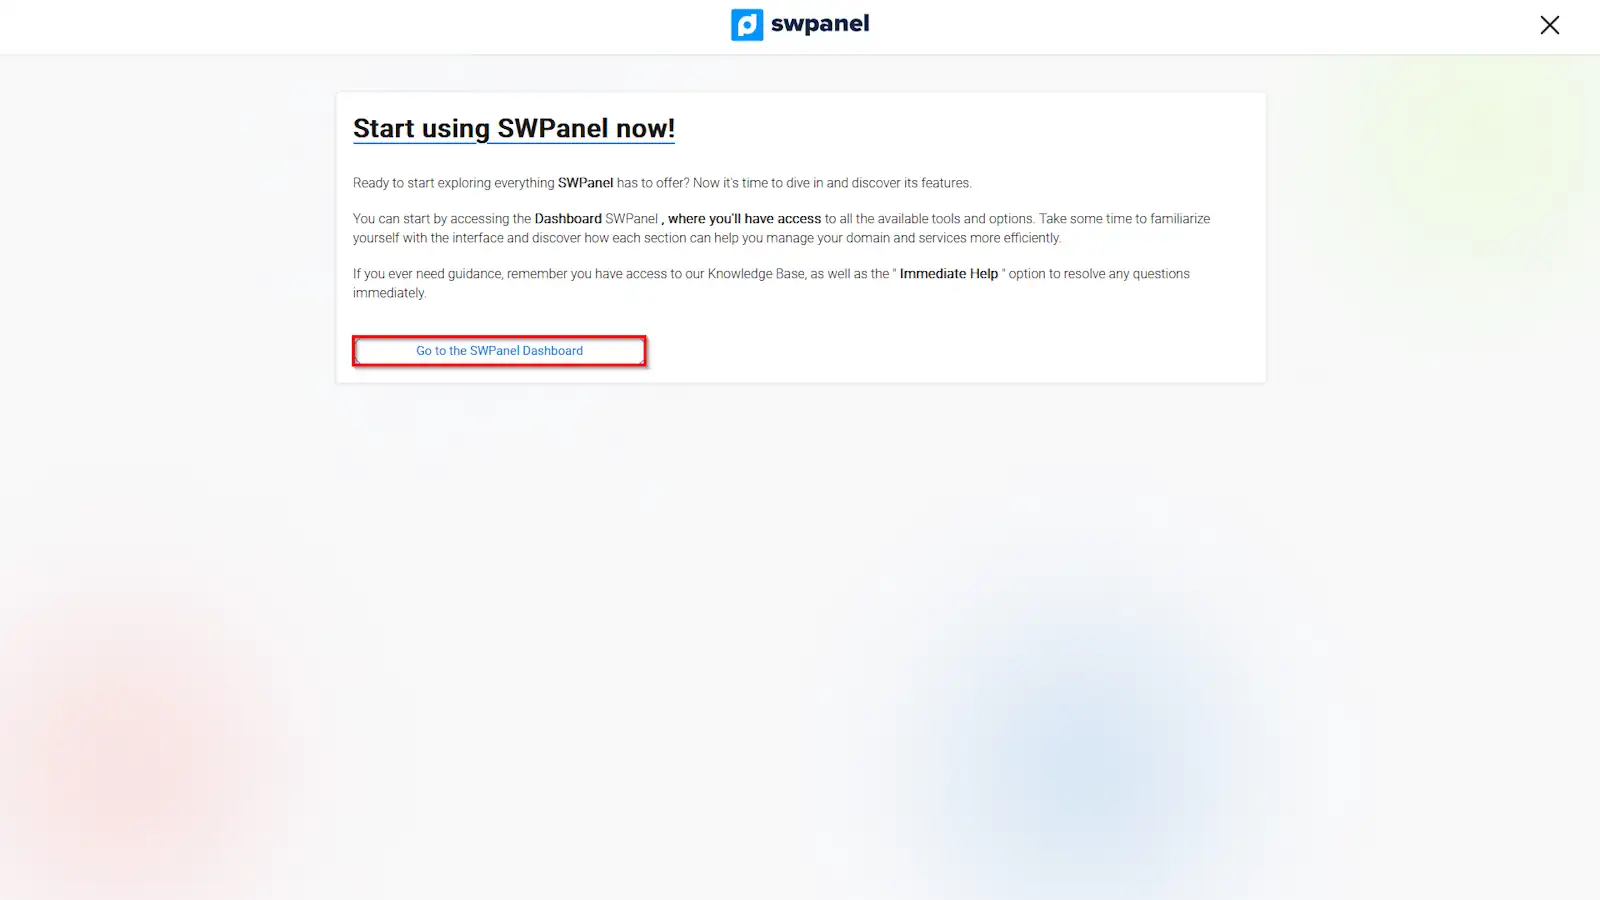
info_capture The screenshot is for guidance. It was taken using version 2025.03.0003 dated 03/26/2025. It may differ from what the current version of SWPanel shows.
3. Registration via Google account
Step 1: Access to registration
Access the following registration link and select "Sign Up".
info_capture The screenshot is for guidance. It was taken using version 2025.03.0003 dated 03/26/2025. It may differ from what the current version of SWPanel shows.
Step 2: Selection of "Sign up with Google" option
Click on "Sign up with Google".
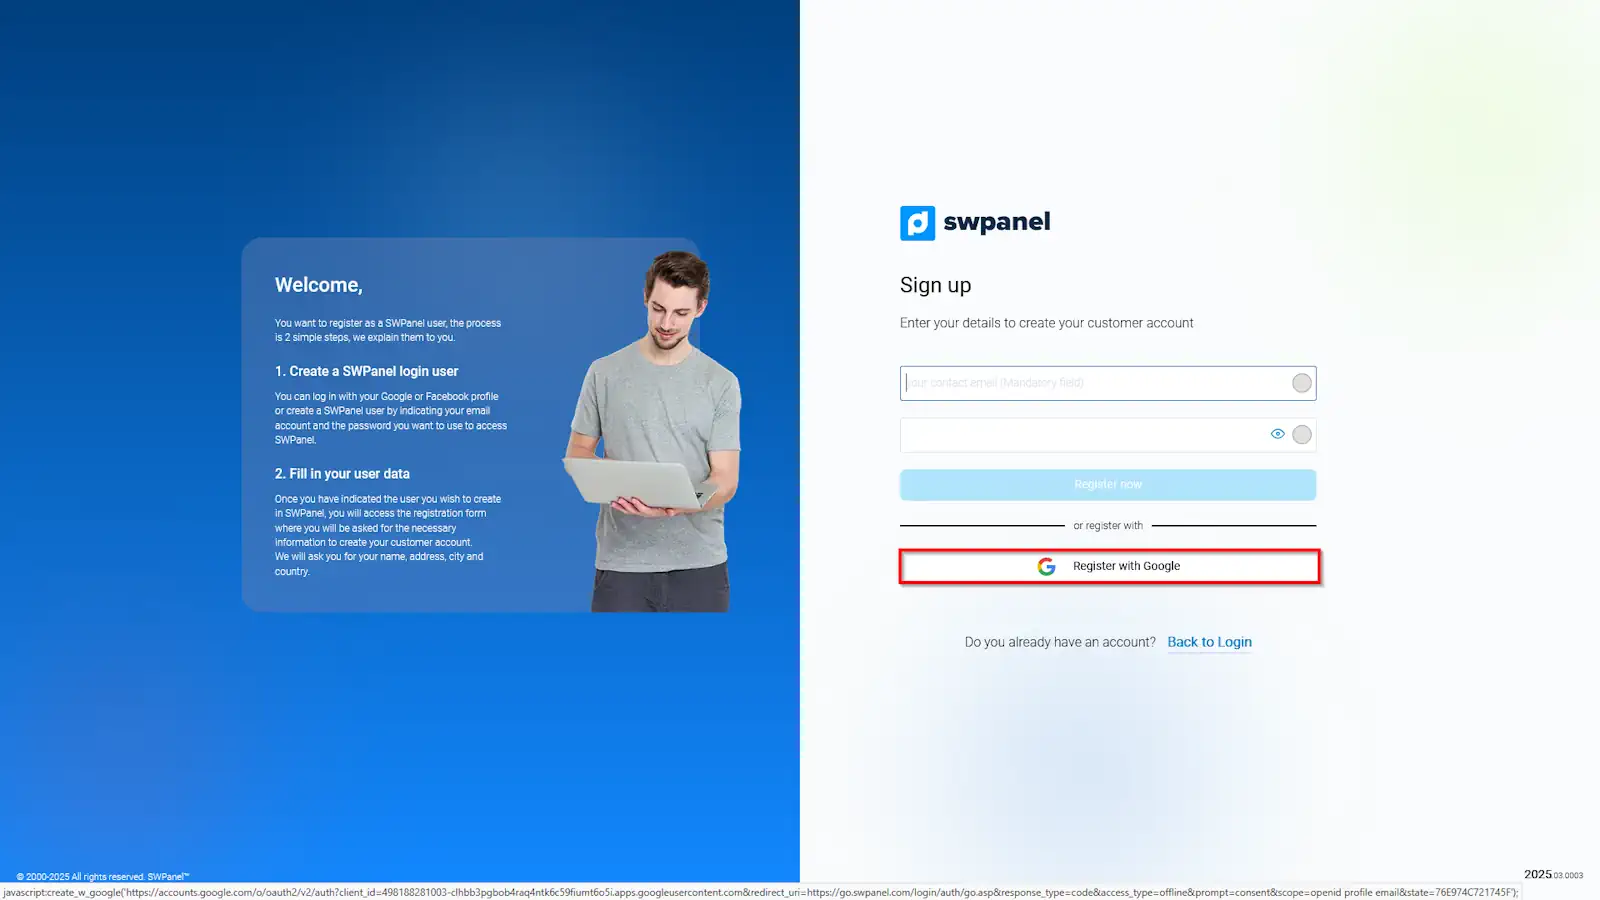
info_capture The screenshot is for guidance. It was taken using version 2025.03.0003 dated 03/26/2025. It may differ from what the current version of SWPanel shows.
Step 3: Selection or entry of Google account
Select an already signed-in account or enter a valid Google address and press "Next".
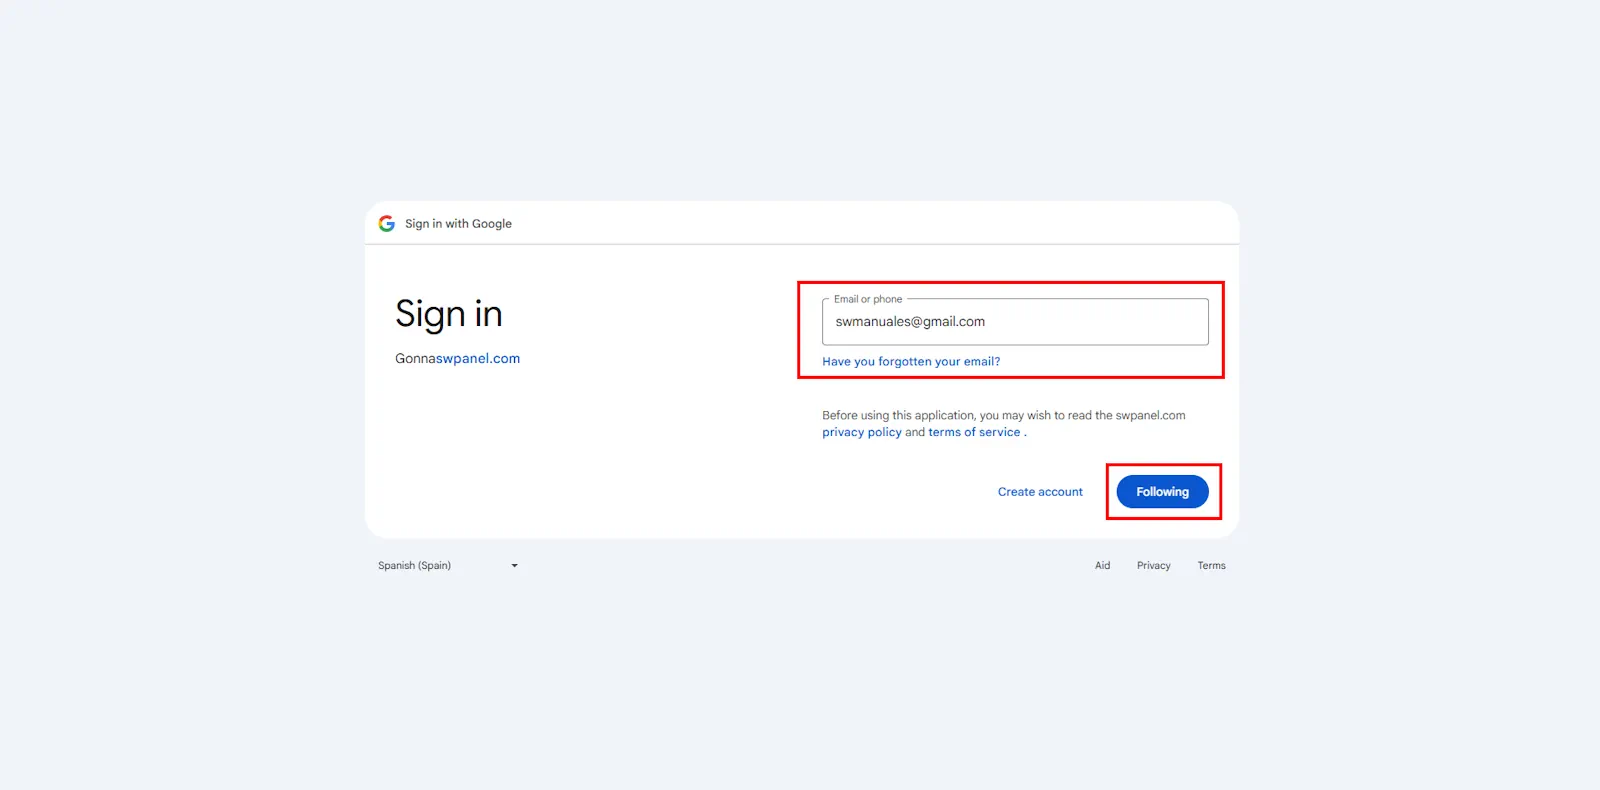
info_capture The screenshot is for guidance. It was taken using version 2025.03.0003 dated 03/26/2025. It may differ from what the current version of SWPanel shows.
Step 4: Google password
Enter your password and click "Next" to continue.
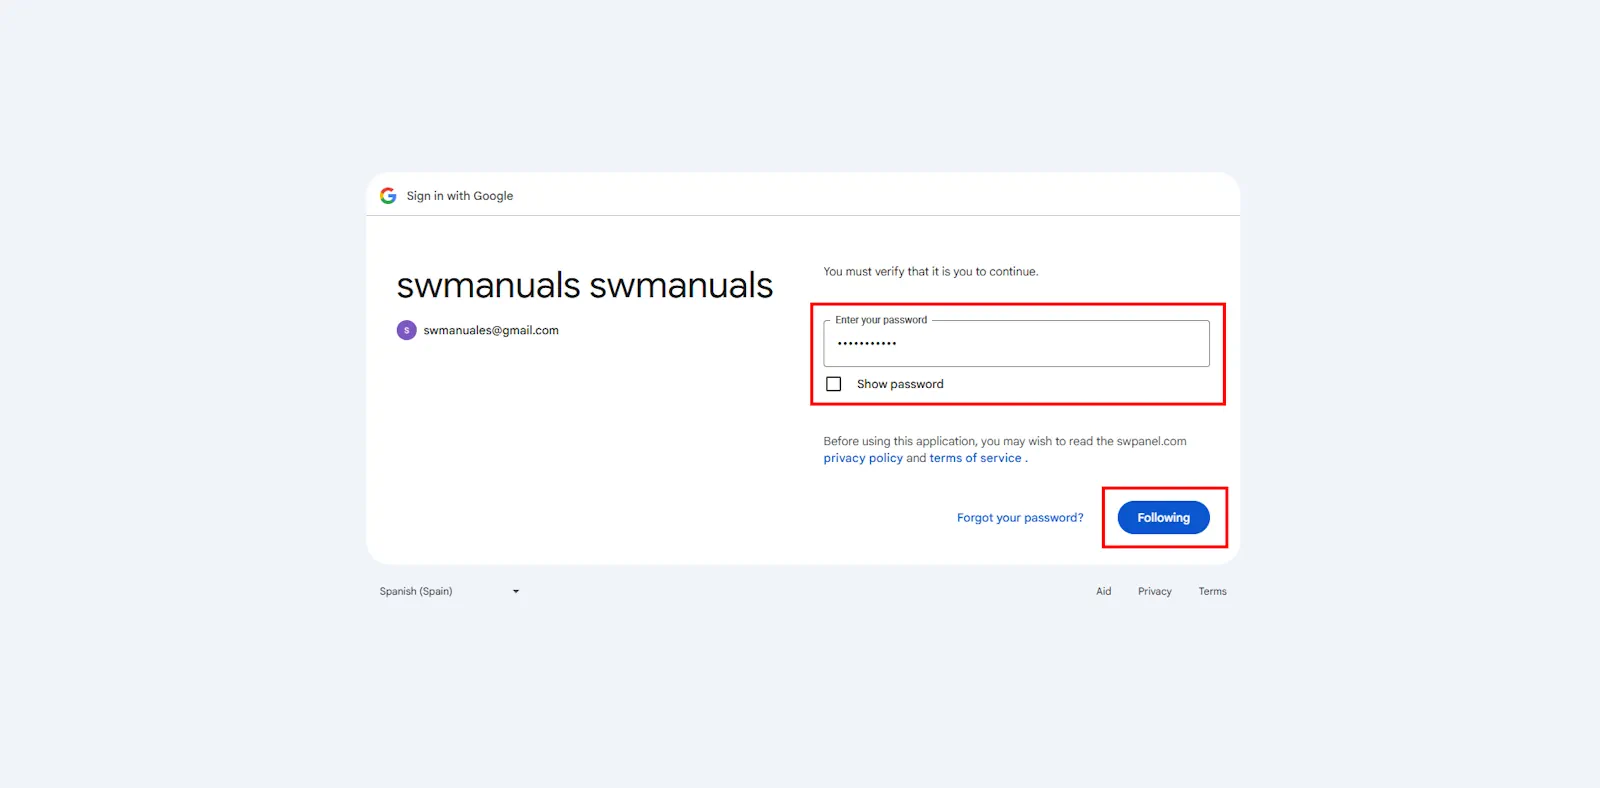
info_capture The screenshot is for guidance. It was taken using version 2025.03.0003 dated 03/26/2025. It may differ from what the current version of SWPanel shows.
Step 5: Authorization of permissions
Allow access to SWPanel to link your Google account. Press "Continue".
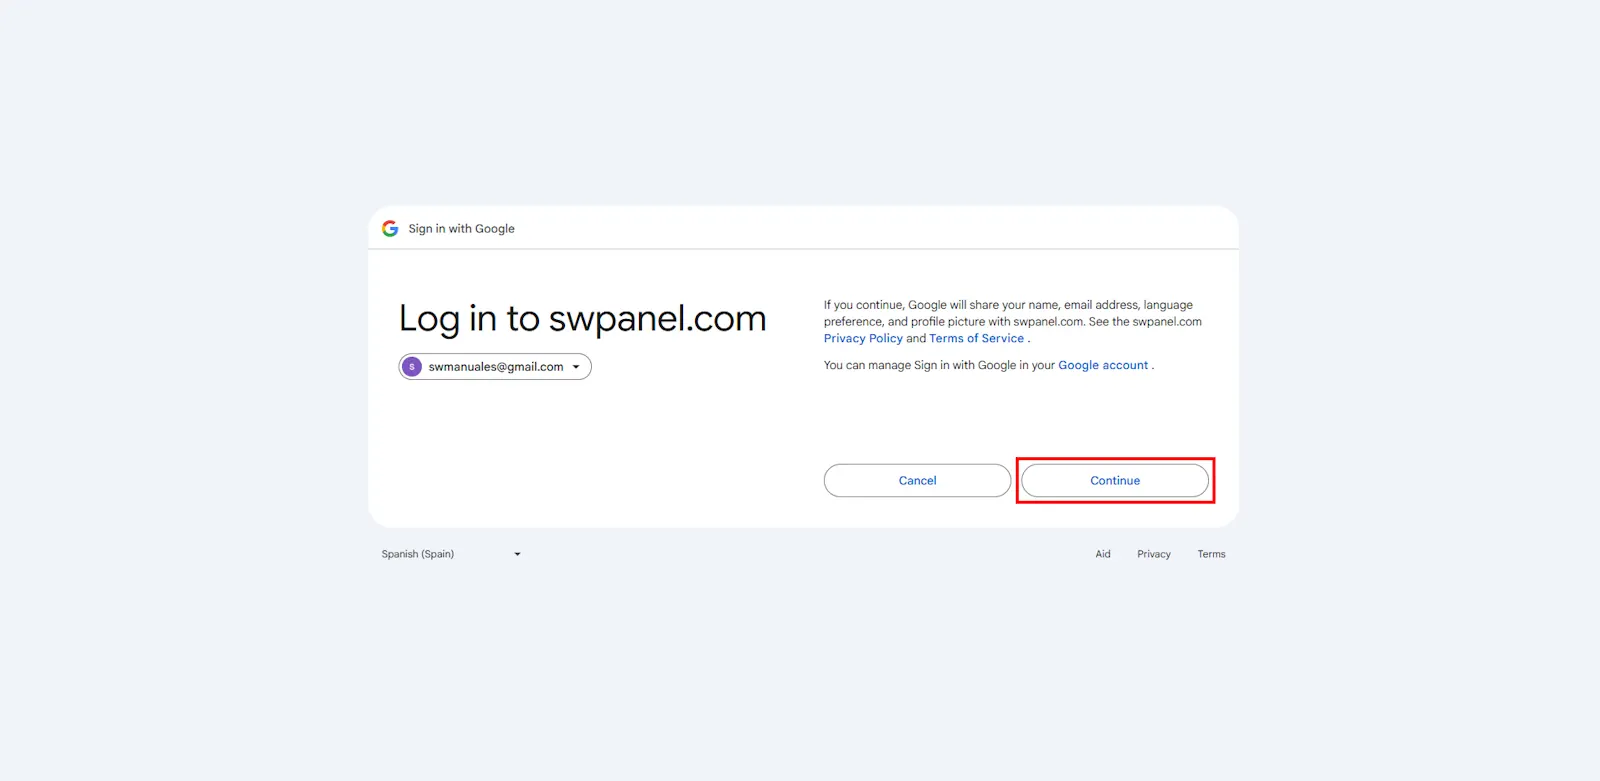
info_capture The screenshot is for guidance. It was taken using version 2025.03.0003 dated 03/26/2025. It may differ from what the current version of SWPanel shows.
Step 6 : Continue with registration
Return to step 4- Additional information and registration continuation to finalize the complete registration of your SWPanel account.
success Done! Your new user account has been created. You can now enjoy all the features offered by SWPanel.