
Configure email accounts from my Hosting in Mail OSX
Mac email setup is slightly different from other configurations, so we must pay special attention to specific configuration details.
The configuration shown in this manual requires the installation of a TLS security certificate for your Hosting email.
The data we must take into account for the email account configuration are as follows:
- Incoming mail server: mail.dominio.com
- IMAP Port: 993
- POP3 Port: 995
- Outgoing mail server: mail.dominio.com
- SMTP Port: 465
- Email account
- Access key
- Protocol: SSL/TLS
To view the connection details of your email account from SWPanel, you can check this ? Handbuch: How to view the connection details of my email account.
It is very important to keep this first detail in mind: email configurations on Mac cannot be carried out via the TLS security protocol, but rather through SSL. It is an identical security protocol; however, it is not the one that has been standardized for mail servers. Even so, it is possible that Mac may not accept configurations with security protocols, so we will have to leave it disabled for some accounts.
We open the Mail application on our computer:

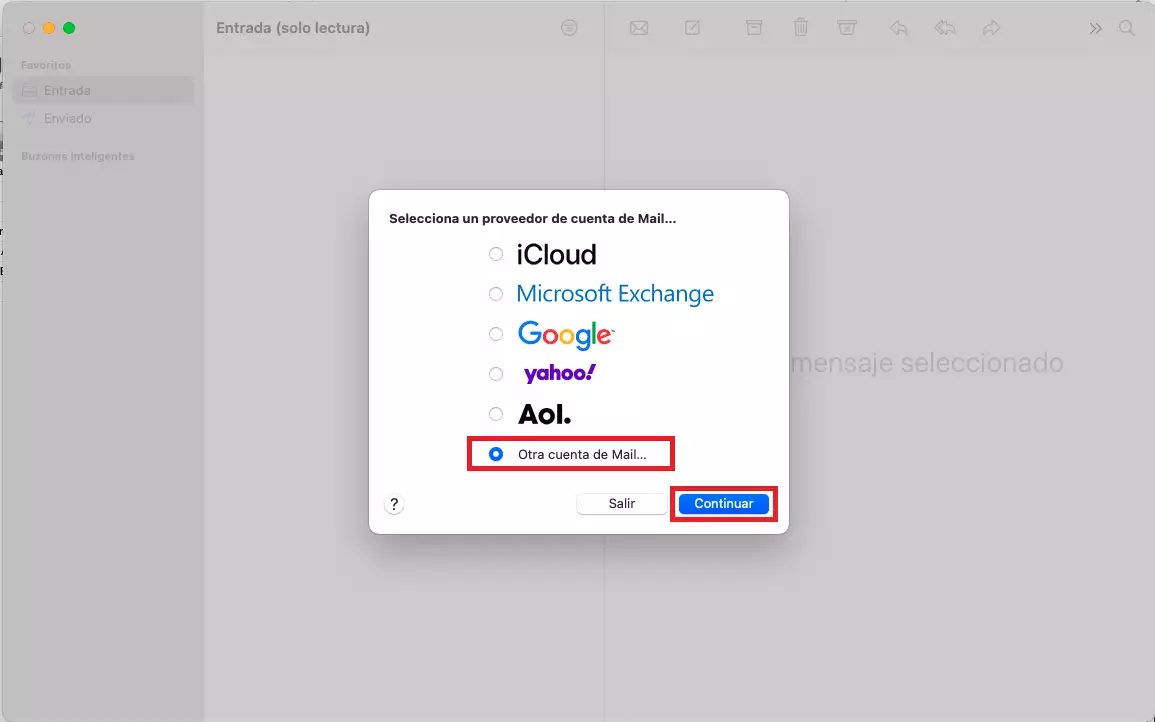
If it is the first time we are configuring an email account on our computer, the welcome message will appear and ask us to select which type of account we want to configure.
We select 'Other Mail Account' and click Continue:
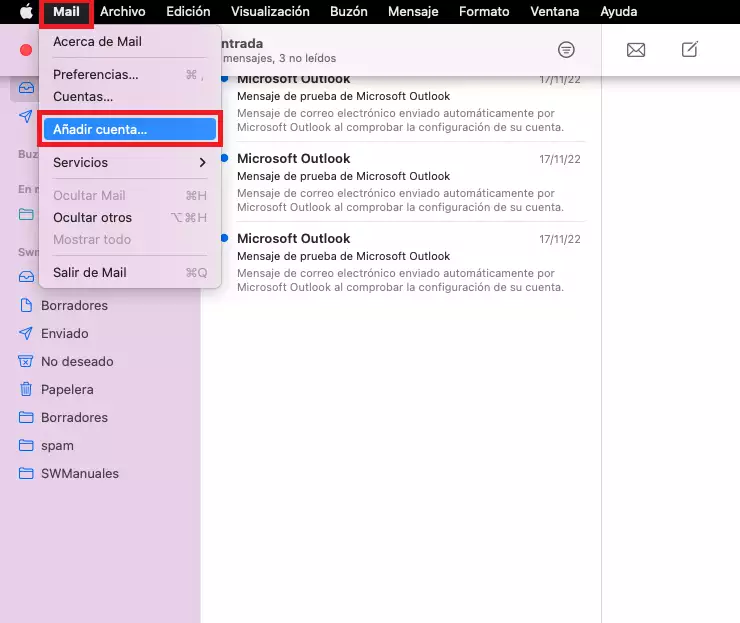
In case an email account is already configured in the mail manager, we must access the email settings via the Mail tab. We open the dropdown menu and select 'Add Account':
In both cases, the wizard box for adding email accounts will open. We fill in the corresponding data: our name, the email address, and the password. When we finish, we click 'Sign In':
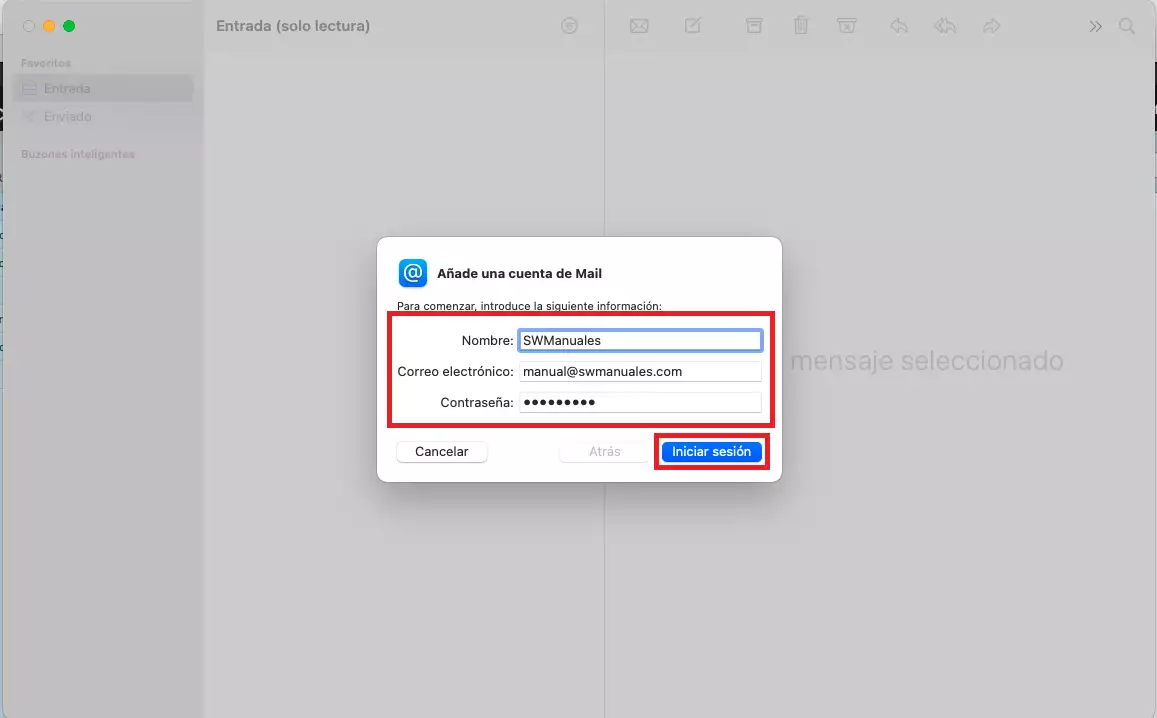
We remind you that the information regarding the email account key cannot be viewed from SWPanel, because in compliance with ISO 27001, LOPD, and GDPR regulations, we do not store or provide personal keys, nor do we have access to email account keys, much less provide them.
As soon as we have clicked the button, the dialog box will go blank and the automatic configuration of the service will begin.
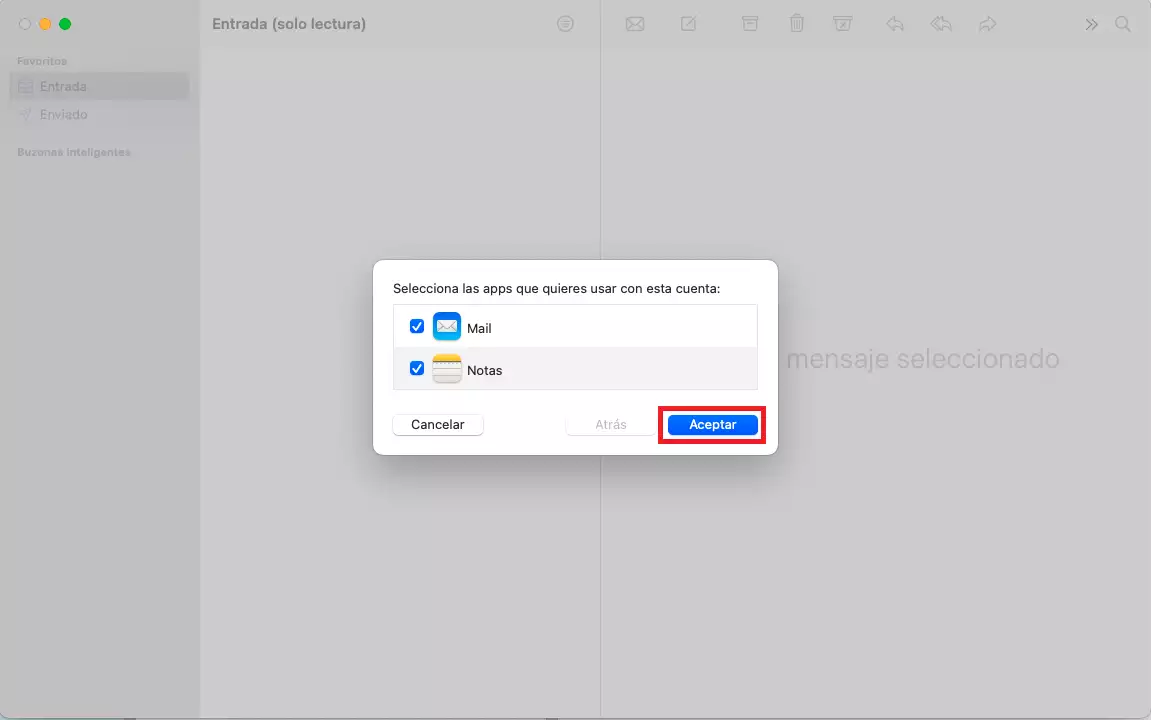
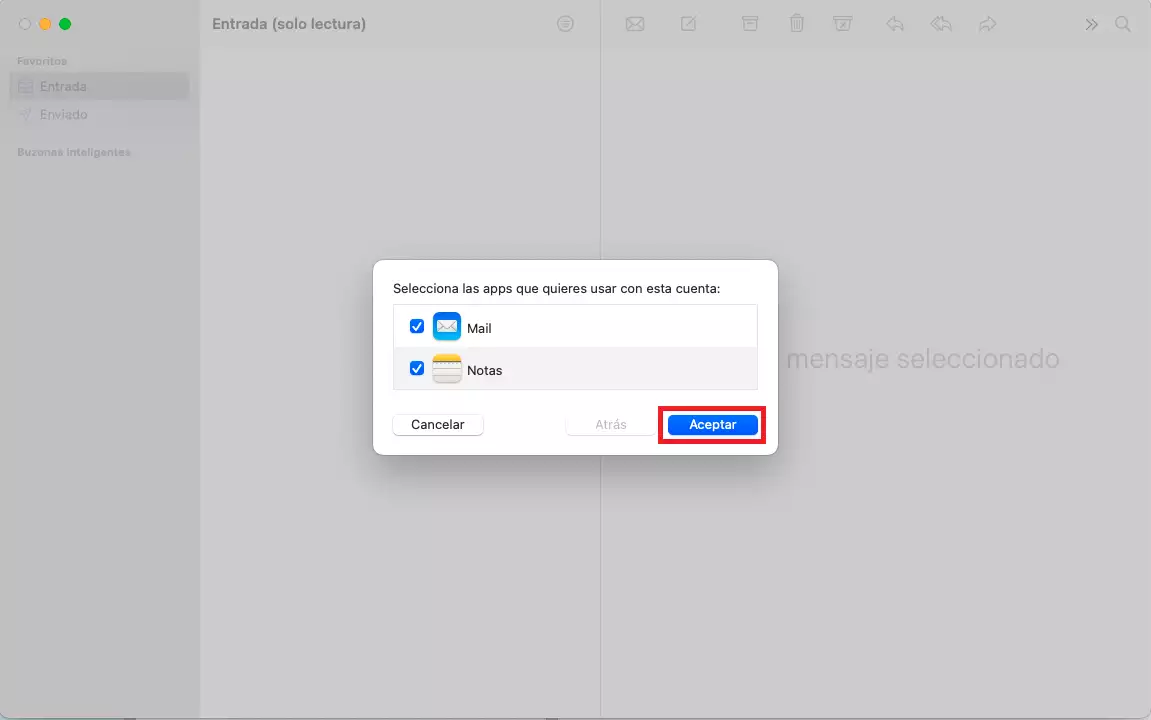
It is possible that the system automatically detects the configurations and proceeds to finish the account creation process. At this point, we will select which elements we want to configure (mail and notes). We click OK and the configuration will be finalized:
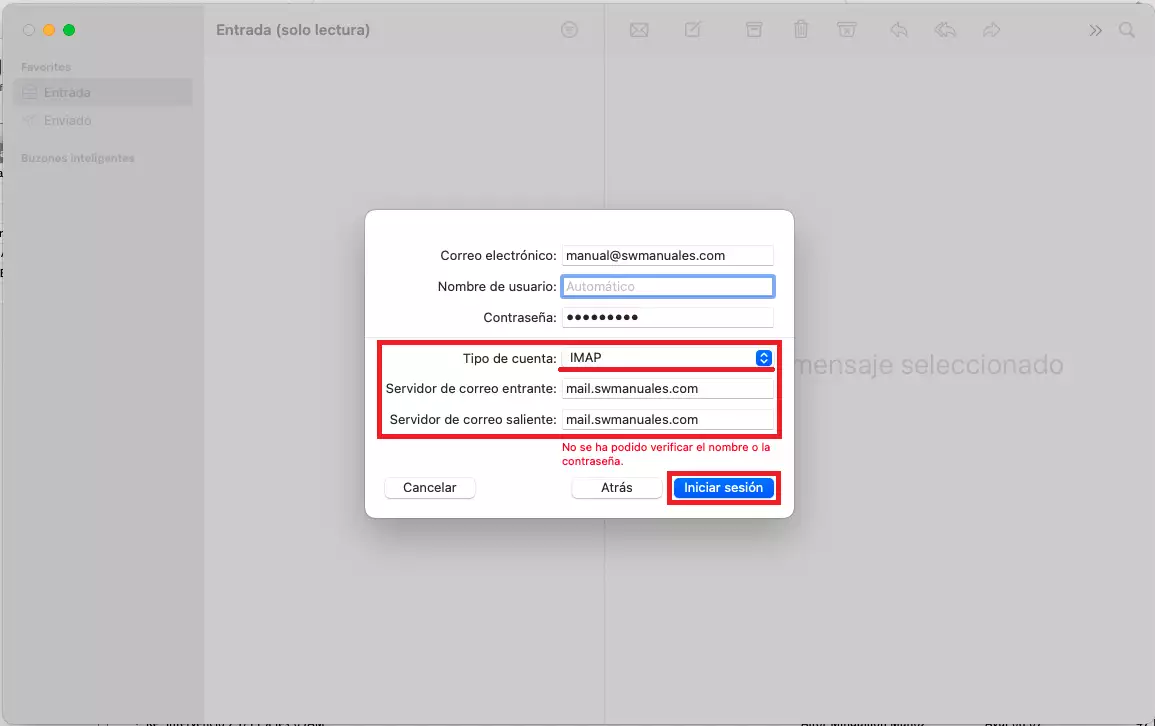
However, it is most common that the system does not recognize the incoming and outgoing servers, so an error message will appear indicating that 'The name or password could not be verified' and we will have to enter the parameters manually.
From this configuration screen, we can also select the incoming mail protocol, that is, whether we want our account in IMAP or POP3:
In this step, it is very important to keep in mind that in 'User Name' we should not enter the username as such, but the email address. In current systems, this field is filled in automatically.
As soon as the account configuration is completed manually, the account creation process will proceed to finish. At this point, we will select which elements we want to configure (mail and notes). We click OK and the configuration will be finalized:
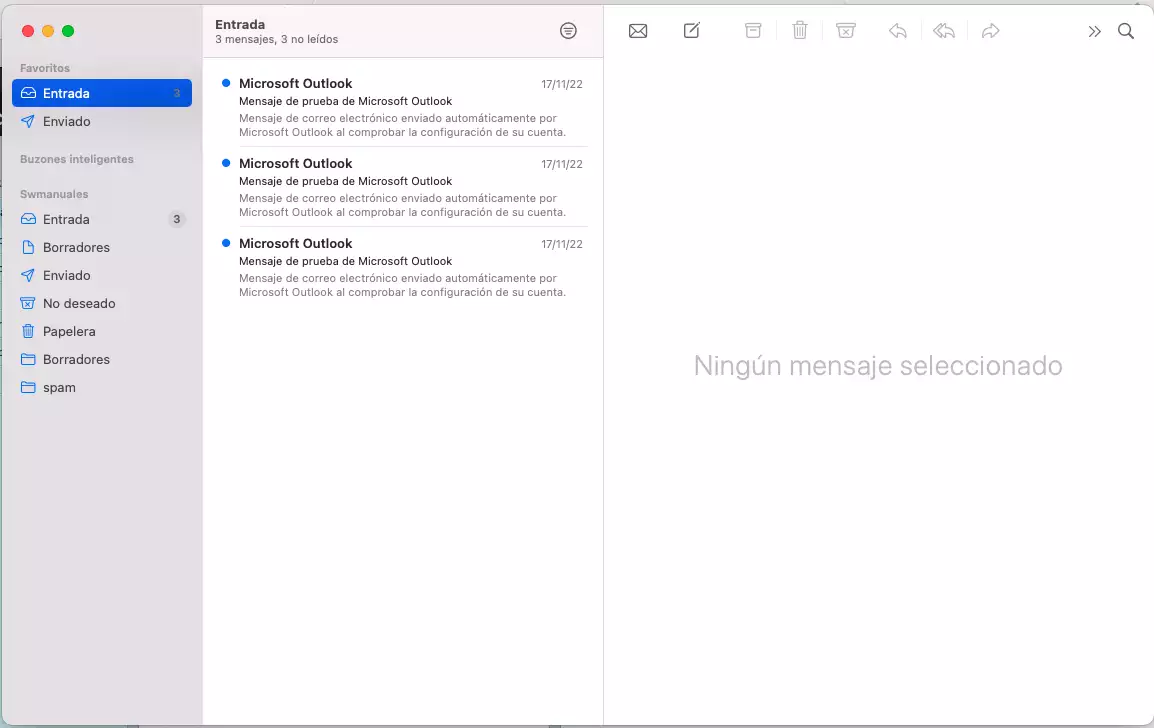
Finally, we should see our account correctly configured:
Check another manual of interest: