
How to connect to an Advanced SSL VPN
1. Introduction and overview
This manual aims to guide the user through the process of connecting to an Advanced VPN SSL using the OpenVPN GUI tool on Windows operating systems. A VPN (Virtual Private Network) allows you to establish a secure, encrypted connection between the user's computer and the internal services of their cloud infrastructure, managed through SWPanel.
2. Establish the connection to your SSL VPN
Step 1: Open OpenVPN GUI
At the bottom right of the Windows desktop (system tray), click on the icon to show hidden icons. Look for OpenVPN GUI, identified by an icon representing a computer screen with a closed padlock.
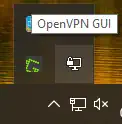
Step 2: Import the configuration file
Right-click on the OpenVPN GUI icon. Select the Import option and then Import file.
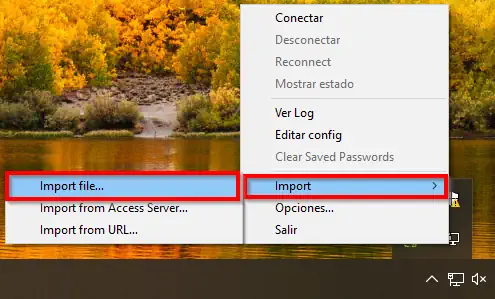
Select the .OVPN file that you previously downloaded from SWPanel. This file contains all the necessary settings for the VPN connection.
Step 3: Connect to the VPN
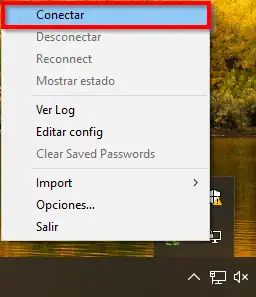
Once the file has been imported correctly, right-click on the OpenVPN GUI icon again and select the Connect option.
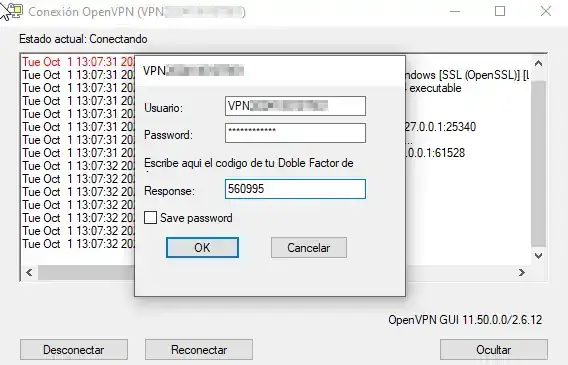
A window will open asking for your credentials: username, password and the 2FA code generated from your authentication app (such as Google Authenticator or Authy).
Enter the details and click OK.
success You should now have a connection to our Advanced VPN SSL.
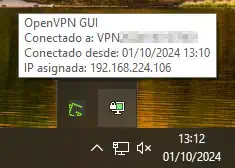
3. Verify connectivity by pinging a device on the VLAN
Once the VPN connection is established, it is advisable to verify that you have access to the internal network resources.
How to do it?
- Open the Command Prompt (CMD) in Windows.
- Run the
pingcommand to the internal IP address of a server or Cloud within the VLAN.
Example:
ping 192.168.25.2
If you receive a response, it means that the VPN connection is working properly and you have access to your private network resources.
4. Possible errors and solutions
Error: Not connected to the VPN
Possible causes:
- Incorrect credentials (username, password or 2FA code).
- Incomplete double authentication configuration.
Solution:
- Make sure that the username and password entered are correct.
- Check that the 2FA code has been entered correctly.
- If the code is not accepted and you suspect that there was an error when setting up 2FA (for example, you did not capture the QR code properly), delete the SSL VPN user from SWPanel and recreate it. This will generate a new QR code and you will be able to set up 2FA correctly again.
Error: Connected but no response to ping
Possible causes:
- The destination server does not have a return route configured to your VPN network.
Solution:
- Access the server or Cloud within the VLAN.
- Check the route table by running:
ip route show
or
route -n
- If there is no route to the VPN subnet, you must create it manually. For example, if the subnet is
192.168.25.0/24and the gateway is192.168.25.1, you can use the following commands:
- Linux / Mac:
route add -net 192.168.25.0/24 gw 192.168.25.1
- Windows (execute CMD as Administrator):
route -p add 192.168.25.0 mask 255.255.255.0 192.168.25.1
This will add a persistent route that will allow traffic to return from the server to the VPN client.