
Configure email accounts from my Hosting in Android Gmail
The Android operating system, present in most of today's smartphones, offers us a wide variety of different email clients through the Play Store application, each with a slightly different configuration; however, the configuration parameters we will use will always be the same (we will see them later).
To show a standard email configuration with an email client present in all our Android phones without the need to install anything, we are going to configure our email account in Gmail for Android.
The configuration shown in this manual requires the installation of a TLS security certificate for your Hosting email.
The data that we must take into account for the email account configuration are the following:
- Incoming mail server: mail.dominio.com
- IMAP Port: 993
- POP3 Port: 995
- Outgoing mail server: mail.dominio.com
- SMTP Port: 465
- Email account
- Access key
- Protocol: SSL/TLS
To view the connection data of your email account from SWPanel you can check this ? Manuale: How to view the connection details of my email account.
In this case, the first account configured in the manager is always that of our Android phone, a Gmail account that we have created or linked to be able to enjoy all the services that the operating system makes available to us.
Thus, in this case, we are going to configure a second email account in the manager.
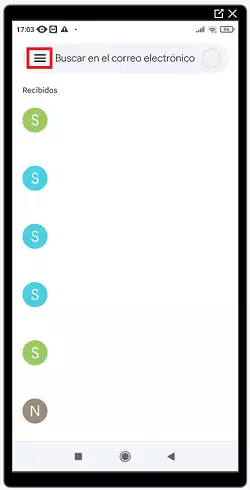
We open the email application. From this screen we click on the dropdown menu icon:
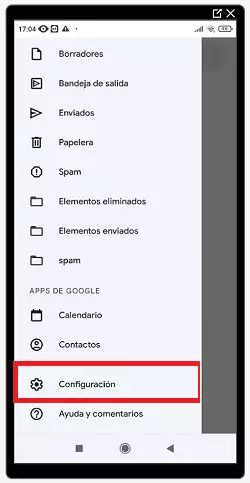
In the menu, we select the "Settings" icon. We click on it:
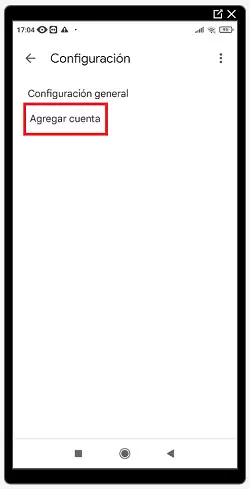
The settings menu will open. We click on "Add account":
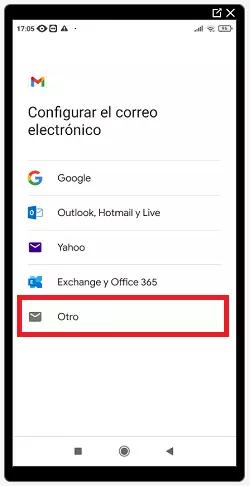
Next, the email configuration wizard will start. To be able to configure an account with our own domain, we must click on "Other":
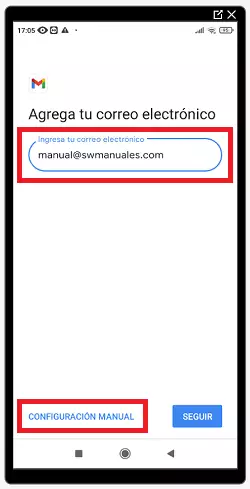
We enter the corresponding email account and click on "Manual configuration":
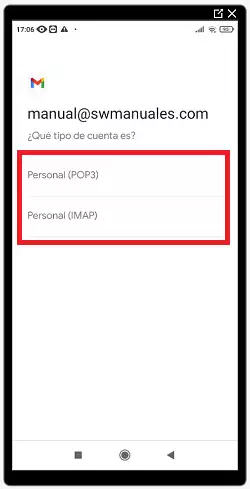
In this step, it will ask us what type of account we want to configure. We must choose whether we wish to configure the account with the IMAP or POP3 incoming mail protocol (in the following ? Manuale: Email account configuration, in the "Email protocols" section we explain in detail the types of email accounts that can be configured, what the differences are between them and what the advantages and disadvantages are between both).
For our example, we are going to configure the account in IMAP:
Now we must enter the password for our email account. Once entered, we click on "Next":
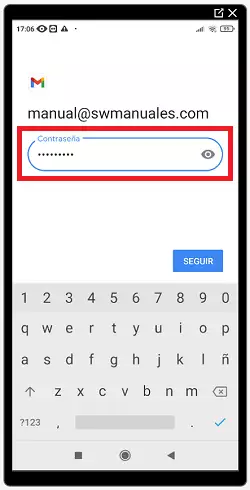
We remind you that from SWPanel you will not be able to see the information about the email account key because in compliance with the ISO 27001 standard, the LOPD and the RGPD, we do not store or provide personal keys, nor do we have access to email account keys, let alone provide them.
In the next step, it will ask us to confirm the incoming server settings.
At this moment it is very important to ensure that the incoming mail server name is correctly indicated. Otherwise, we must modify it to correspond to the specific configuration of our email account.
Once checked and corrected, we click on "Next":
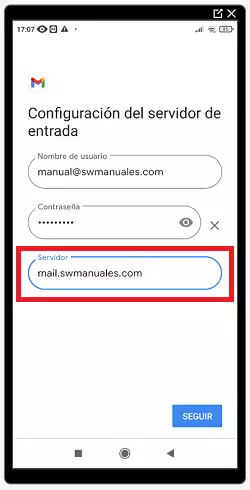
At this moment, the manager will allow us to continue with the configuration by proceeding with the outgoing server settings. We ensure that the outgoing mail server configuration is correct and we click on "Next":
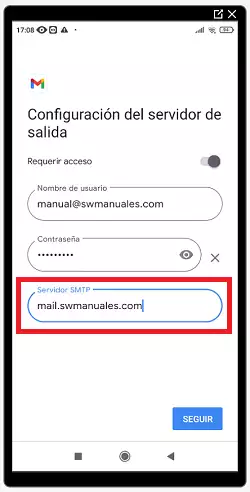
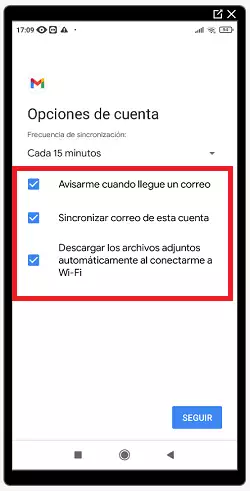
Next, it will ask us to select the preferences and options of the account. In this step, you must choose which settings and preferences you need.
We are going to leave the predefined selections:
Finally, an "Account configured" warning message will appear; you may modify the Username (optional, does not affect general configuration). Subsequently, we must click on "Next" to exit the wizard:
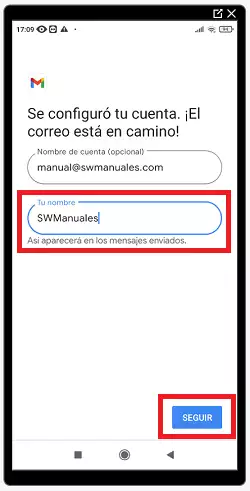
Once the configuration is finished, we will have the email service with our own domain in the Google Mail email client.
Check another manual of interest: