
Configure email accounts from my Hosting in Thunderbird
The configuration shown in this manual requires the installation of a TLS security certificate for your Hosting email
The data we must take into account for the email account configuration are as follows:
- Incoming mail server: mail.dominio.com
- IMAP Port: 993
- POP3 Port: 995
- Outgoing mail server: mail.dominio.com
- SMTP Port: 465
- Email account
- Access password
- Protocol: SSL/TLS
To view the connection details of your email account from SWPanel, you can check this ? Manual: How to view the connection details of my email account.
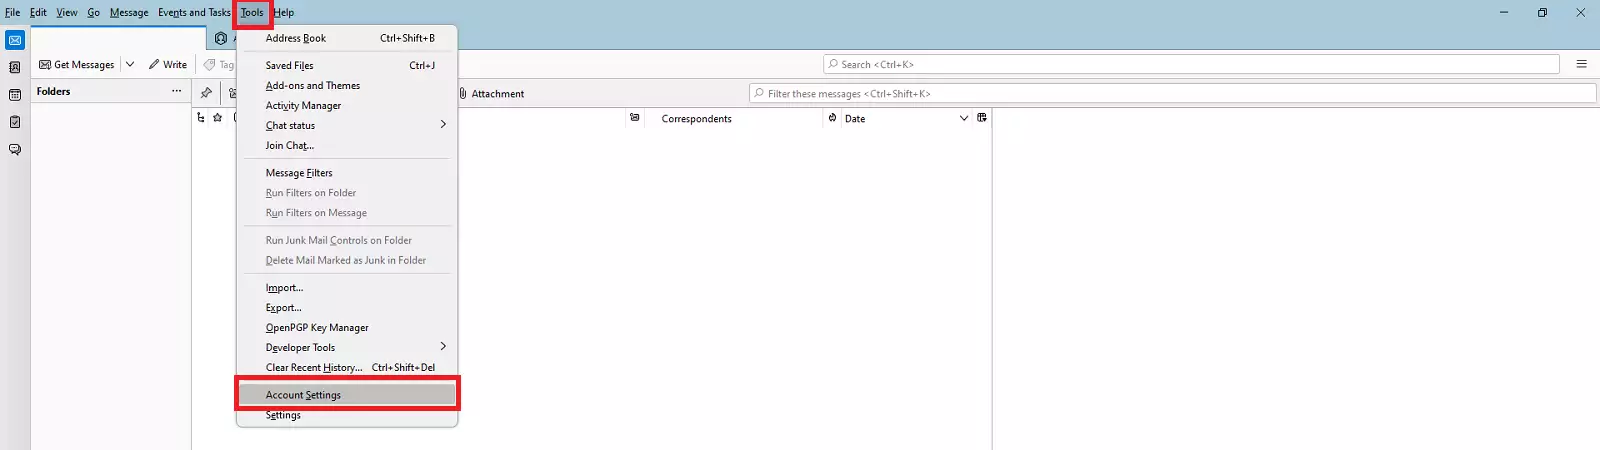
In the Thunderbird manager, we go to Tools → Account Settings (If you have not yet configured any account in Thunderbird, you can skip to step no. 3):
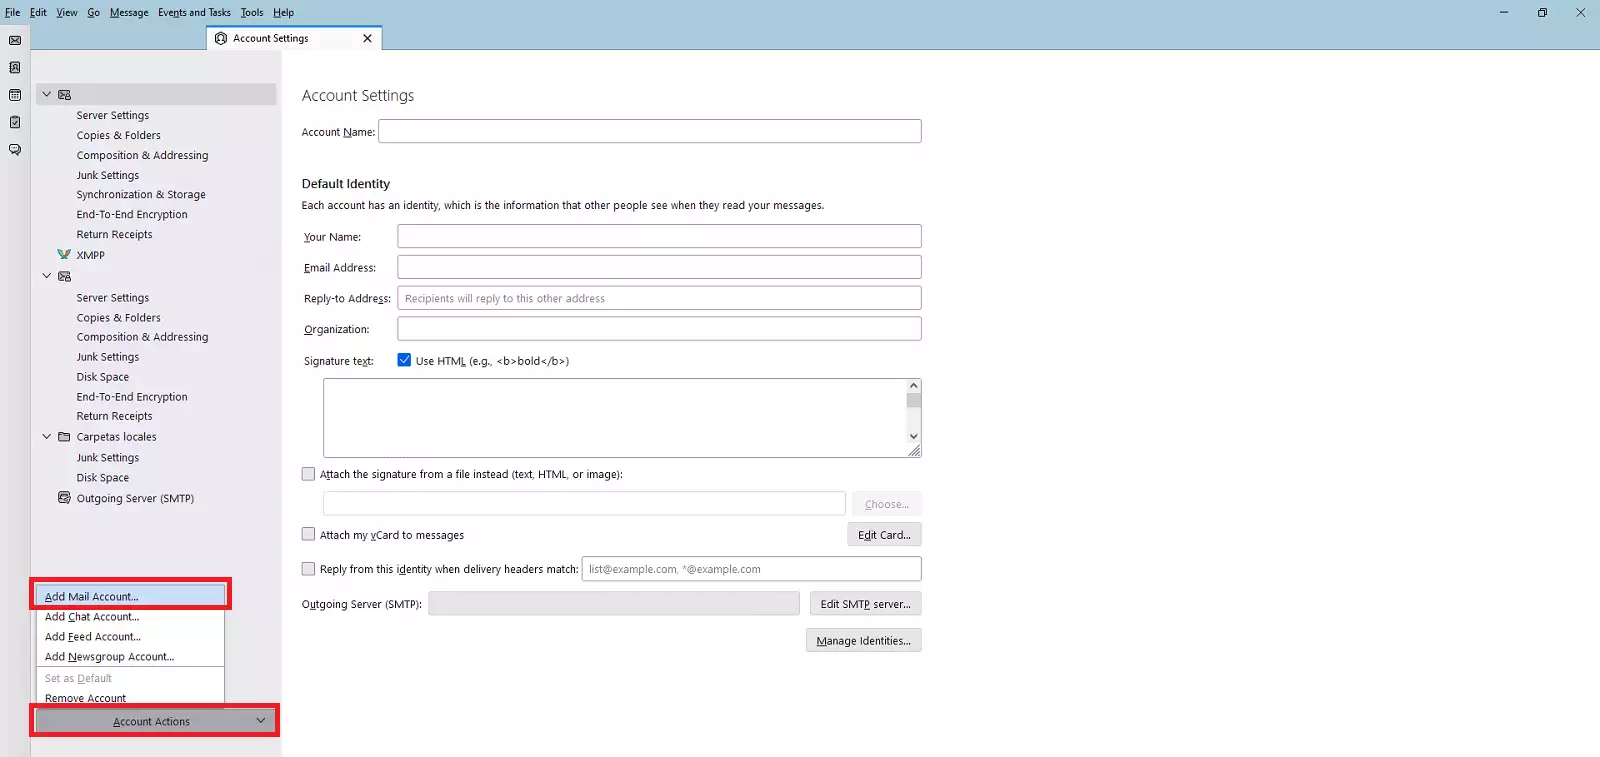
The configuration screen will open. From there, we go to Account Actions → Add Mail Account:
The wizard to add email accounts will open. Enter the requested data and click Continue:
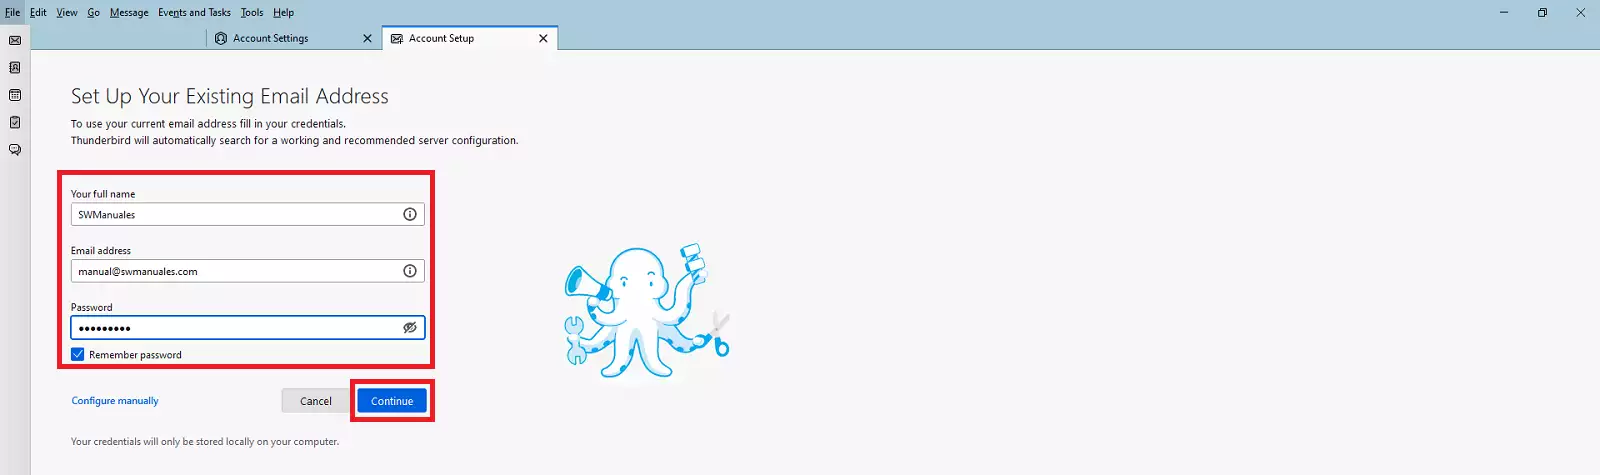
Please remember that from SWPanel you will not be able to see the information about the email account password, because in compliance with ISO 27001, LOPD and GDPR regulations, we do not store or provide personal passwords, nor do we have access to email account passwords.
The Thunderbird manager will verify that the data is correct before proceeding to the next step.
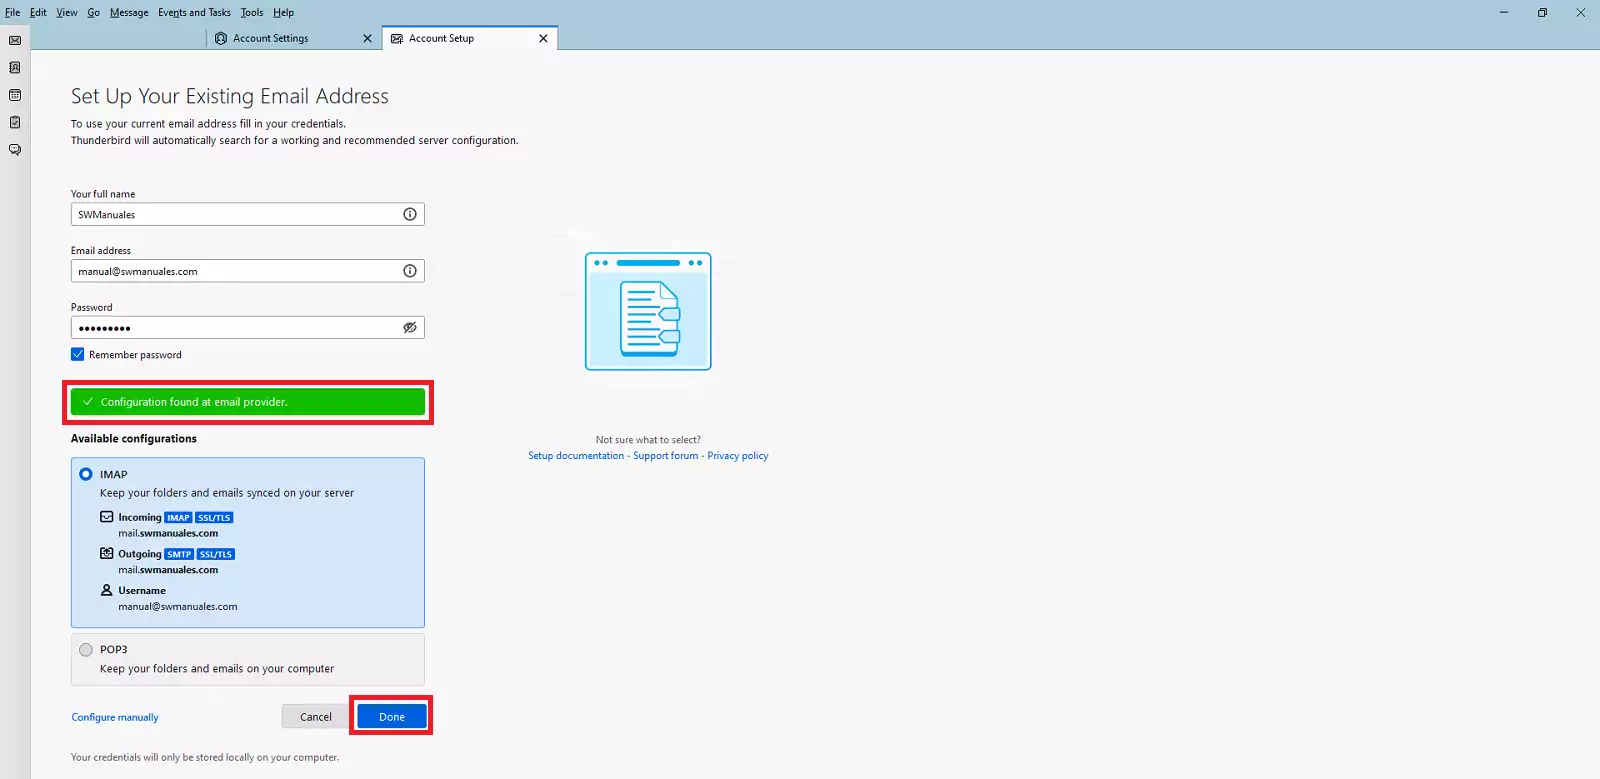
Once the verification is complete, a checkmark will be displayed on the screen and a default configuration will be proposed, along with the possibility of choosing between the IMAP Protocol or the POP3 Protocol. If the configuration is correct, we can proceed to click the Done button to finish the wizard and open the email screen:
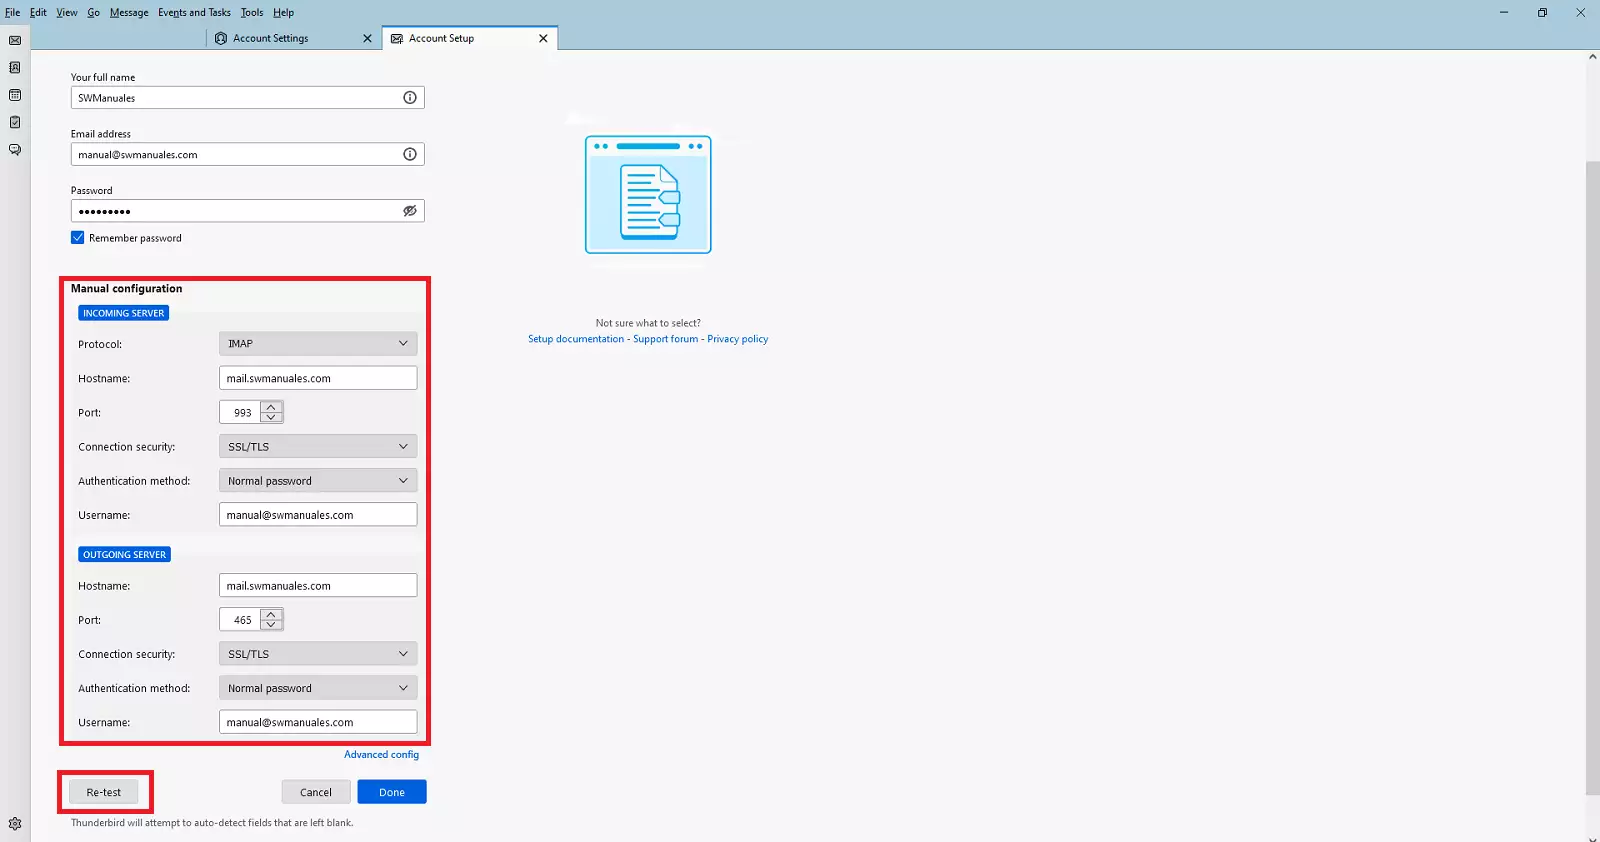
If the configuration is not correct, we will click the Configure manually button and proceed to modify the data manually. We must check that the data is correct (compare with the data provided at the beginning of the section). We can also modify the Username (optional, does not affect the general configuration).
Once everything is checked and verified, click the Re-test button:
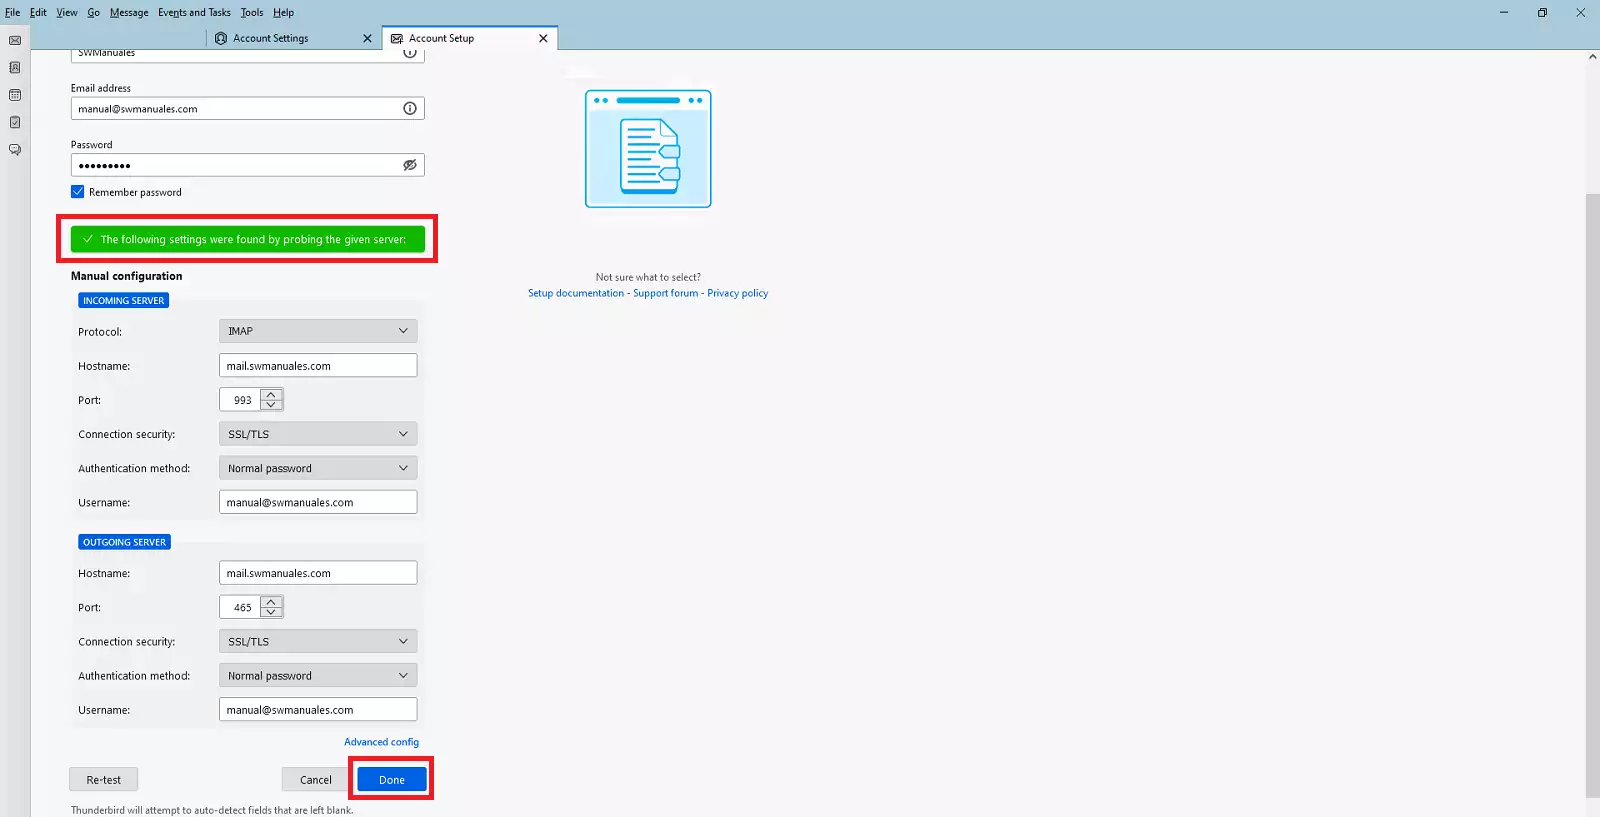
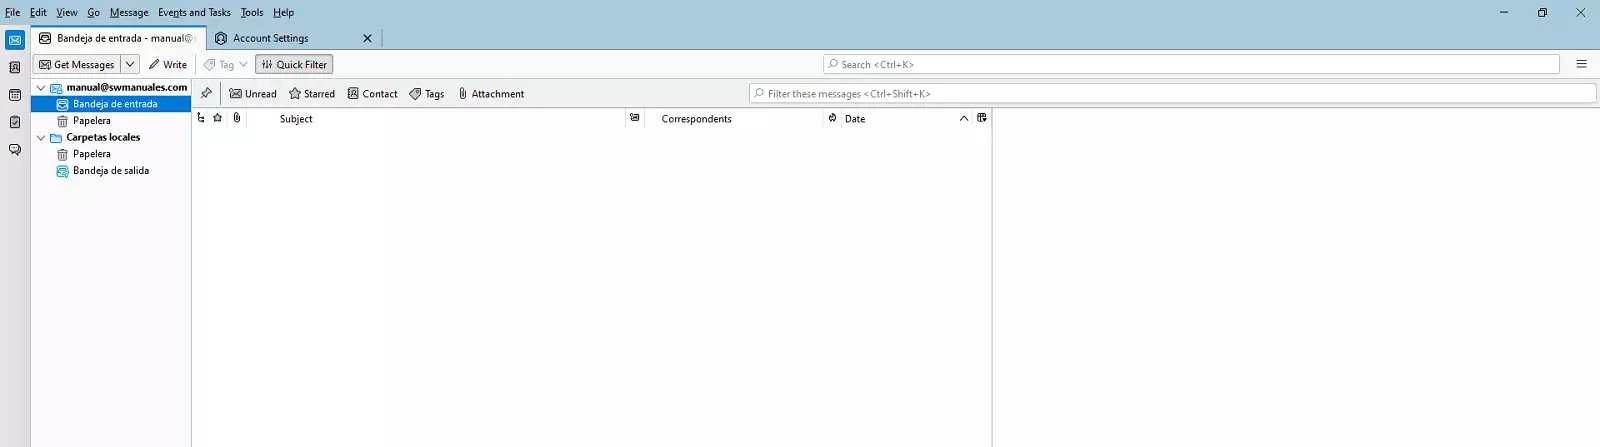
 The data verification checkmark will appear. Click the Done button to finish the wizard and open the email screen:
Check another manual of interest: