Next-Generation Firewall or Layer 7 Firewall
What is a Next-Generation or Layer 7 Firewall?
It can also be called an Application Firewall or Next-Generation Firewall
Layer 7 firewalls perform functions at the application level. This means they can perform functions in network protocols higher than those of layers 4 and 3.
These types of firewalls emerged to revolutionize network security as we knew it until now. Traditional firewalls are limited to stateful packet inspection and access control rules, but as hackers become more sophisticated and threats more advanced, this system has ceased to be effective. In order to protect a business from constantly evolving threats, the Next-Generation Firewall must be able to offer a deeper level of network security.
The key is to ensure the inspection of every byte of each packet, but this must be achieved while maintaining high performance and low latency so that high-traffic networks continue to function optimally, as well as effectively combating threats and addressing increasingly urgent productivity issues.
Companies require a deeper level of security and control, which this type of Firewall provides. Below, we detail some of the main features:
IPS with anti-evasion technology
Cybercriminals often try to bypass IPS using complex algorithms that avoid detection.
Context-based application control
The popularity of network-access-based applications has skyrocketed in the last ten years, complicating the task for administrators to monitor user activity and application traffic usage.
Network-based malware protection
New malware variants are developed every hour. Staying informed about all these threats thanks to network-based malware protection that uses a constantly updated cloud database is essential to block new threats as they emerge.
In other words, a Layer 7 Firewall has the capability to analyze and protect your server or cloud from a much wider variety of attacks due to its analysis capacity and power. Highlights include:
- Application-level filtering
- Filtering by URL.
- Application control: WEB, FTP, P2P,…
- Protection against denial-of-service attacks.
- Protection against code injection attacks.
- SandBox
- SSL traffic inspection.
- Filtering by user.
What is SWPanel Next-Generation Security?
It is the ability of SWPanel to activate and manage several layers of Layer 3, 4, and Layer 7 Firewalls that filter incoming and outgoing traffic from your server or cloud to ensure total protection against attacks, or even to ensure the protection of your server or cloud so that it does not become the attacker.
Please note that there are different levels of next-generation security services, each with different capabilities/properties. You can select the one that best suits your needs.
Can my server or cloud attack other servers?
Yes.
Often when talking about Firewalls or protection, we focus on inbound traffic. Solutions like CloudFlare, Incapsula, or WAF applications are based solely on the analysis and filtering of traffic that your server or cloud receives.
But what about the traffic my server sends? Can it be harmful?
Yes, your server may be compromised or have viruses or malware installed inside and become part of a zombie network or be remotely controlled. In these cases, traditional external filters such as CloudFlare, Incapsula, and many others are of no use to us.
So, what should I do? Can this outbound traffic be filtered?
Yes.
With Next-Generation Security from SWPanel and SW Hosting. When we filter traffic, we do it in both directions: inbound and outbound traffic.
We can protect you against attacks and prevent you from being the attacker. Often, for a company's reputation, it is worse to be the attacker than to suffer the attacks.
IN traffic and OUT traffic. Sent and Received. Inbound and Outbound...
This is the great virtue of SWPanel Next-Generation security; it protects in both directions.
All reports, lists, analyses, and statistics offered by next-generation security will include the analysis of received and sent traffic.
At all times, you will know if you are being attacked or if you are attacking. Furthermore, all of this is provided with country-by-country analysis and a global view of the geographic distribution of your attacks.
Activation of Next-Generation Security
Activation using the Service Dashboard
-
The first step will be to choose the Cloud or server on which you wish to activate Next-Generation Security
Enter the name of your server in the search box at the top of your SWPanel and select it.
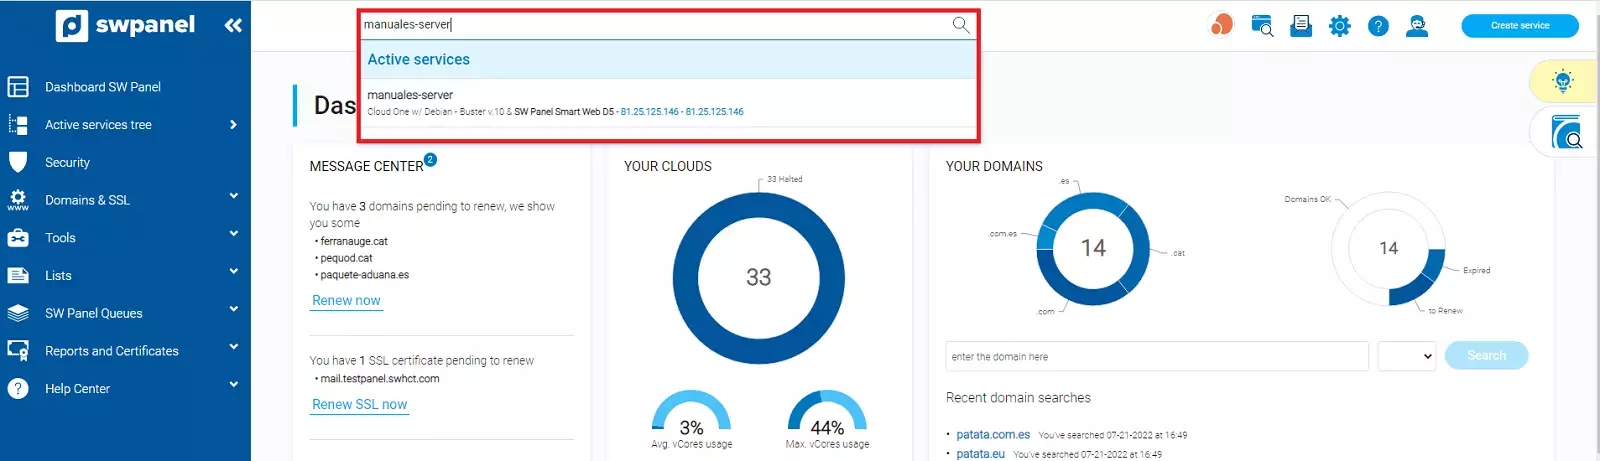
-
Once selected, SWPanel will show you the Dashboard for this service.
In the Dashboard, you will find the “Available Improvements” box, and in it, you will find the Next-Generation Security option and a button located to the right to activate or deactivate it.
Move the button to the right to activate it.
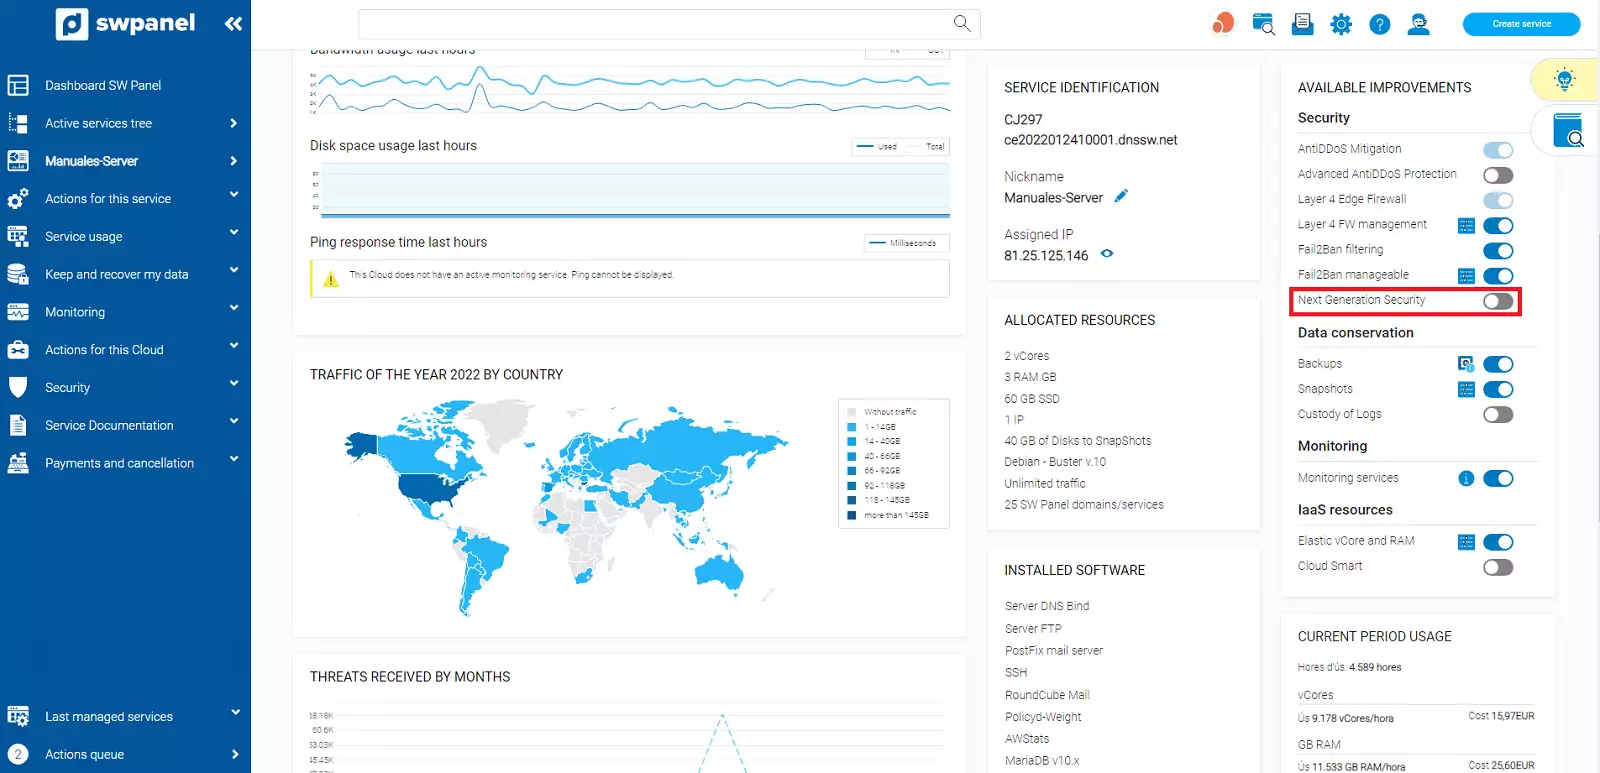
Once you have clicked, you will access the configuration and activation screen for Next-Generation Security.
On this screen, a box is shown with the available subscriptions for Next-Generation Security and each of the details and characteristics of each subscription.
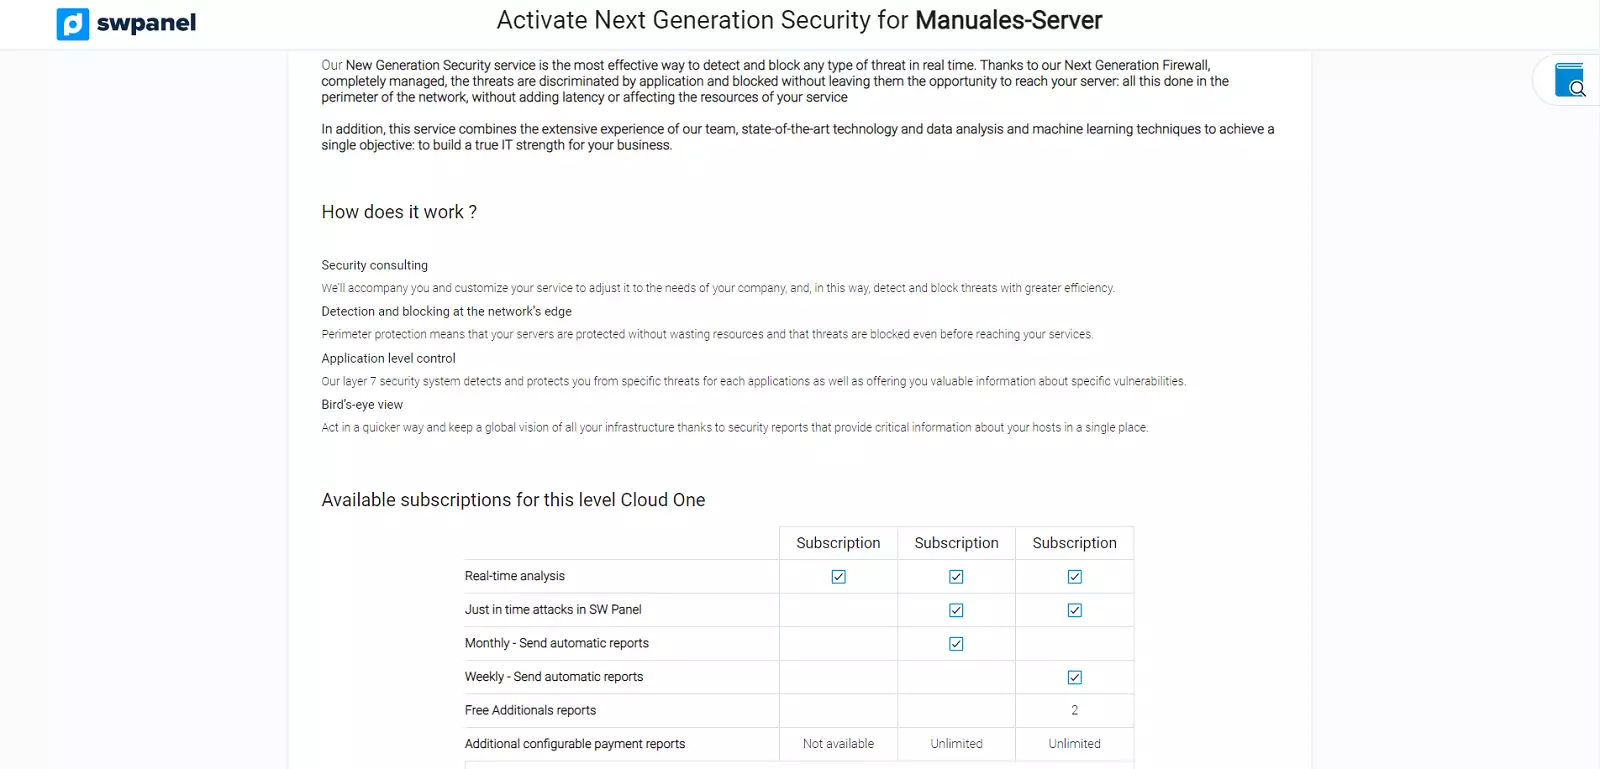
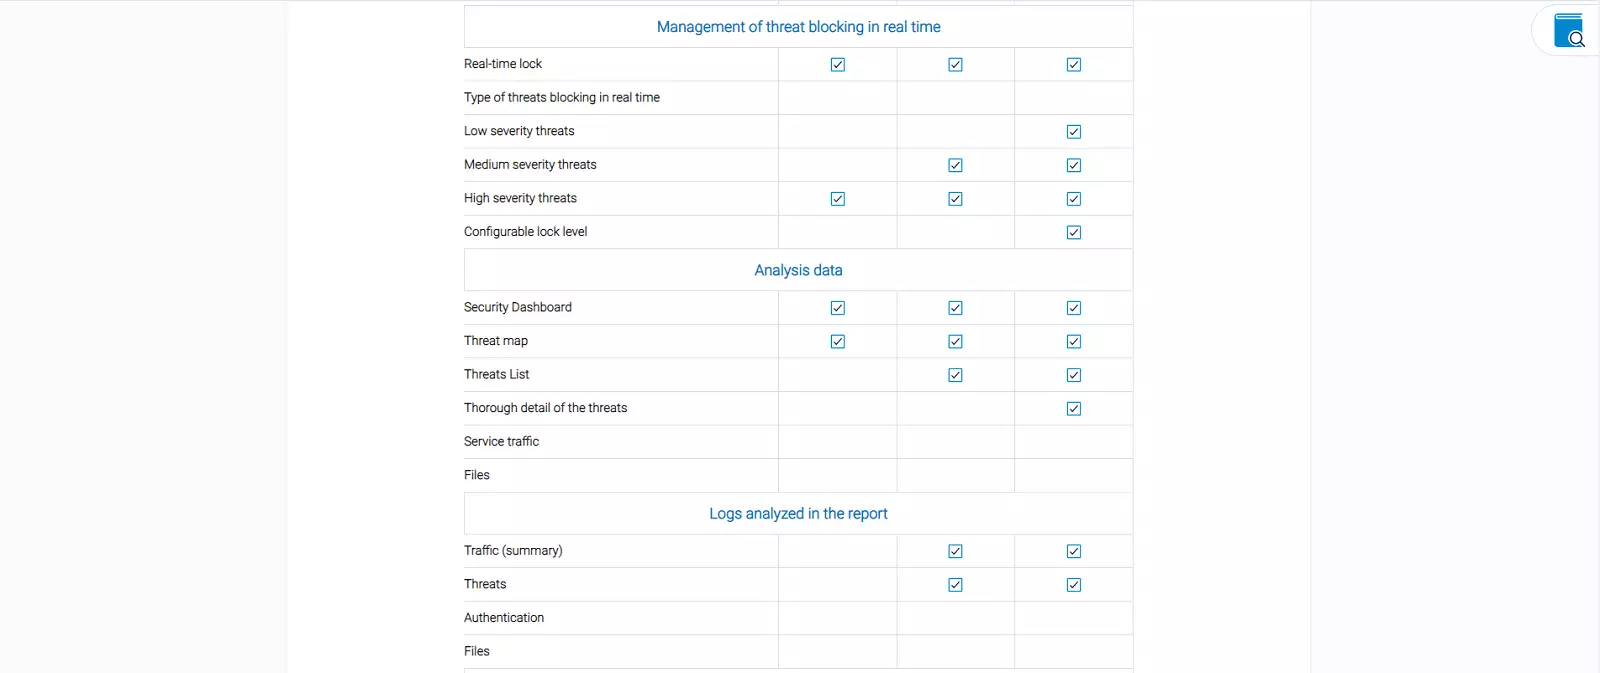
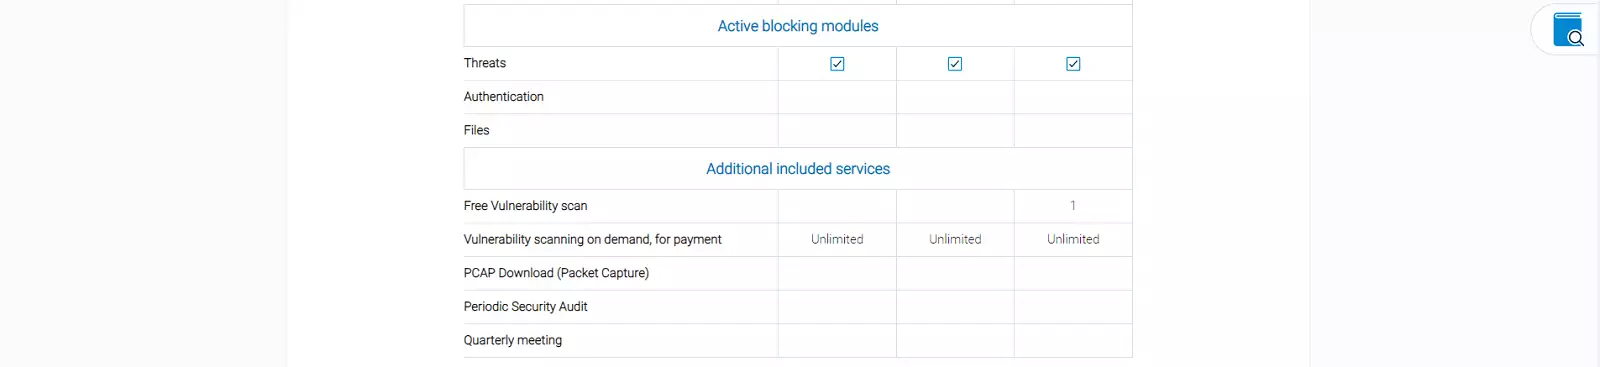
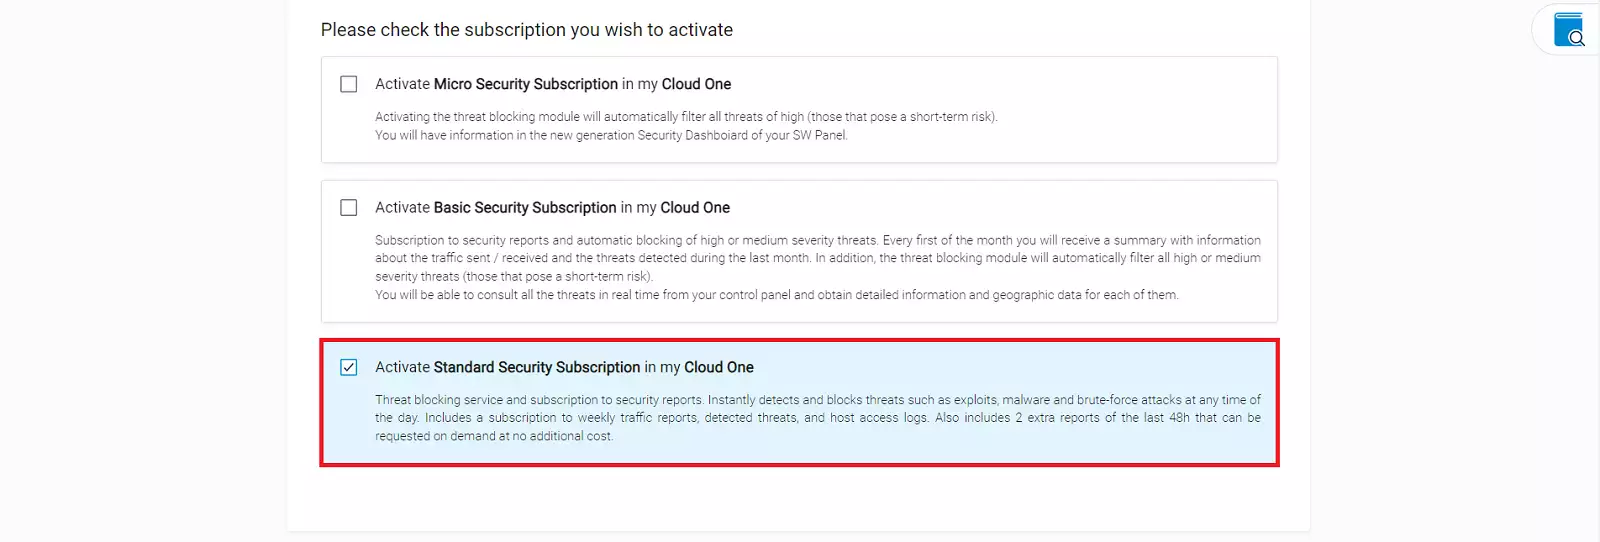
Study and analyze which subscription best fits your needs before activating it.
Once you have decided, check the corresponding “checkbox” to activate this subscription and confirm the activation by clicking the Activate Now button at the bottom.
It's that simple; in a few seconds it will be activated and the service Dashboard will now show the switch in green, confirming it is already activated.
Activation through the service management menu
- The first step will be to access the service tree in your SWPanel.
Look for the Cloud or server for which you wish to activate Next-Generation Security and click to open the Manage menu
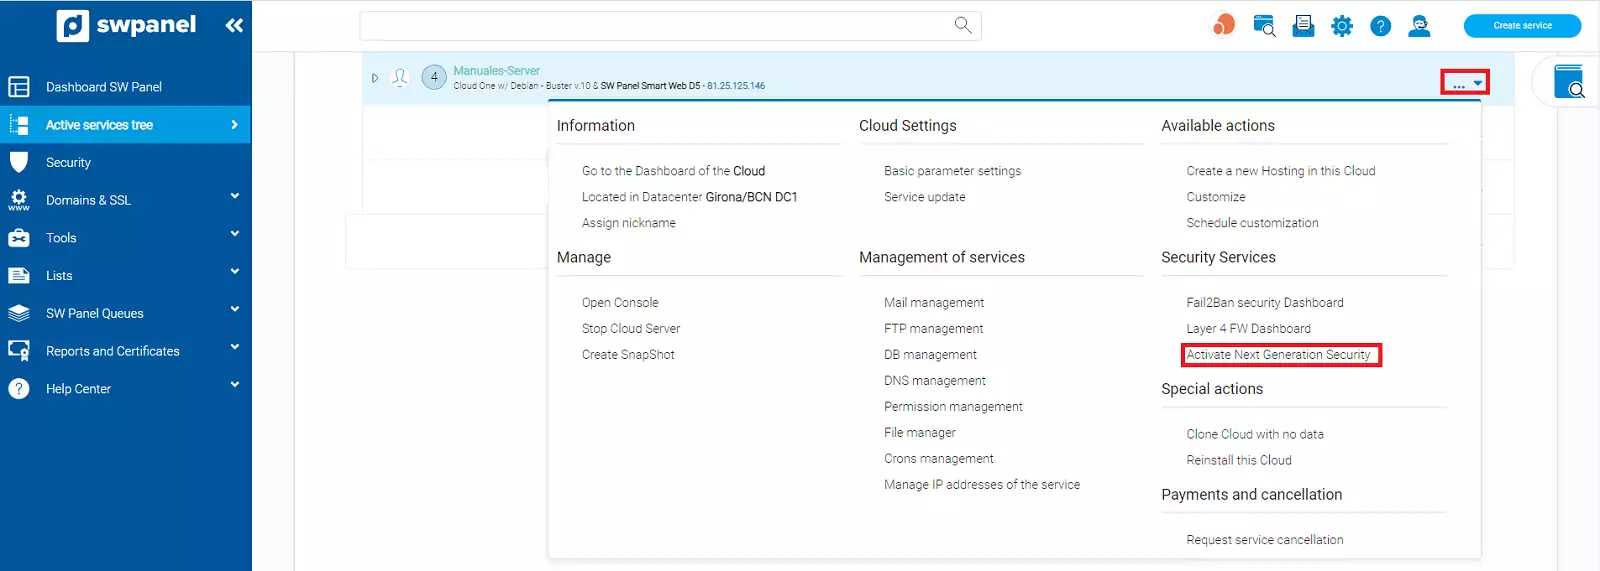
Within the menu, you will find the Security Services section; click on the Activate Next-Generation Security option
- SWPanel will take you to the Next-Generation Security activation screen
On this screen, a box is shown with the available subscriptions for Next-Generation Security and each of the details and characteristics of each subscription.
Study and analyze which subscription best fits your needs before activating it.
Once you have decided, check the corresponding “checkbox” to activate this subscription and confirm the activation by clicking the Activate Now button at the bottom.
It's that simple; in a few seconds it will be activated, and the service Dashboard will now show the switch in green, confirming it is already activated.
Next-Generation Security for a service
Once next-generation security is activated, in the Security section found on the left side of the Dashboard of the server on which you have activated security, the Next-Generation FW menu and its different sections will appear.
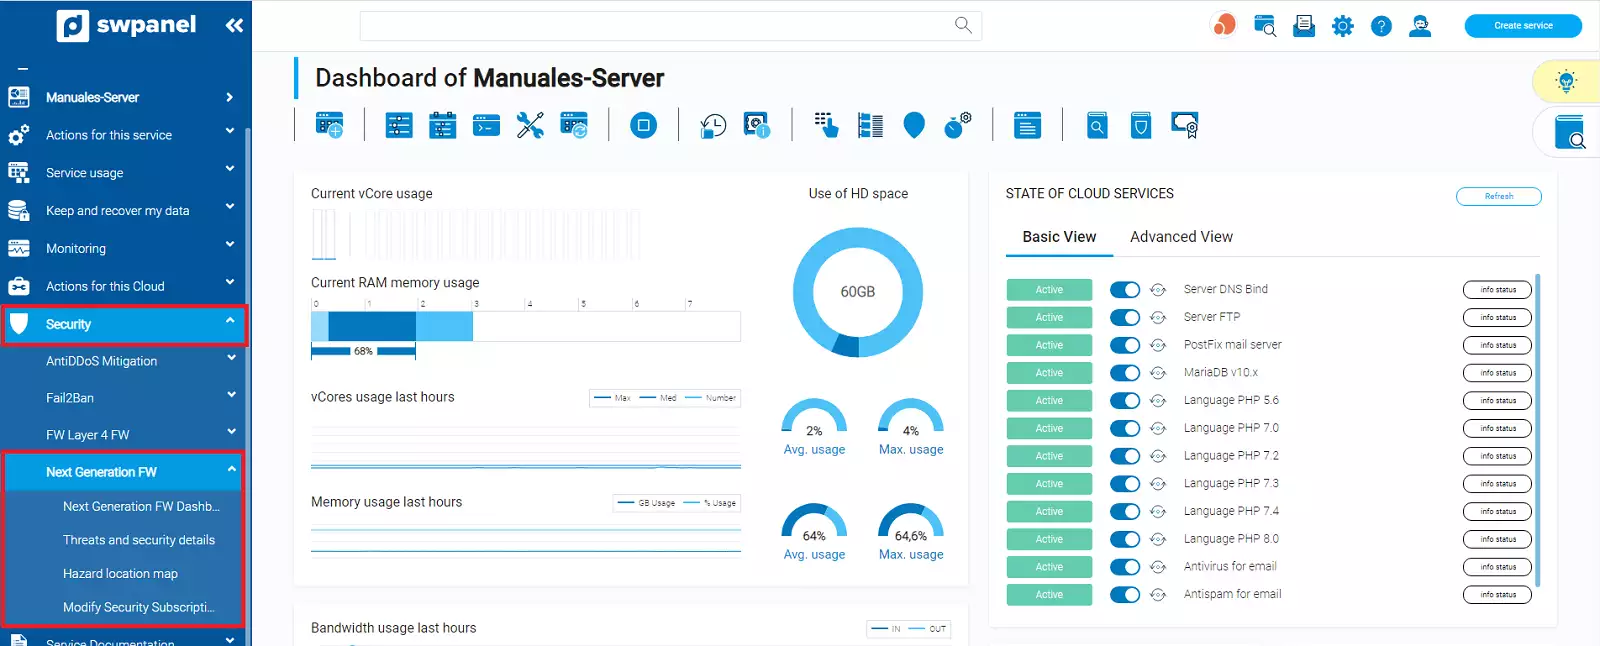
- Next-Generation Security Dashboard
- Threats and security details
- Threat location map
- Modify Security Subscription
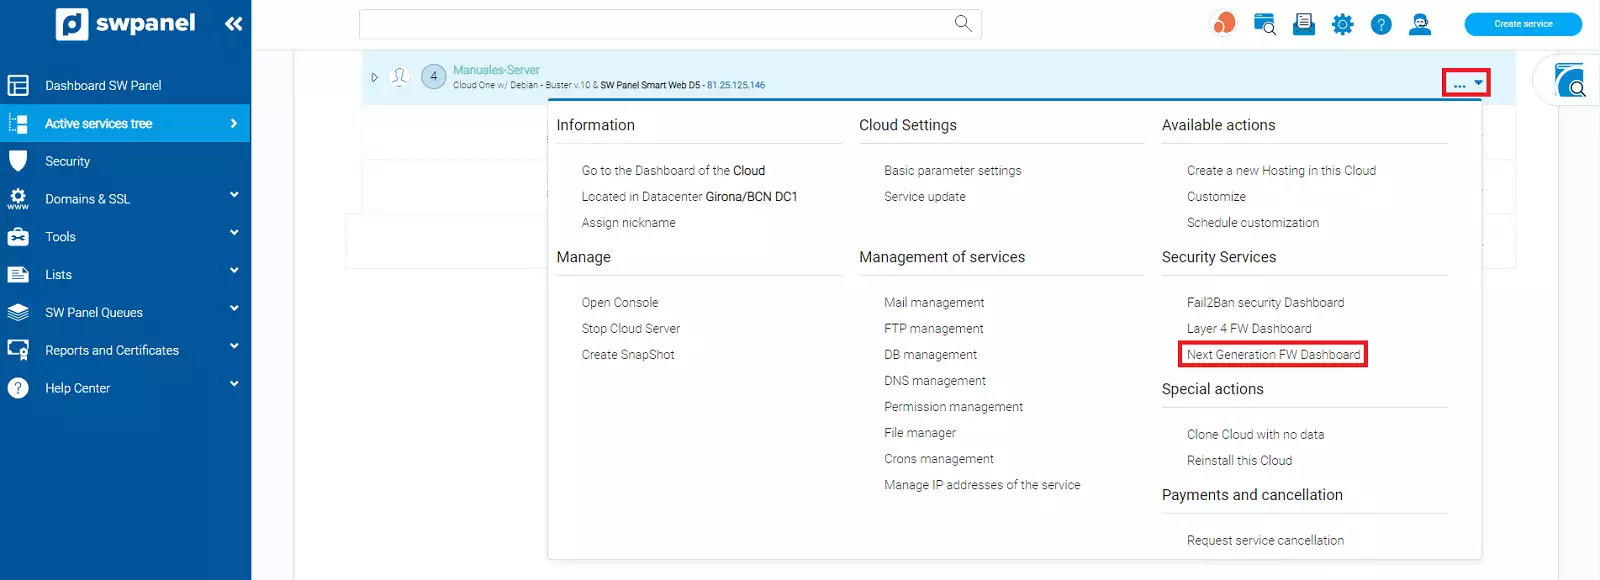
Also, in the Service tree, services with Next-Generation Security activated appear with a shield-shaped icon to the left of the service name and in the Manage menu, within the Security Services section, a new option Next-Generation Security will appear, which, when clicked, will take us to the Next-Generation Security section for this service.
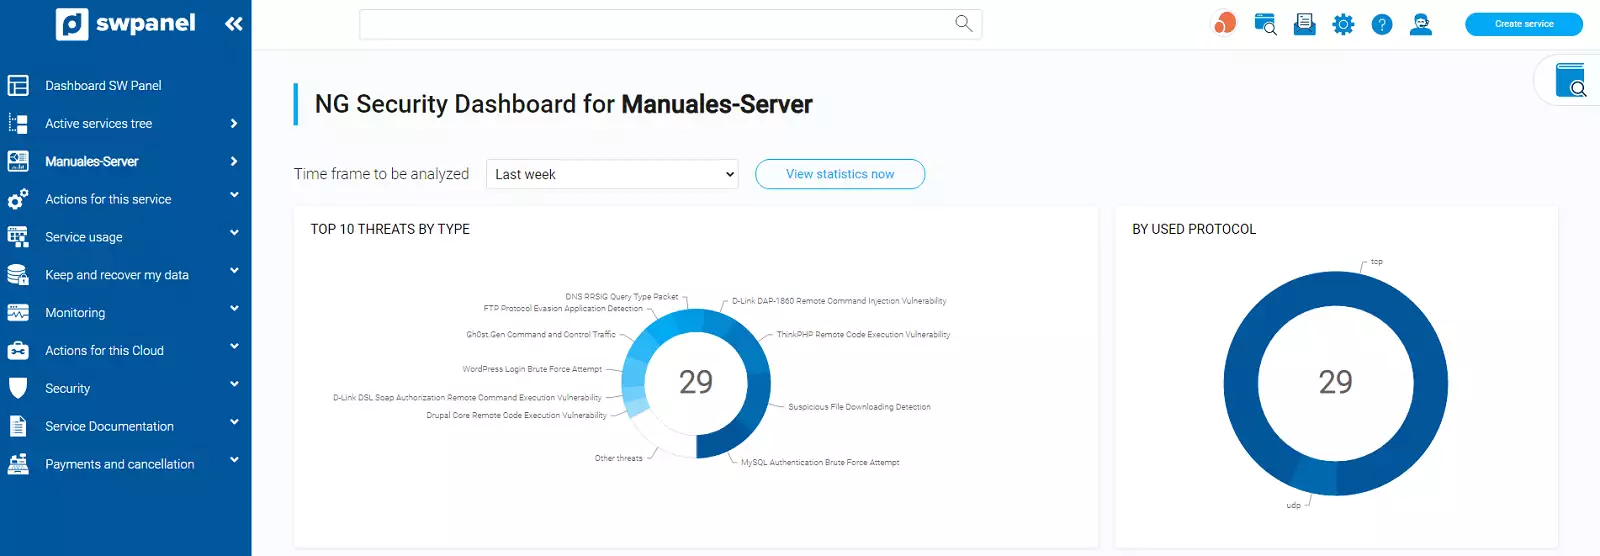
Next-Generation Security Dashboard
This Dashboard shows us a summary of everything being detected in the outbound and inbound traffic of your server or cloud and the actions being taken as a control measure.
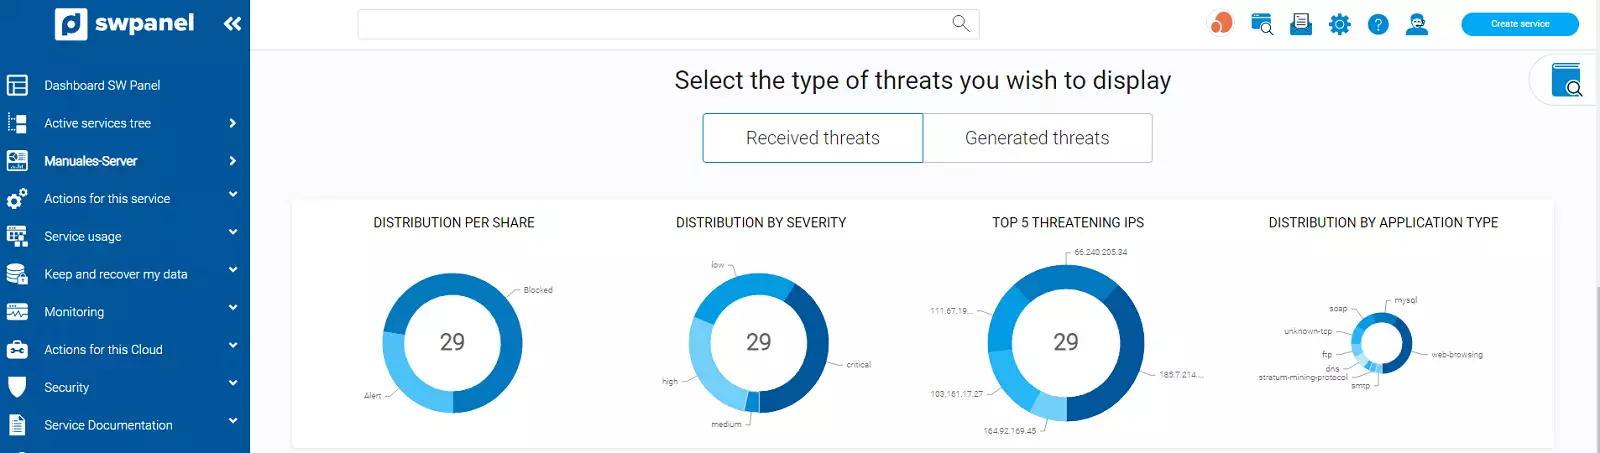
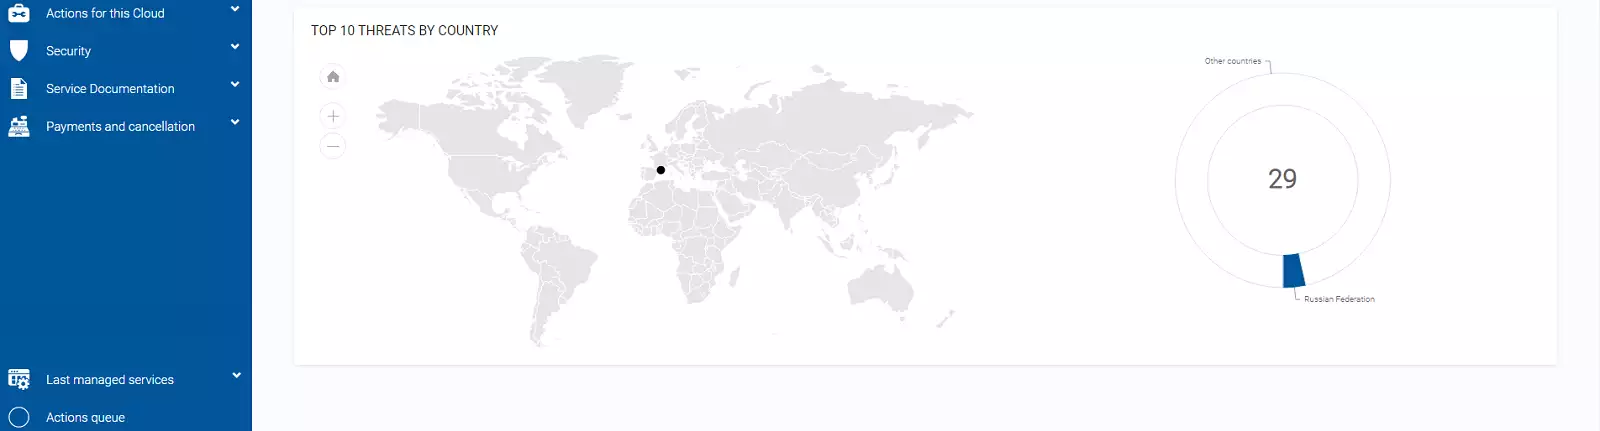
You will also find a map of the geolocation of the origins of the attacks or the destinations of your attacks, in case your server or cloud is the attacker.
At the top, you will find a dropdown menu that will allow you to analyze the period you wish. Select or indicate the period and the Dashboard will reload with the data relative to that period.
Improvement of the SWPanel main Dashboard
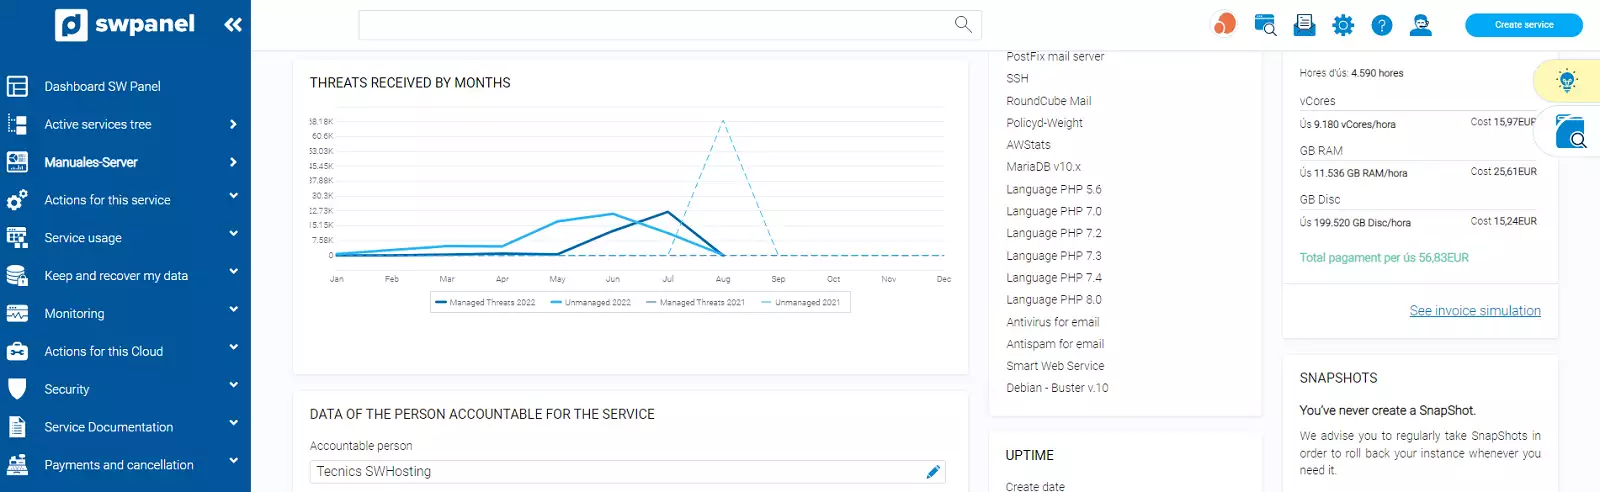
When you activate Next-Generation Security in your main SWPanel Dashboard, a new box will appear with the summary of threats by month that the next-generation security is handling in your services.
Threats and security details
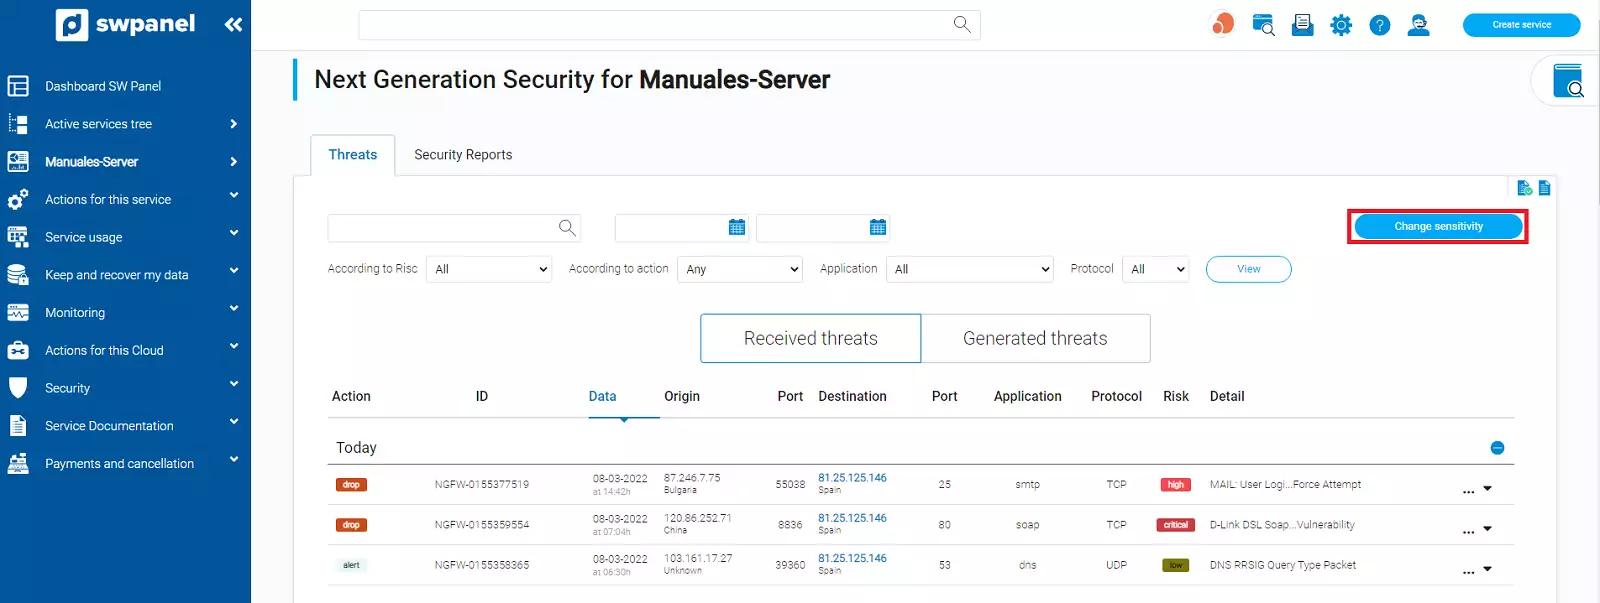
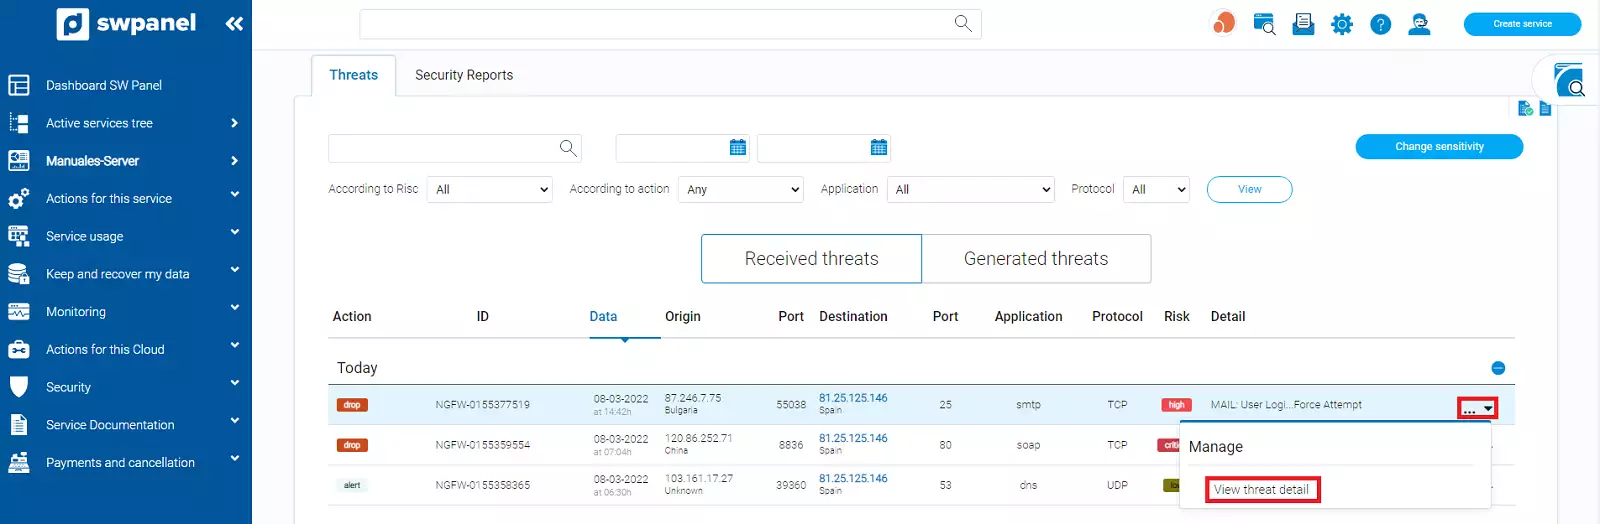
The threat list will show all threats detected by the Layer 7 Firewalls and the actions that have been performed on them.
There are always 2 possible actions to perform:
- Drop
This threat has been blocked and the service has been protected
- Permit
This threat has been allowed through as it is considered non-harmful.
The actions to be performed and the rigor or strictness in the analysis of them can be configured using the Change Sensitivity button.
Sensitivity change
You can define among 4 different types of sensitivity and adjust how you want the Firewall to analyze vulnerabilities.
- Threat blocking disabled
- Moderate sensitivity
- High sensitivity
- Very high sensitivity
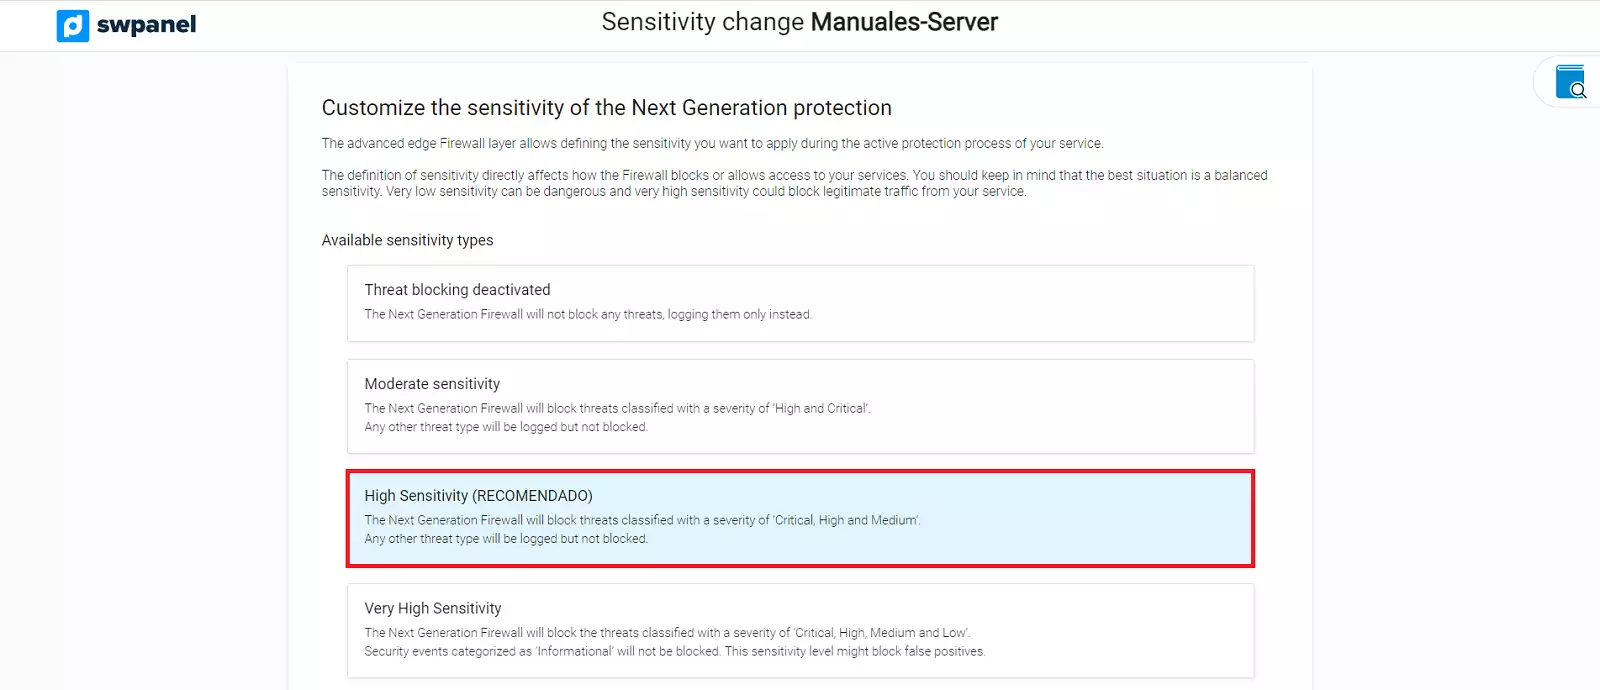
Simply check the box for the type of sensitivity you desire and accept the change. Once done, the Firewall will automatically adjust to the sensitivity you have set as the work pattern.
List filters
To facilitate the search for a specific threat, you have different filters in the list, including a text search and date filters that will allow you to maximize the accuracy of the search you wish to perform.
Actions in the Manage menu
Depending on the type of Next-Generation security subscription you have for your service, the manage menu will show more or fewer options.
Primarily, you should use it to find out in detail the threat that has been handled; for this, use the View threat detail option
Threat Detail
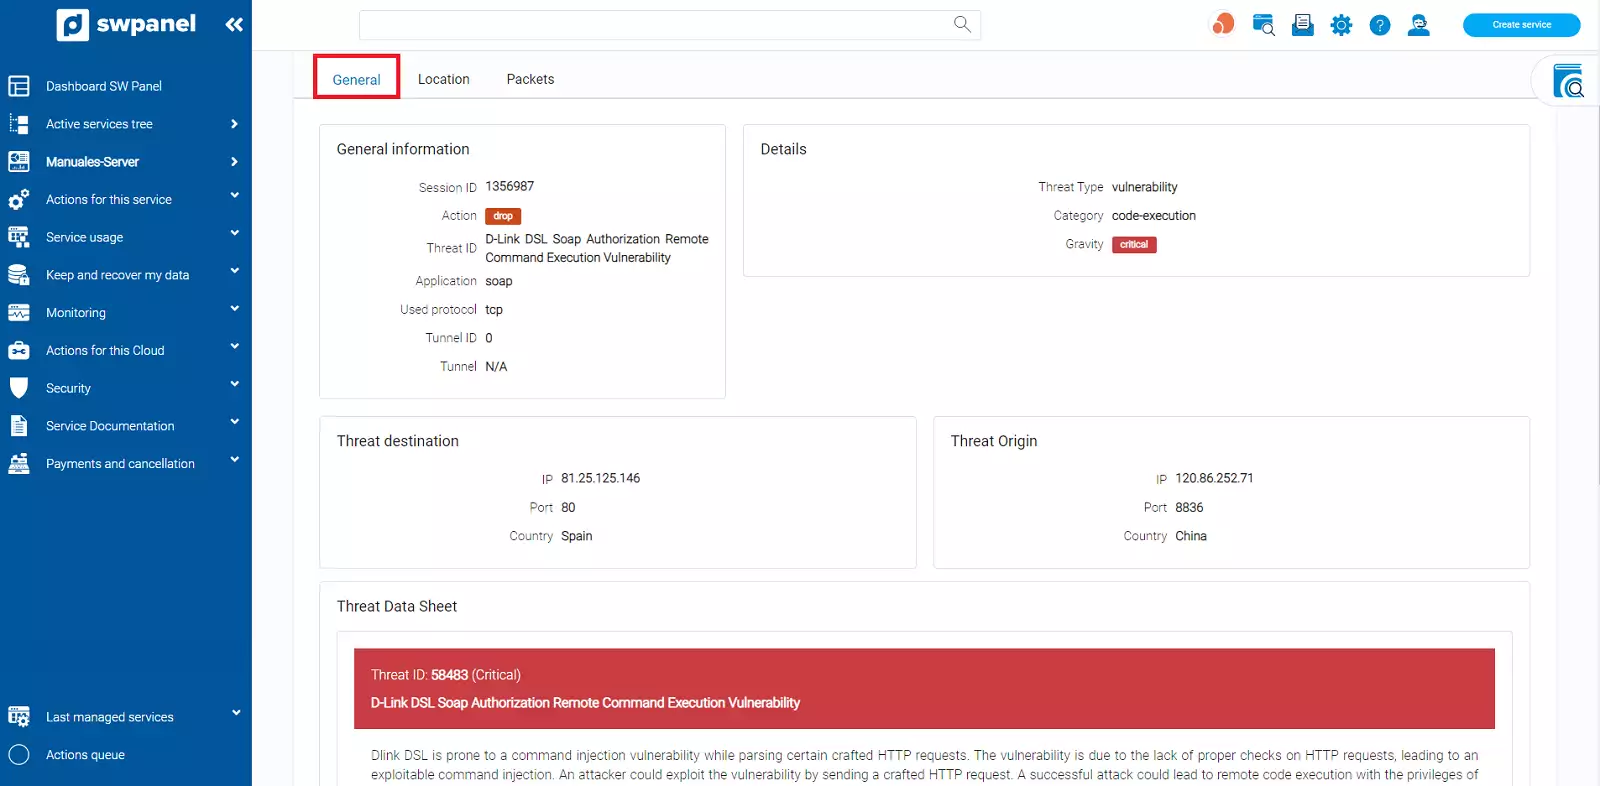
This option will show you all the details that could be known about the threat you have selected.
The information is displayed classified into 3 tabs, which are:
General
General information about the threat, its details, as well as origin and destination.
In the event of it being a globally identified and classified threat, the DataSheet (in English) will appear, which is obtained through the threat's CVE.
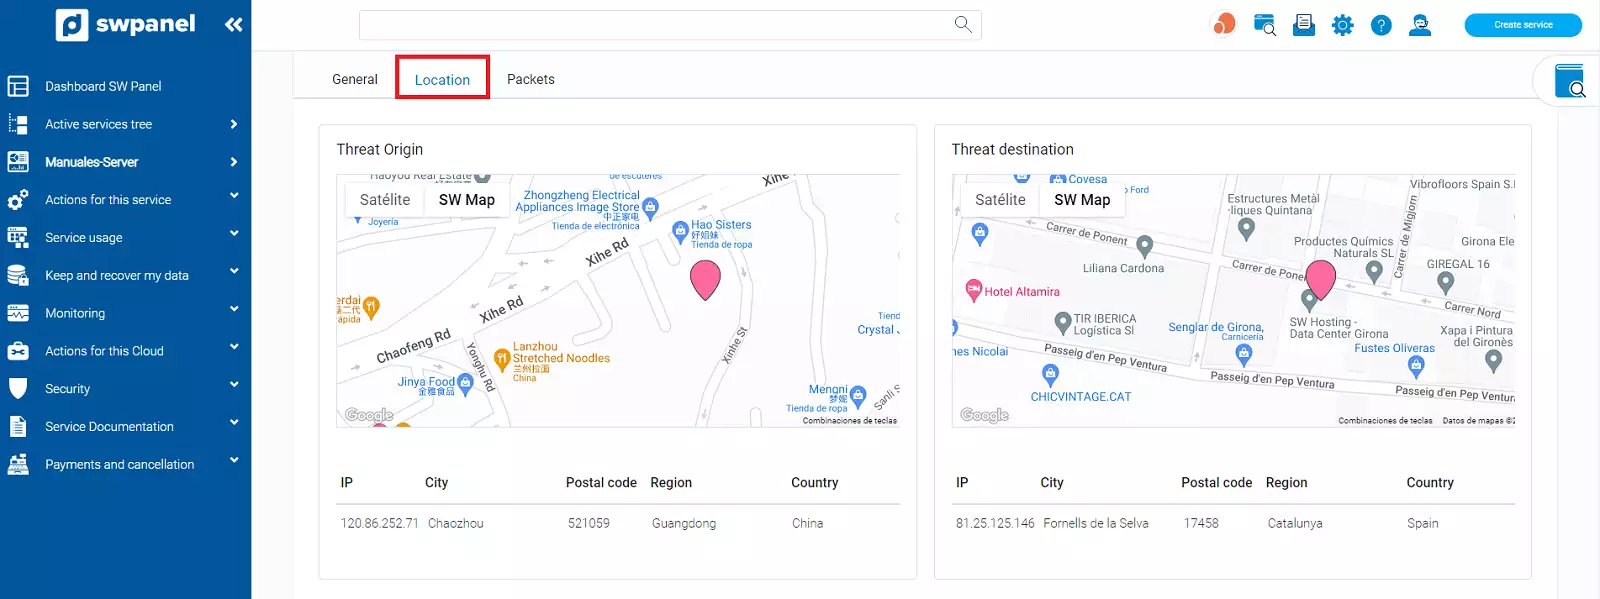
Location (standard security subscription or higher)
The location that could be determined for the source and destination IP of the threat is shown on a map.
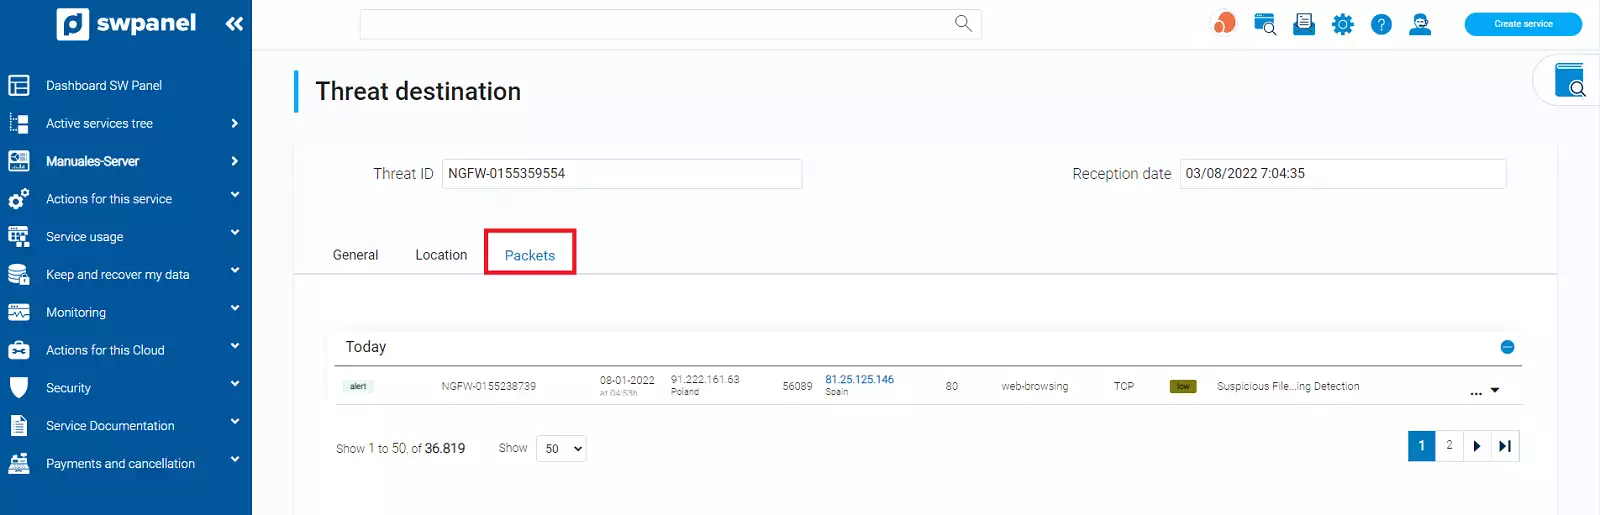
Packets (standard security subscription or higher)
If specific traffic packets from this threat have been identified, these are detailed in this tab as a list
Security Reports
You can schedule automated reports to scan for possible vulnerabilities in your Cloud.
To do this, enter the Security Reports tab located to the right of Threats, and you will see a list where all the reports you have created will be shown. In the right corner, there will be a blue button that will allow you to create new reports:
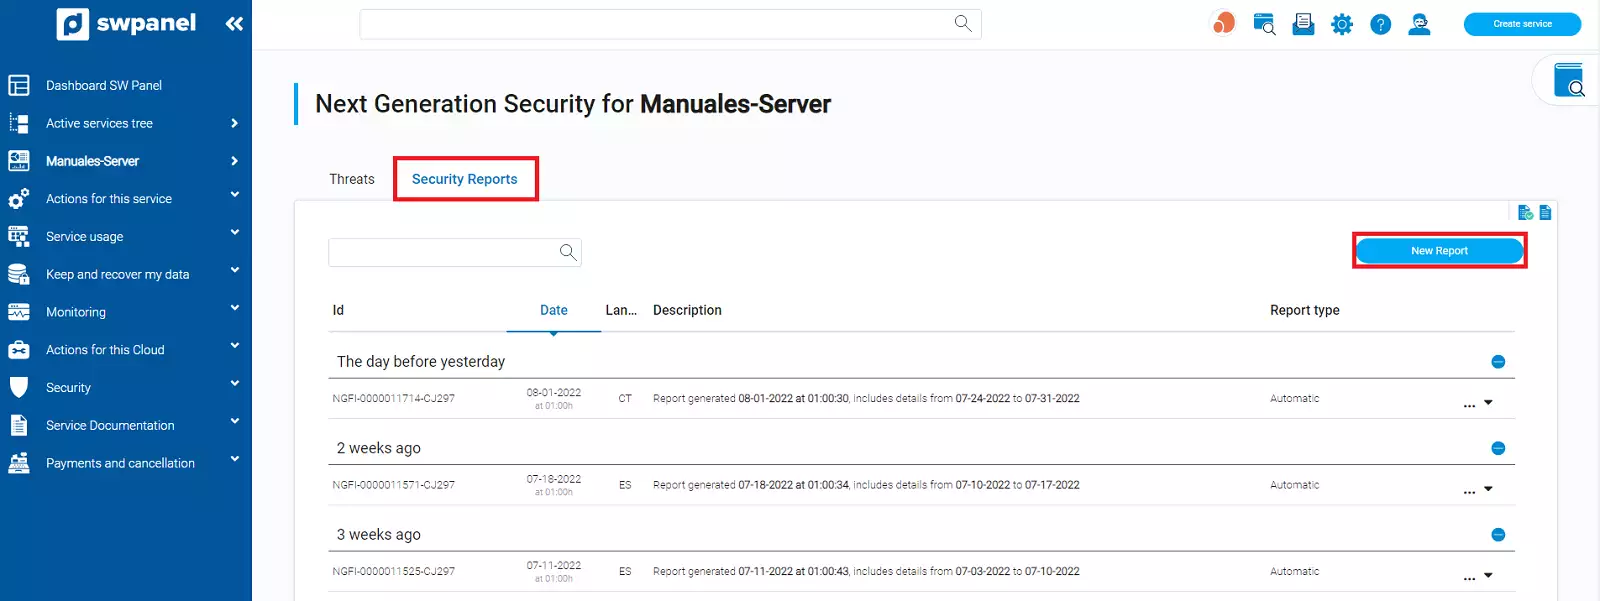
The screen that appears will be divided into 3 blocks:
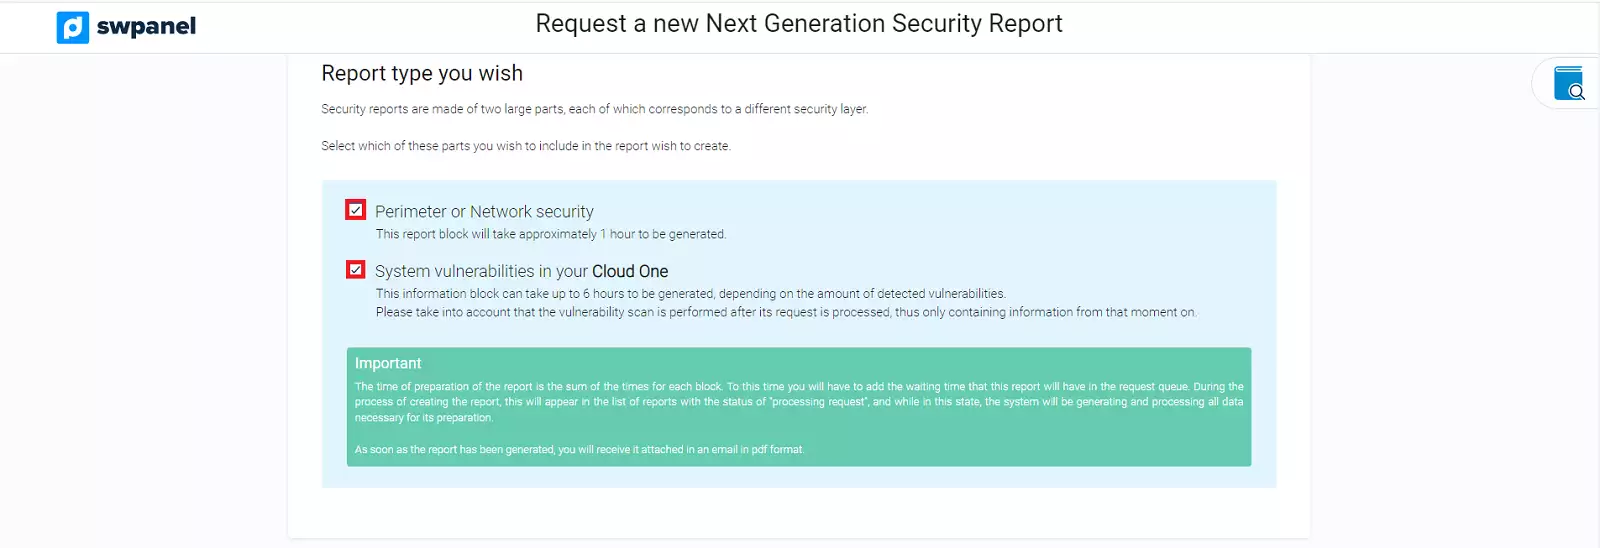
Type of Report you desire
There are two types of reports available: Network or Perimeter Security and your Cloud One system Vulnerabilities
- Network or Perimeter Security: This report may take approximately one hour to generate. It scans the connections to your Cloud and checks their security.
- Your Cloud system Vulnerabilities: This report can take up to approximately 6 hours, depending on the vulnerabilities detected in the system.
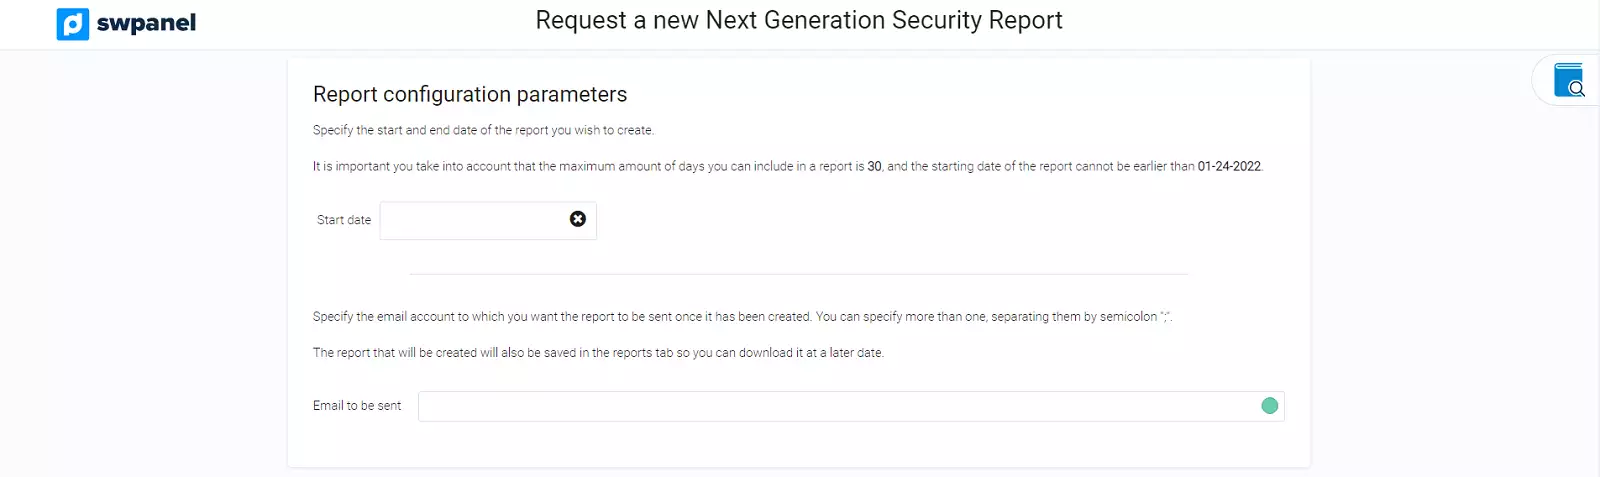
Report configuration parameters
In the scan, you must define which days you want to scan by choosing a start date and an end date; the panel itself will give you a count of the total days you will scan.
Keep in mind that a maximum of 30 days can be scanned, and the start date cannot be prior to 10-01-2020:
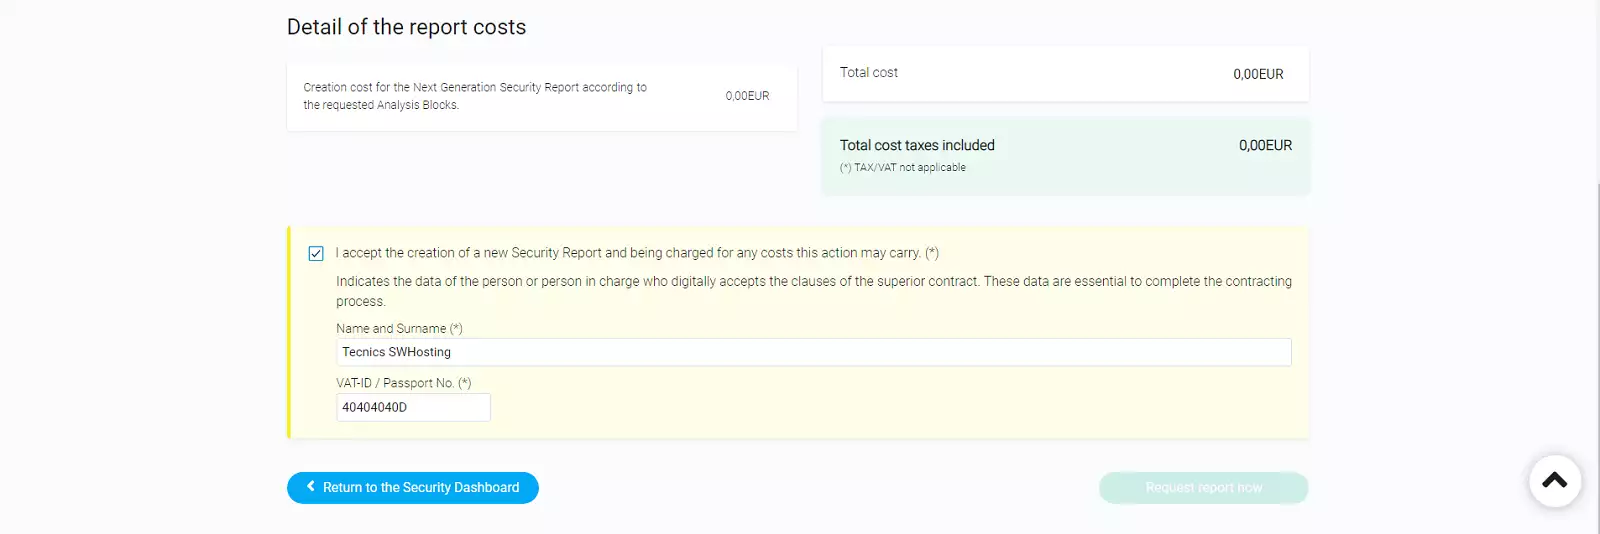
Report cost details
The last section will specify the costs of the Report.