
To assign a Hosting plan to your domain registered in SWPanel, go to the Domains and SSL -> Domain Portfolio tab found in the blue left side menu:
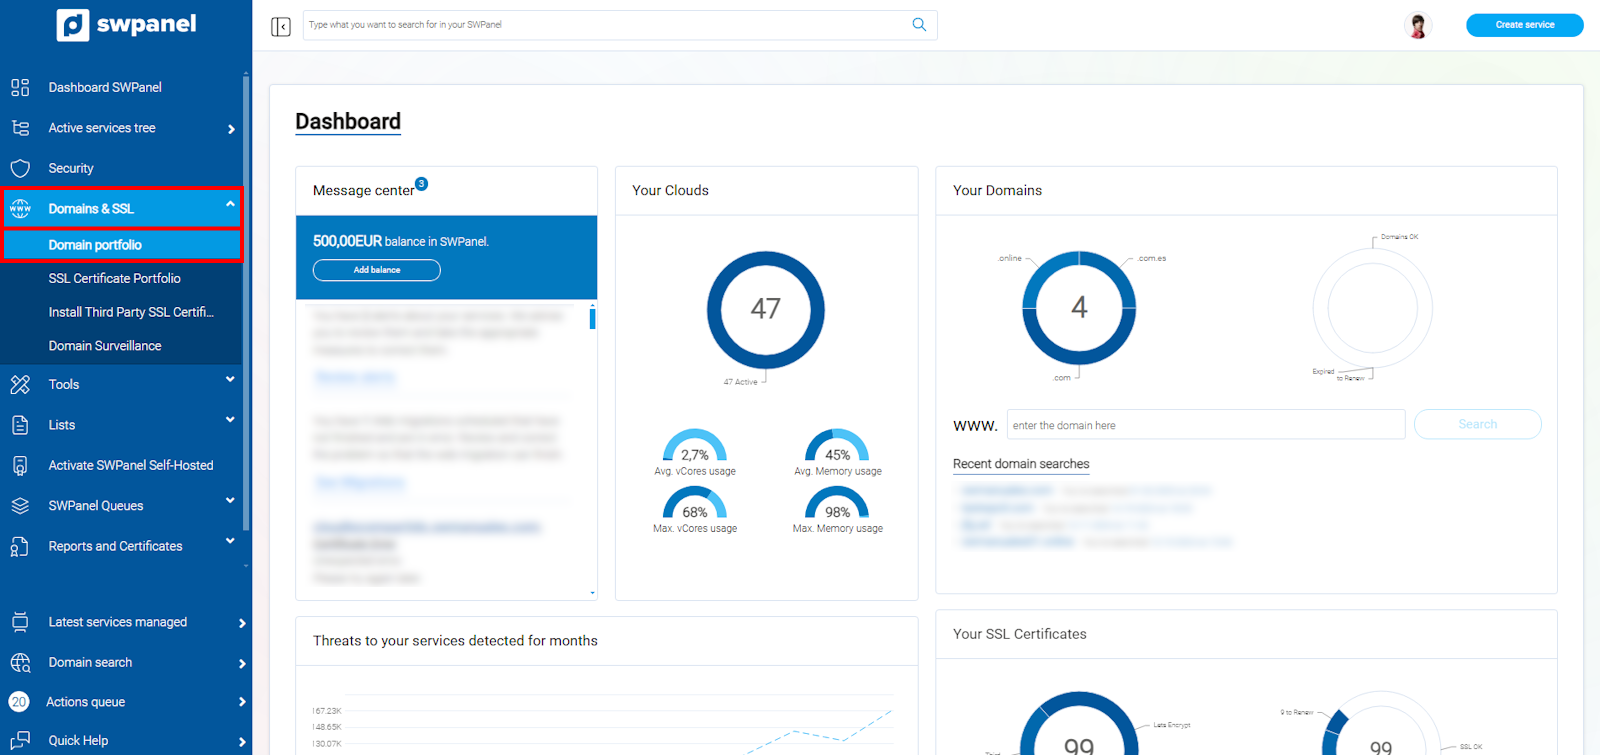
The screenshot is for illustrative purposes. It was taken using version 2025.00.0017 dated 03/01/2025. It may differ from what the current version of SWPanel displays.
Next, search for your domain and hover your mouse cursor over the [...] menu.
If you have more than one domain, you can easily find it using the search tool located in this section.
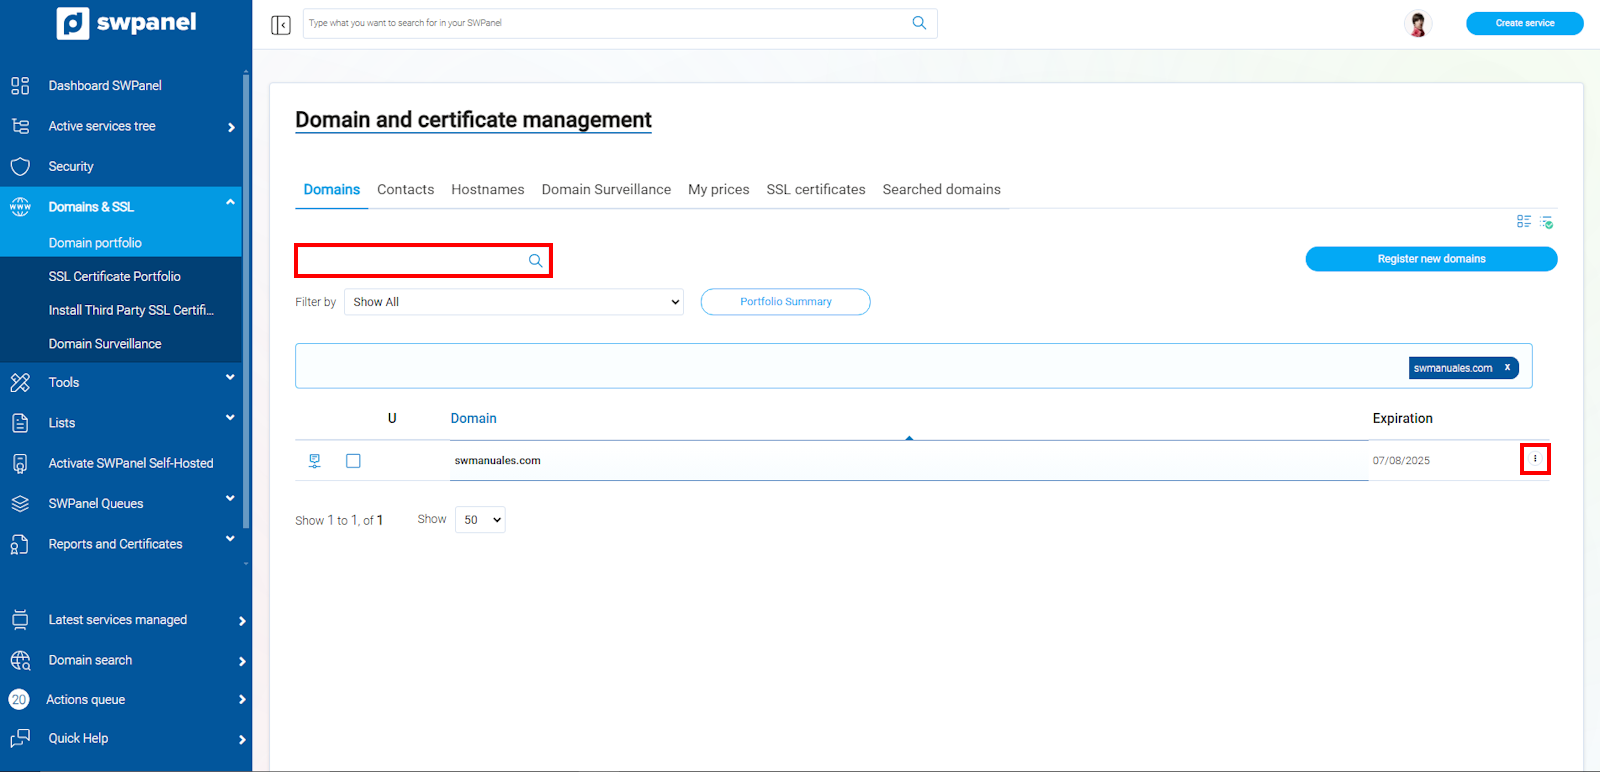
The screenshot is for illustrative purposes. It was taken using version 2025.00.0017 dated 03/01/2025. It may differ from what the current version of SWPanel displays.
Click on the option 'Create a service for this Domain'.
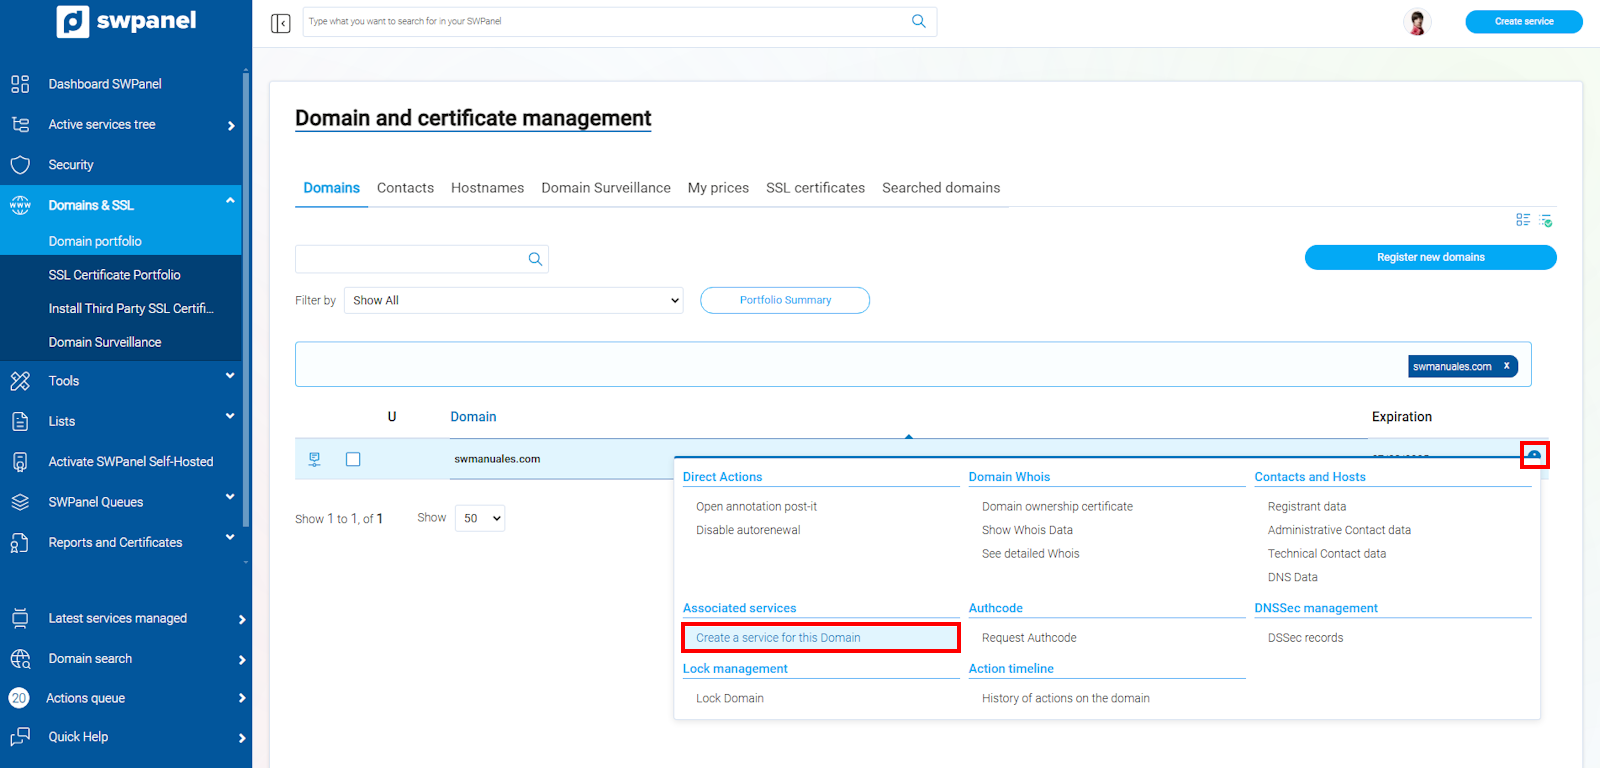
The screenshot is for illustrative purposes. It was taken using version 2025.00.0017 dated 03/01/2025. It may differ from what the current version of SWPanel displays.
In this example, we will proceed to deploy a Startup Smart Hosting. Click on 'Hosting Plans'.
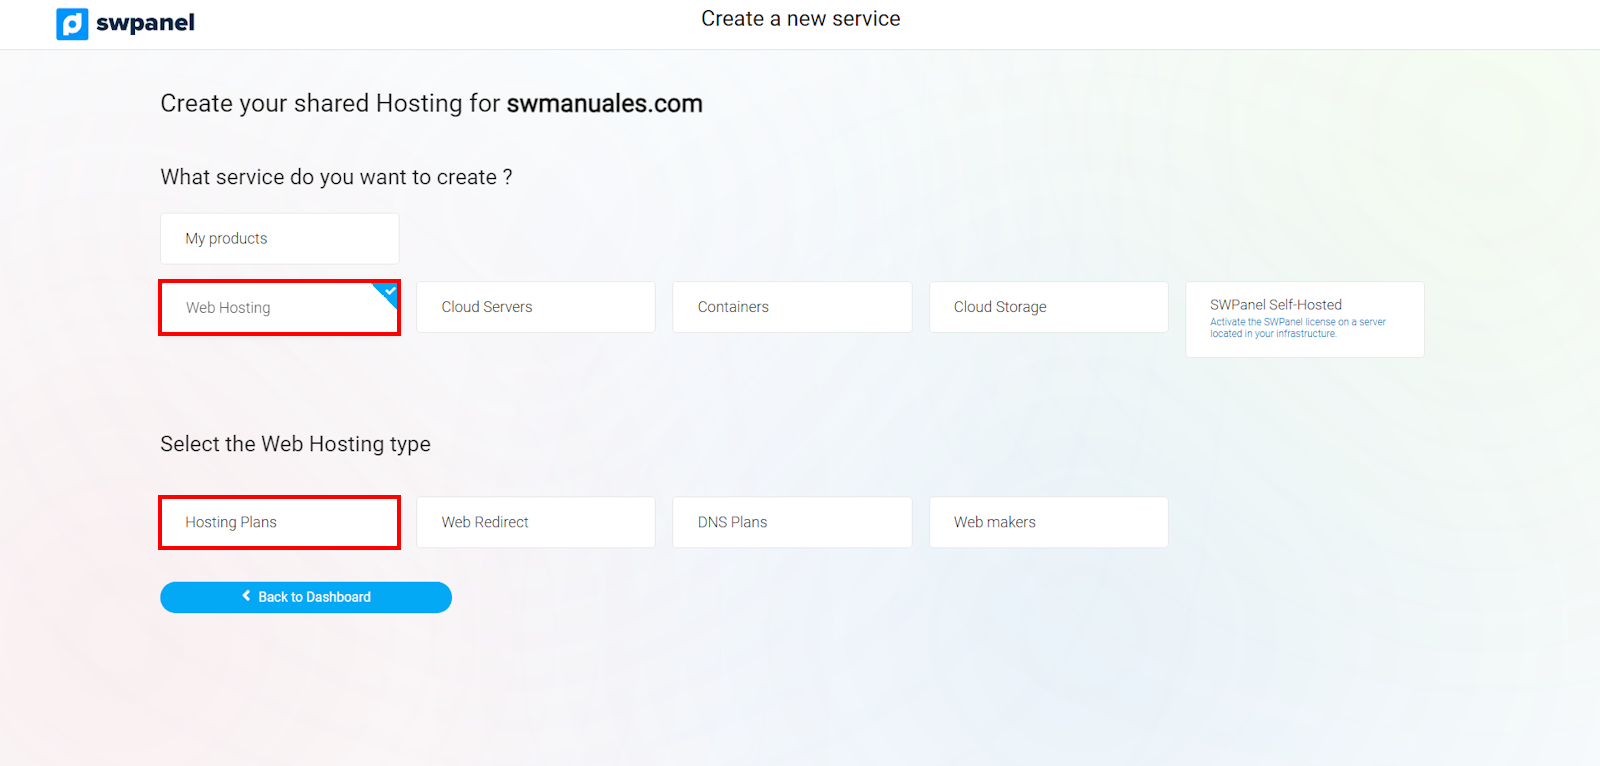
The screenshot is for illustrative purposes. It was taken using version 2025.00.0017 dated 03/01/2025. It may differ from what the current version of SWPanel displays.
We select the Hosting service in question.
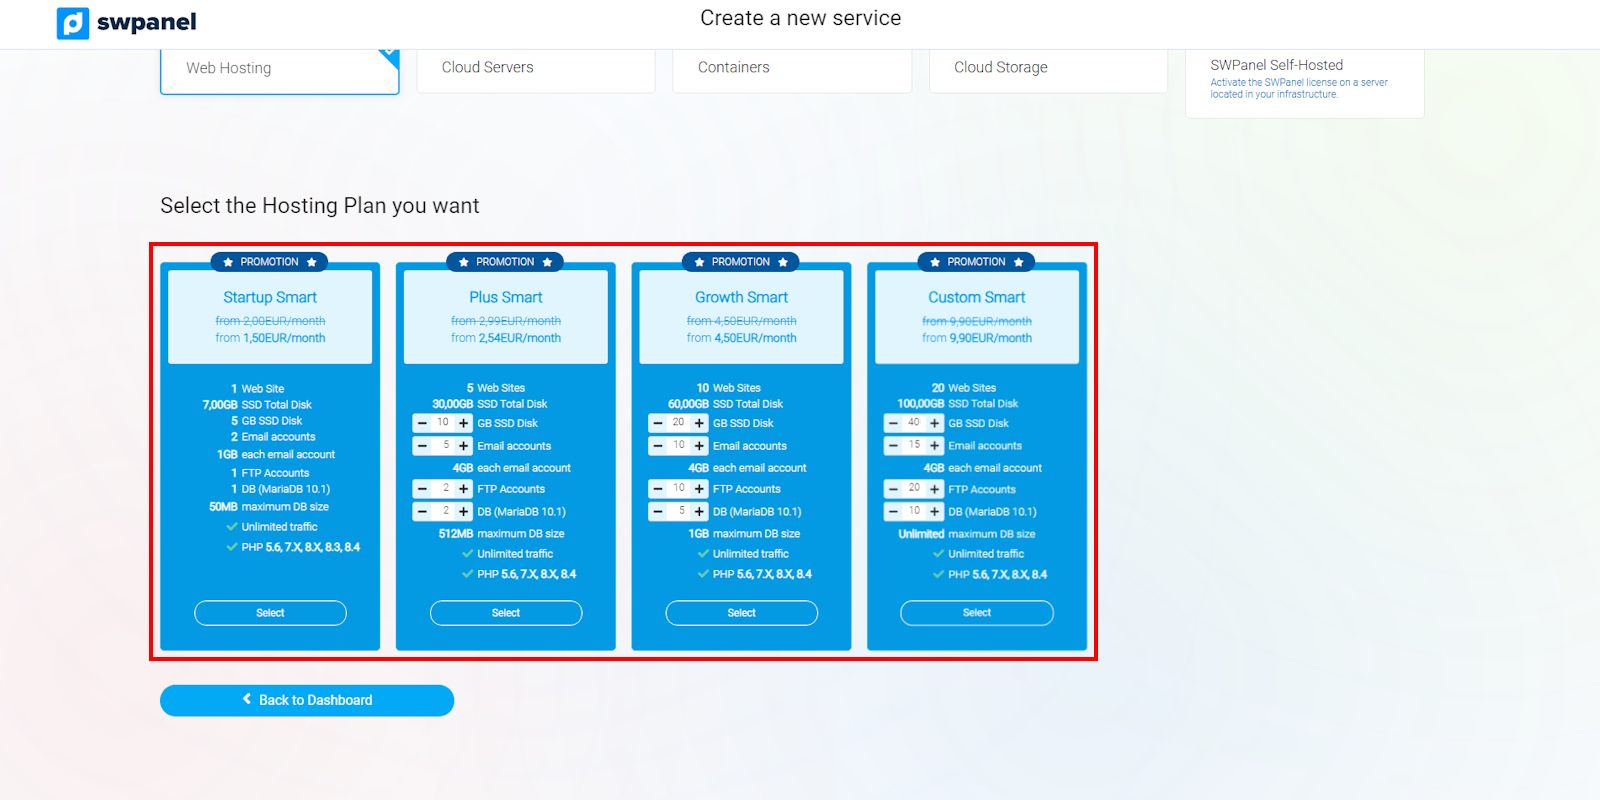
The screenshot is for illustrative purposes. It was taken using version 2025.00.0017 dated 03/01/2025. It may differ from what the current version of SWPanel displays.
If you wish, at this exact moment, you can create an email account, modify the PHP version of your Hosting, and deploy a CMS. If you do not wish to do so now, do not worry; you can create them later.
Go to the bottom of the page to finalize and create the Hosting service.
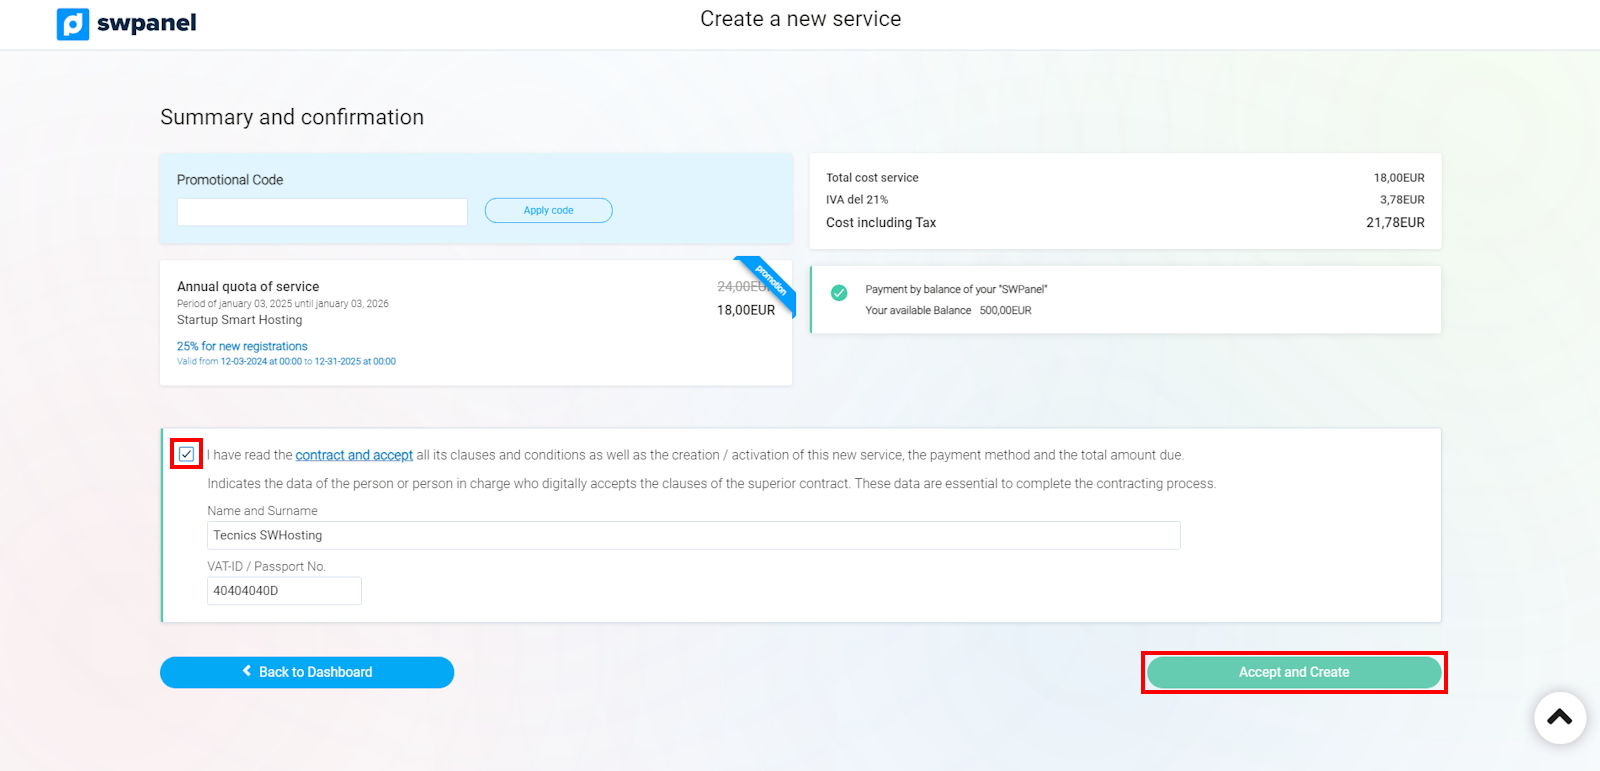
The screenshot is for illustrative purposes. It was taken using version 2025.00.0017 dated 03/01/2025. It may differ from what the current version of SWPanel displays.
Done! You now have your domain associated with a new hosting service.