How to create an Advanced VPN SSL
Manual for Creating an Advanced SSL VPN in SWPanel
1. Introduction and summary of contents
This manual aims to guide users step by step through the process of creating an Advanced SSL VPN from their SWPanel management environment. Throughout the document, the concepts, processes and configurations necessary to implement this functionality will be explained in detail.
What is an SSL VPN?
An SSL VPN (Virtual Private Network Secure Sockets Layer) is a system that allows a secure and encrypted connection to be established between a user and a private network over the Internet, using the SSL protocol. This type of connection is commonly used to access internal services from external locations with complete security.
What is an Advanced SSL VPN?
An Advanced SSL VPN is an extended and more configurable version of a standard SSL VPN. In SWPanel, it allows secure connection through virtual networks (VLAN) to manage one or more Cloud servers securely and efficiently.
Prerequisites
Before creating an Advanced VPN SSL, you must have created a VLAN with your Cloud servers. You can find out how to do this in the following manual:
How to create a VLAN with my Cloud servers
2. Accessing SWPanel
To get started, log in to your account from the SWPanel by entering your username and password. Once logged in, you will be taken to the Dashboard (control panel). From there, click on the ‘Create Service’ button located in the upper right corner.
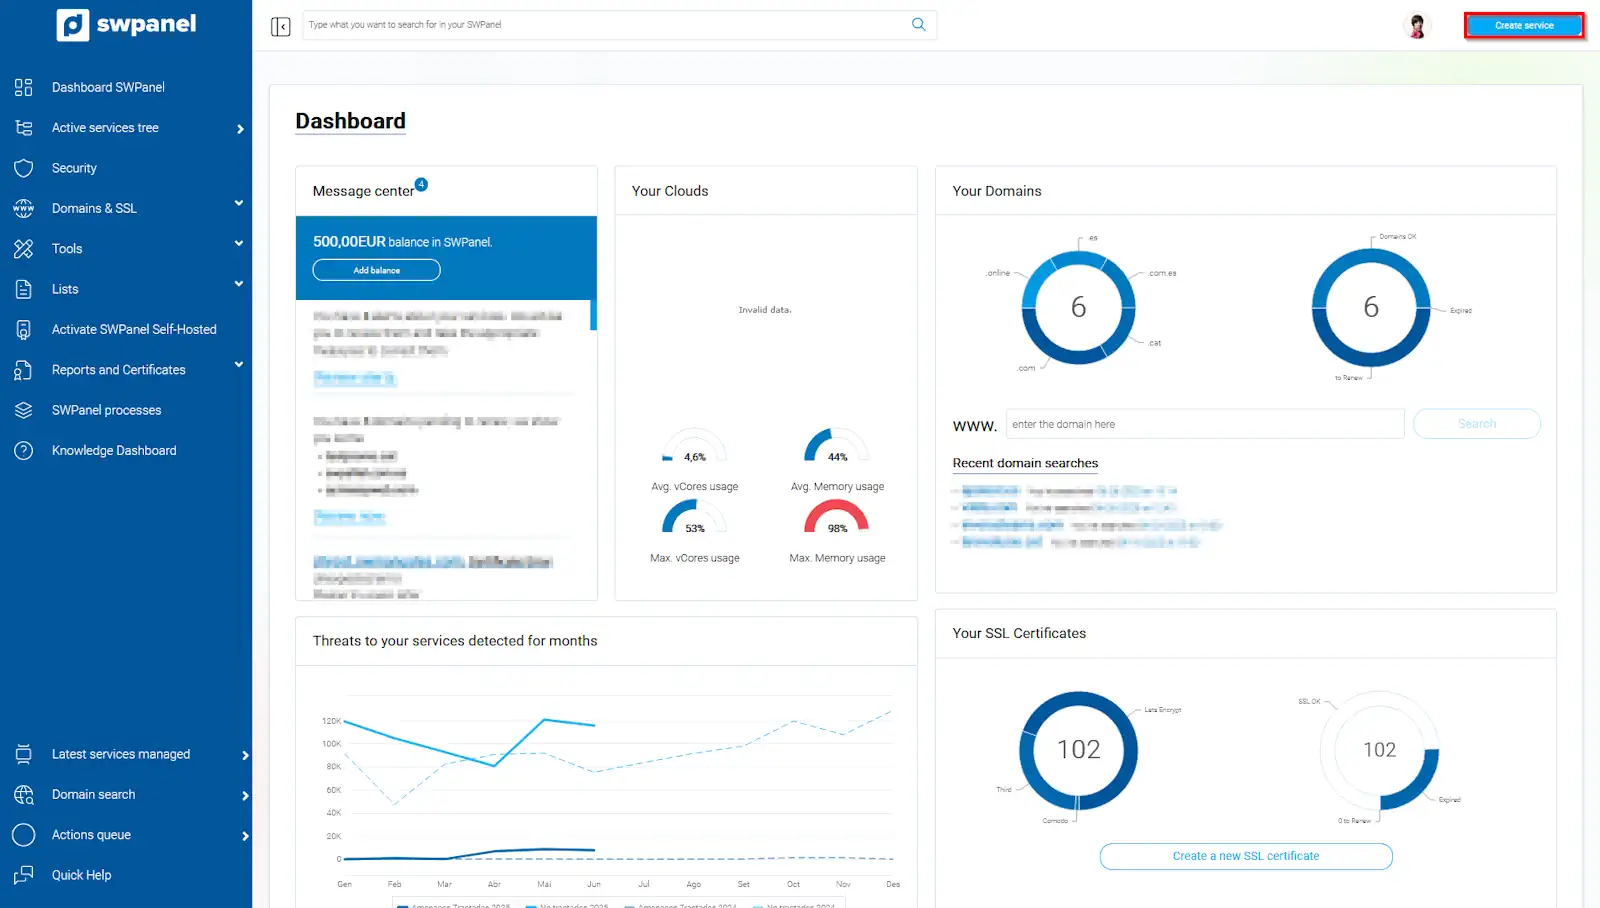
info_capture The screenshot is for illustrative purposes only. It was taken from version 2025.004.0002 dated 27/06/2025. It may differ from what is shown in the current version of SWPanel
3. Accessing the Advanced VPN SSL section
From the service creation menu, go to:
Containers -> Networking -> Advanced VPN SSL
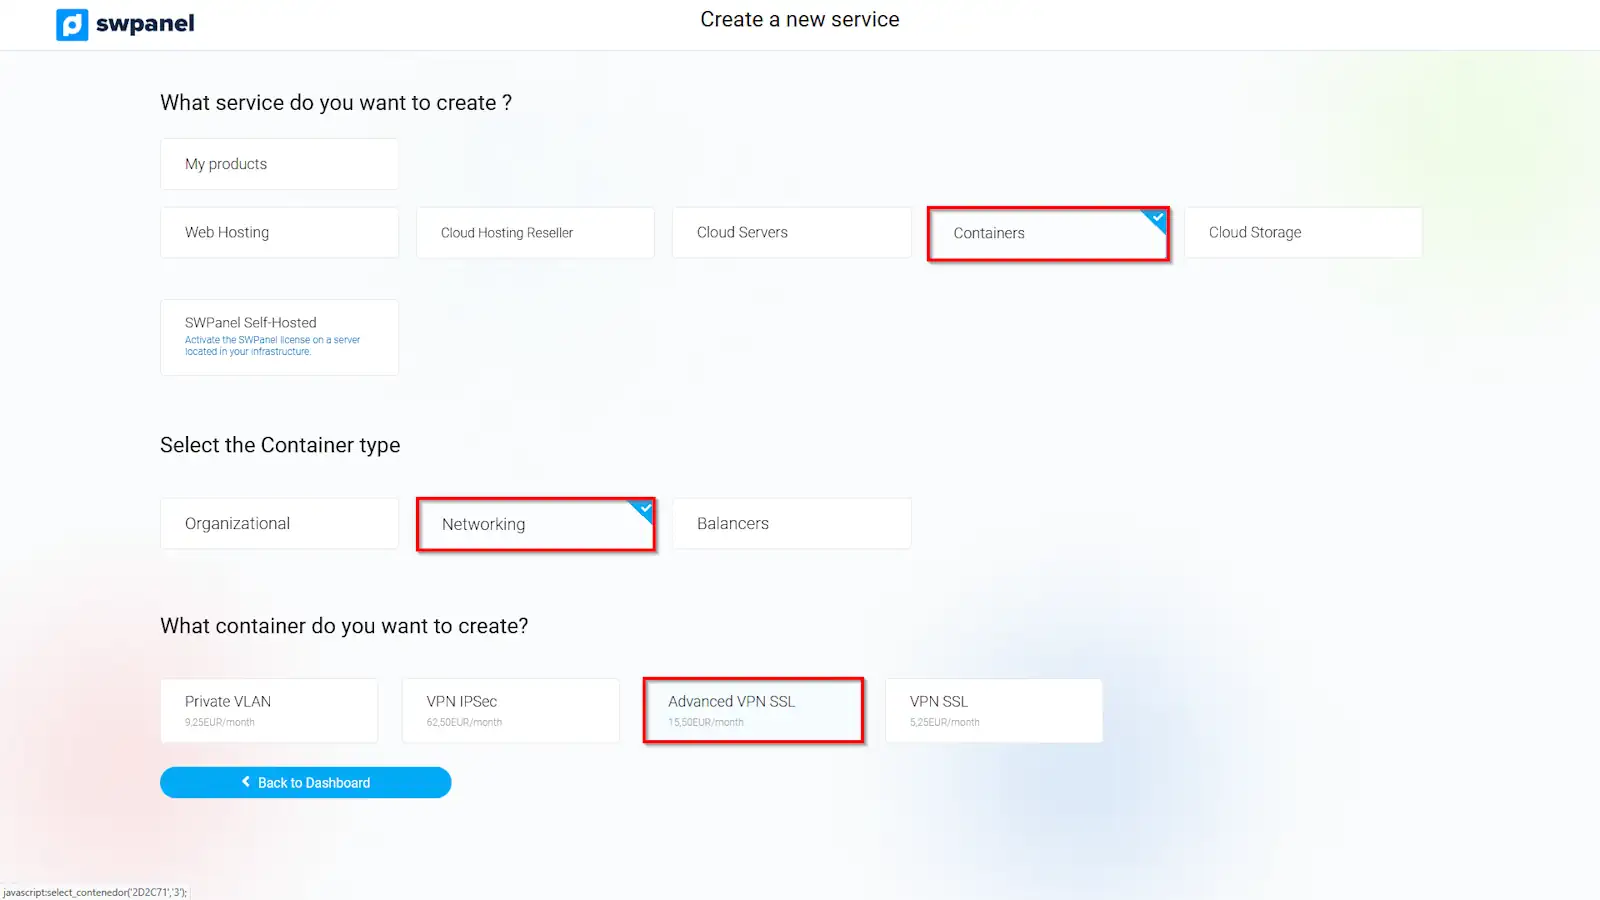
info_capture The screenshot is for illustrative purposes only. It was taken from version 2025.004.0002 dated 27/06/2025. It may differ from what is shown in the current version of SWPanel
4. Selecting components for the VPN
On the next screen, select the Cloud servers and network resources that will be part of the new Advanced VPN SSL. Then click Next.
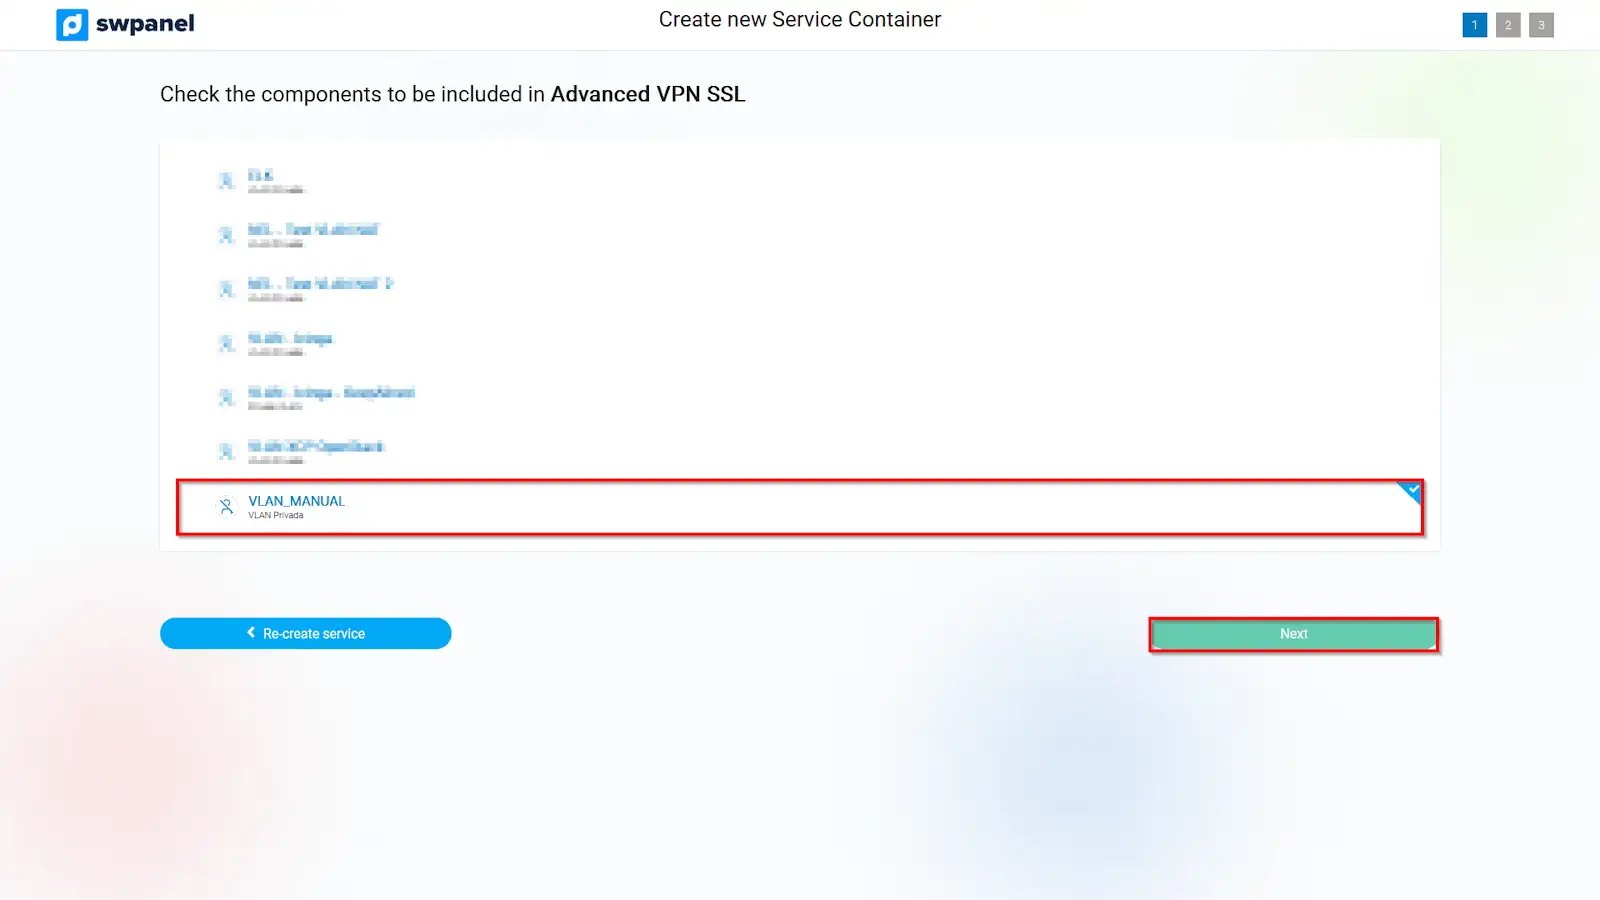
info_capture The screenshot is for illustrative purposes only. It was taken from version 2025.004.0002 dated 27/06/2025. It may differ from what is shown in the current version of SWPanel
5. Network parameter configuration
Fill in all the required fields on the form, including service name, description, and technical parameters related to the network.

info_capture The screenshot is for illustrative purposes only. It was taken from version 2025.004.0002 dated 27/06/2025. It may differ from what is shown in the current version of SWPanel
6. Creating the access user
In this section, you must define the access credentials for the user who will connect to the VPN. You can also enable two-factor authentication for added security and select the permissions profile that the user will have.
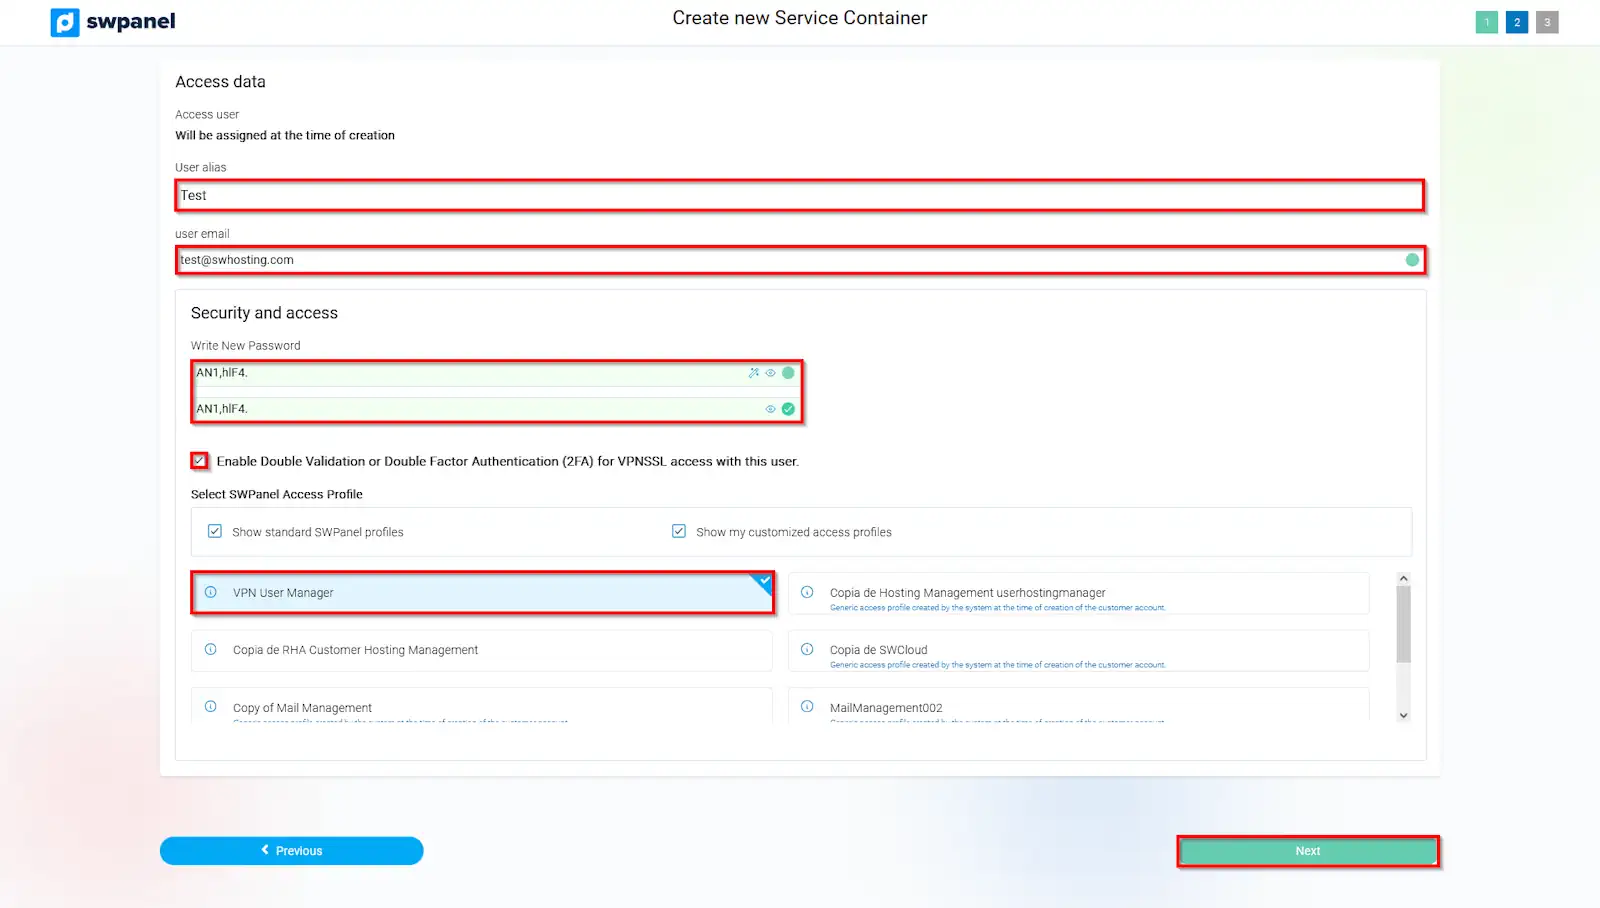
info_capture The screenshot is for illustrative purposes only. It was taken from version 2025.004.0002 dated 27/06/2025. It may differ from what is shown in the current version of SWPanel
7. Review and finalise the process
Once all the details have been validated, click Next to complete the Advanced VPN SSL creation process.
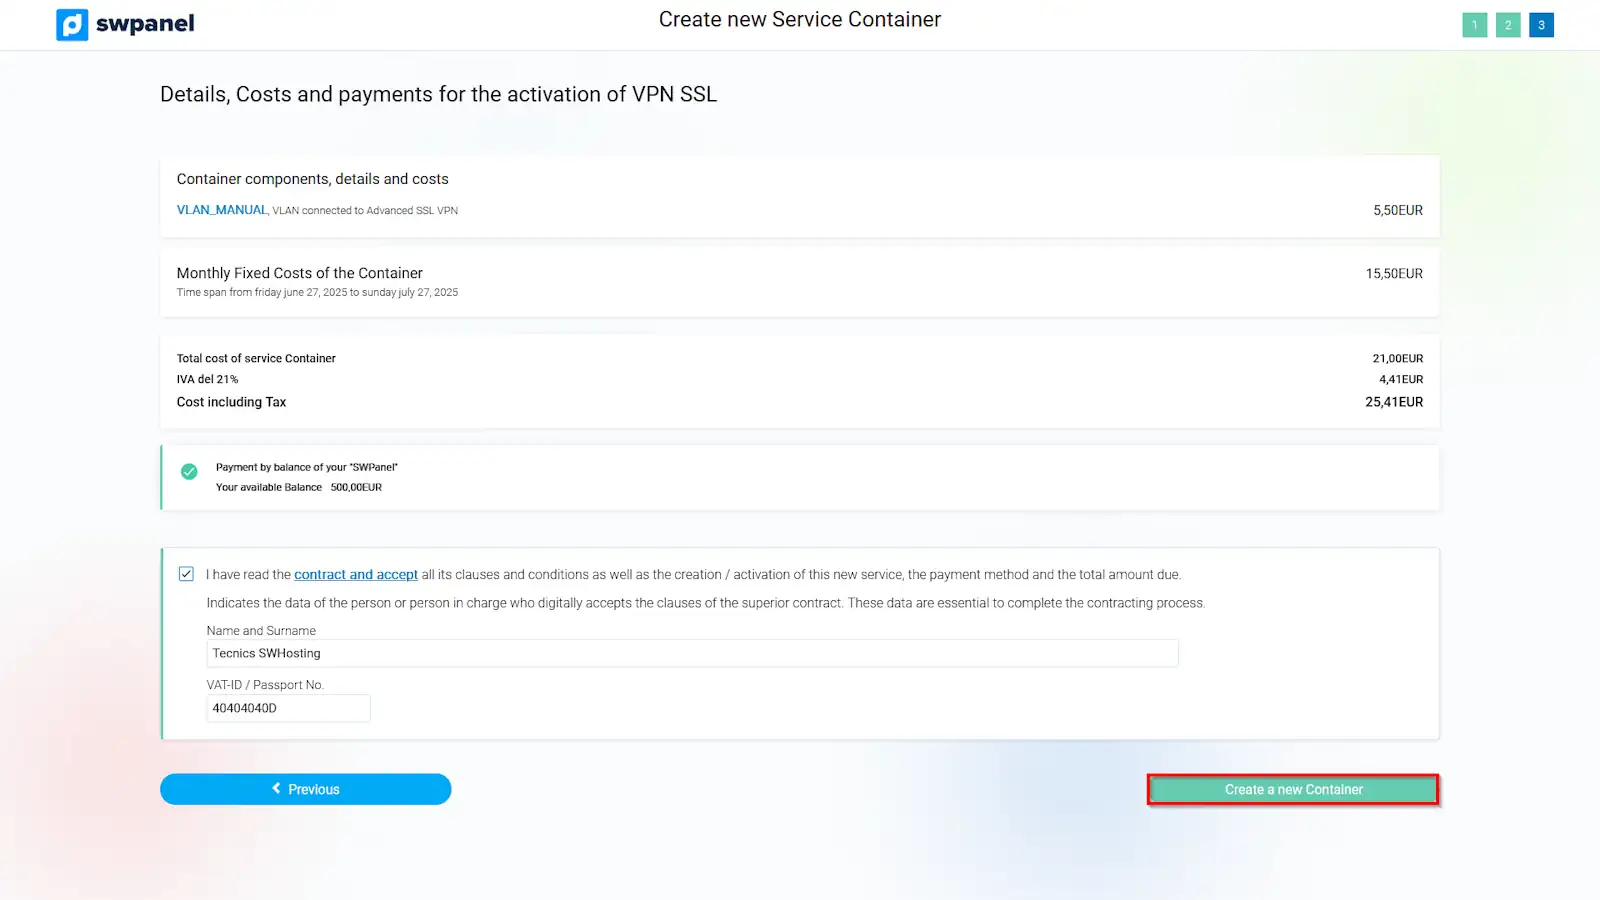
info_capture The screenshot is for illustrative purposes only. It was taken from version 2025.004.0002 dated 27/06/2025. It may differ from what is shown in the current version of SWPanel
8. Conclusion of the process
Once you have followed all the steps above, your new Advanced VPN SSL will be active and ready to use.
Now that you have created your Advanced VPN SSL, you can refer to the following steps in this manual.
How to configure my OpenVPN Client to connect to my Advanced VPN SSL with 2FA