Enabling and disabling the Antispam service in a Cloud with SWPanel
On what type of Clouds can the Antispam service be activated?
The Antispam service can only be activated in Clouds with SWPanel license.
¿Cómo funciona?
Nuestro sistema antispam se basa en dos conceptos: aprendizaje y lista de cuentas de correo electrónico no deseados.
Este sistema, si bien no es infalible, garantiza una reducción notable en el número de correos basura y su aplicación y puesta en funcionamiento es muy simple.
El sistema aprende qué correos son "no deseados" utilizando métodos estadísticos y comparándolos con otros correos de spam, ya que muchos de ellos tienen factores en común.
También se utiliza una “lista negra” para correos no deseados, es decir, se incluyen en una base de datos y en caso de recibir este mismo correo, automáticamente queda filtrado.
Si los correos que son evaluados cómo correos lícitos, se les permite el paso directamente al buzón del usuario. Los que son evaluados como spam son enviados a un repositorio de cuarentena con el propósito de que sean recuperados en caso necesario.
Para Clouds con SWPanel y Debian 11 en adelante, todo el correo basura se almacenará en la carpeta Spam disponible en cada cuenta de correo.
Para los servidores más antiguos, el spam se almacenará en una cuenta [email protected].
Procedure
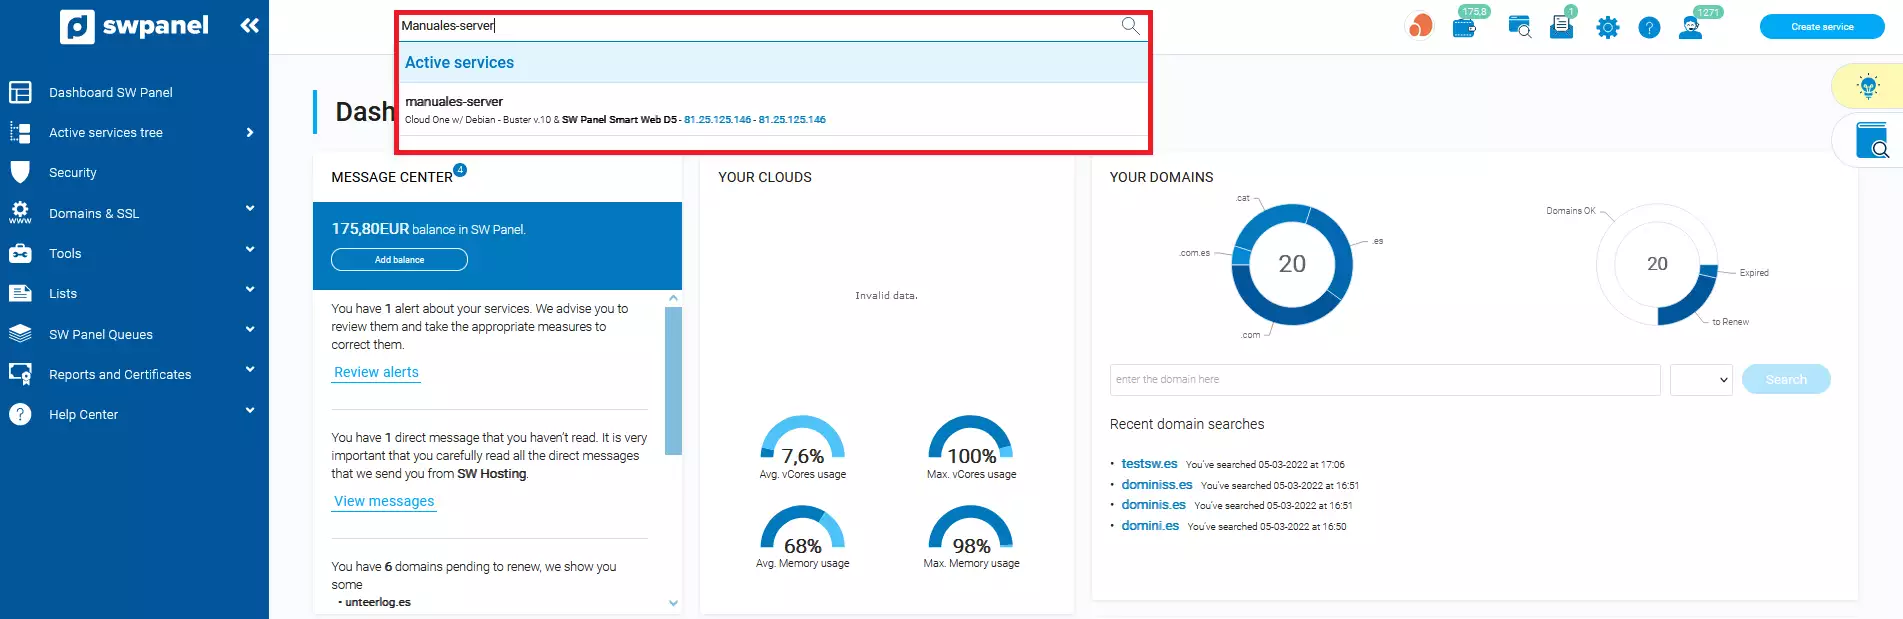
Access the SWPanel and use the search engine to find your Cloud, in our case it is called Manuals-Server, yours will have a different name. Once you find it, select it.
In the dashboard of your Cloud server you have 2 paths:
-
On the left side menu, select Actions for this Cloud -> Cloud Infrastructure -> Customize.
-
From the Customize and adjust the resources and services of this Cloud icon that appears in the top toolbar:

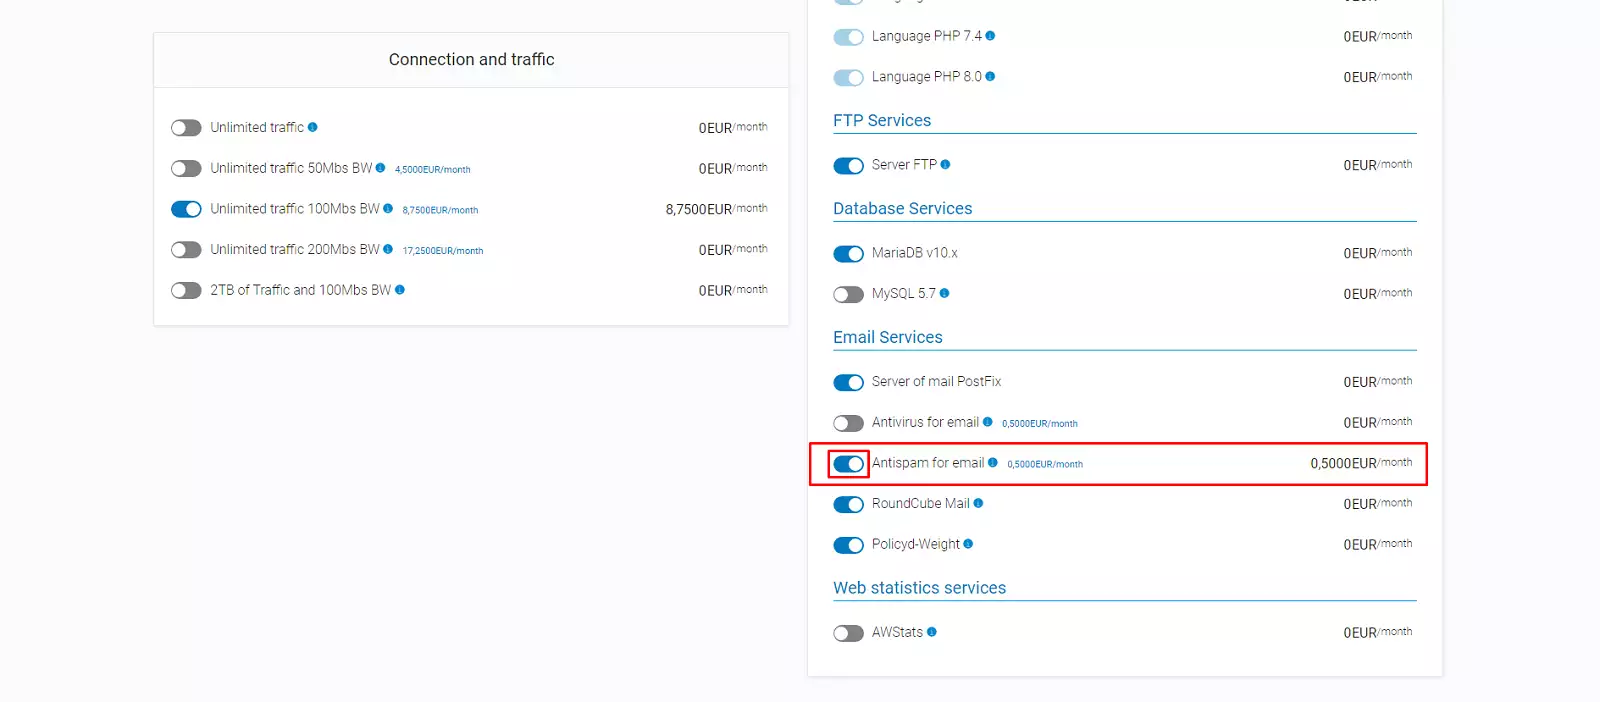
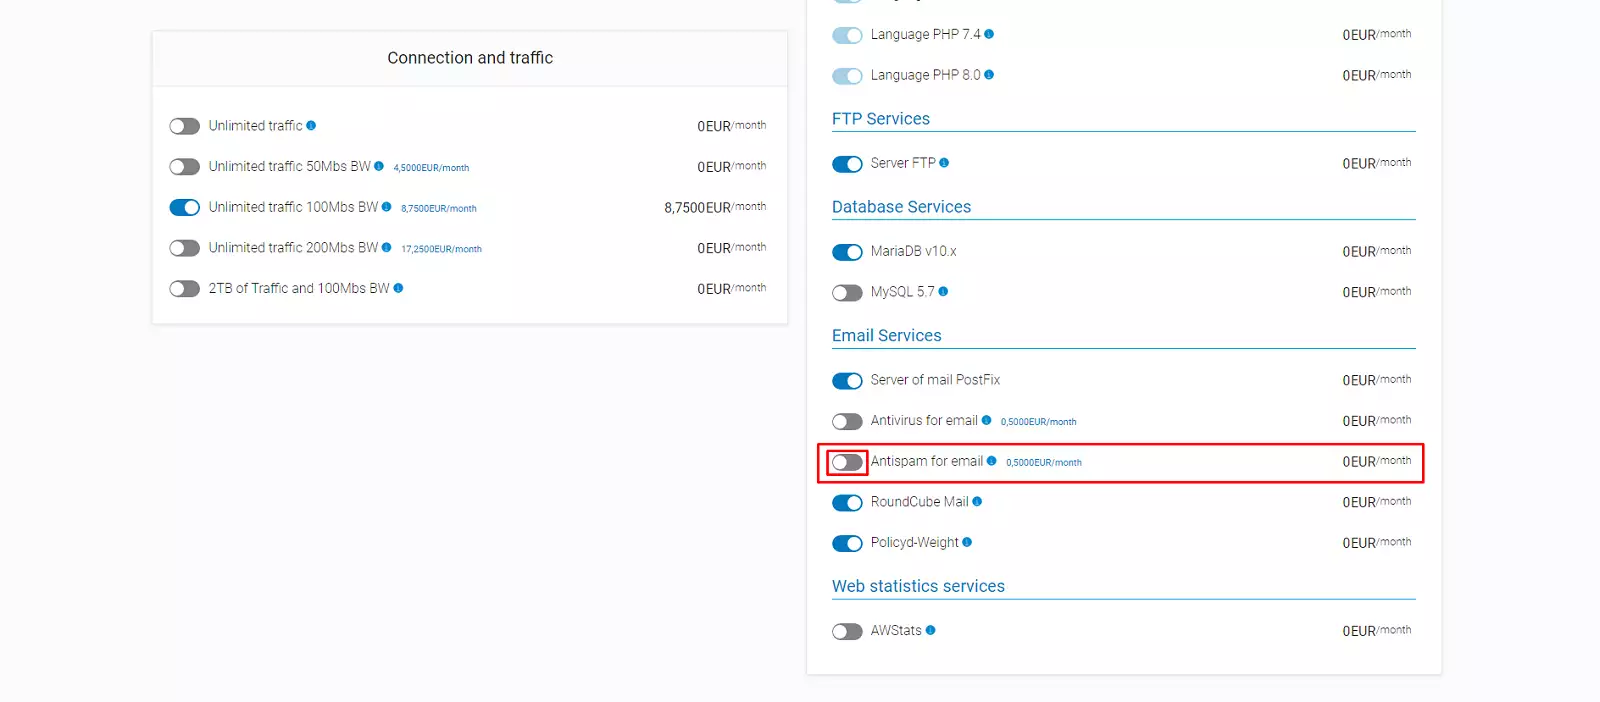
In the "customize" section, you will have to scroll until you find the option: Customize installed software or services Subsequently, you should go to "Mail services" -> Email Antispam services and click next:
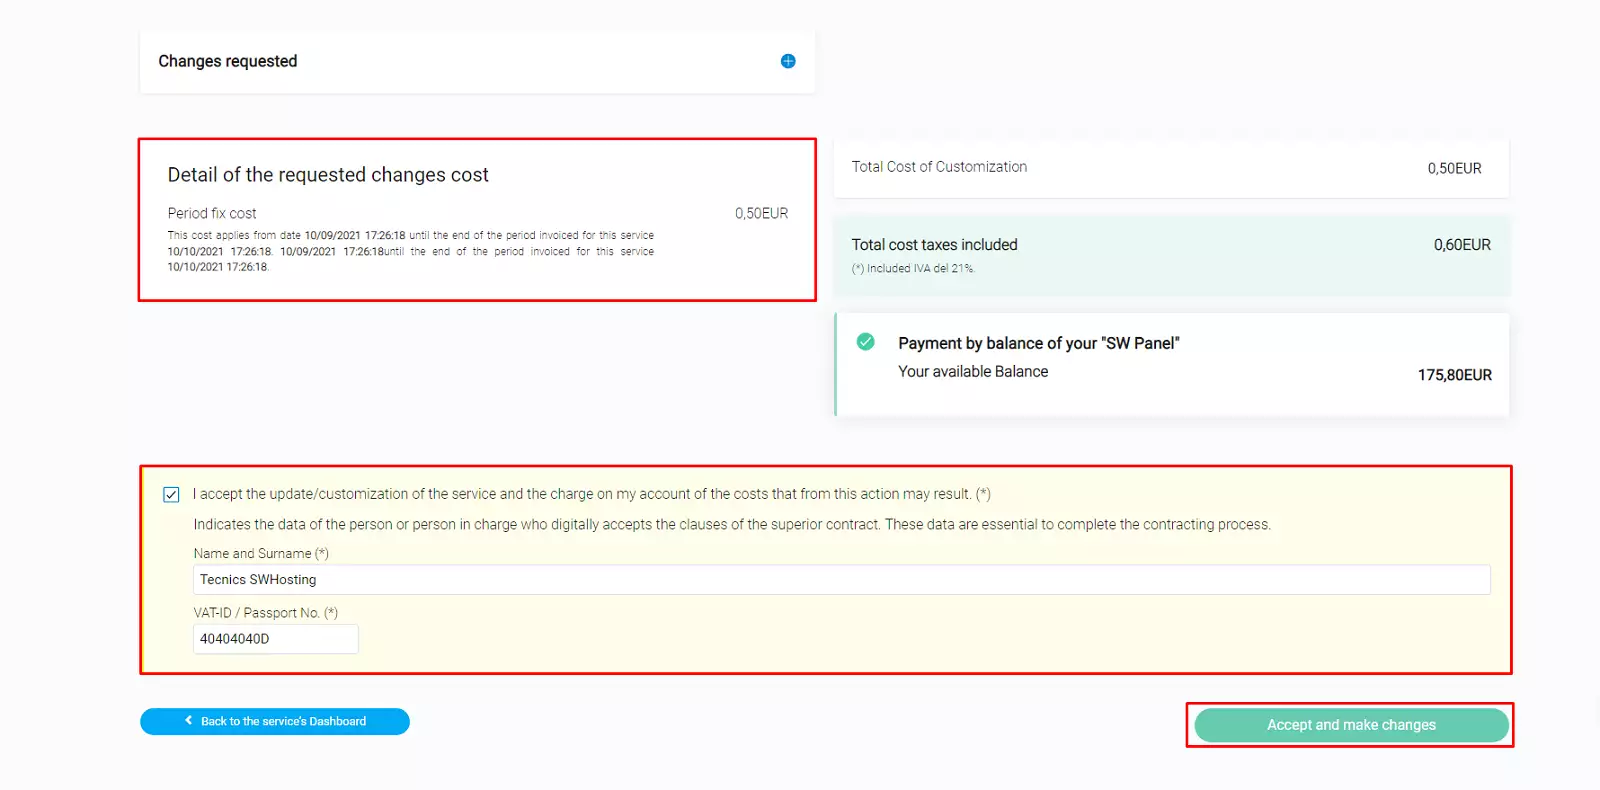
Then, you will have to accept the costs derived from the contracted extra, enter the required data (name and NIF) and Accept and formalize changes:
Remember that this process must be repeated with each of the services that hang from the main Cloud server that you want to have the Antispam service activated.
Activate Antispam in your cloud server hosting
Once the antispam service has been activated on your cloud server, you will be able to activate it on your cloud hosting services as follows:
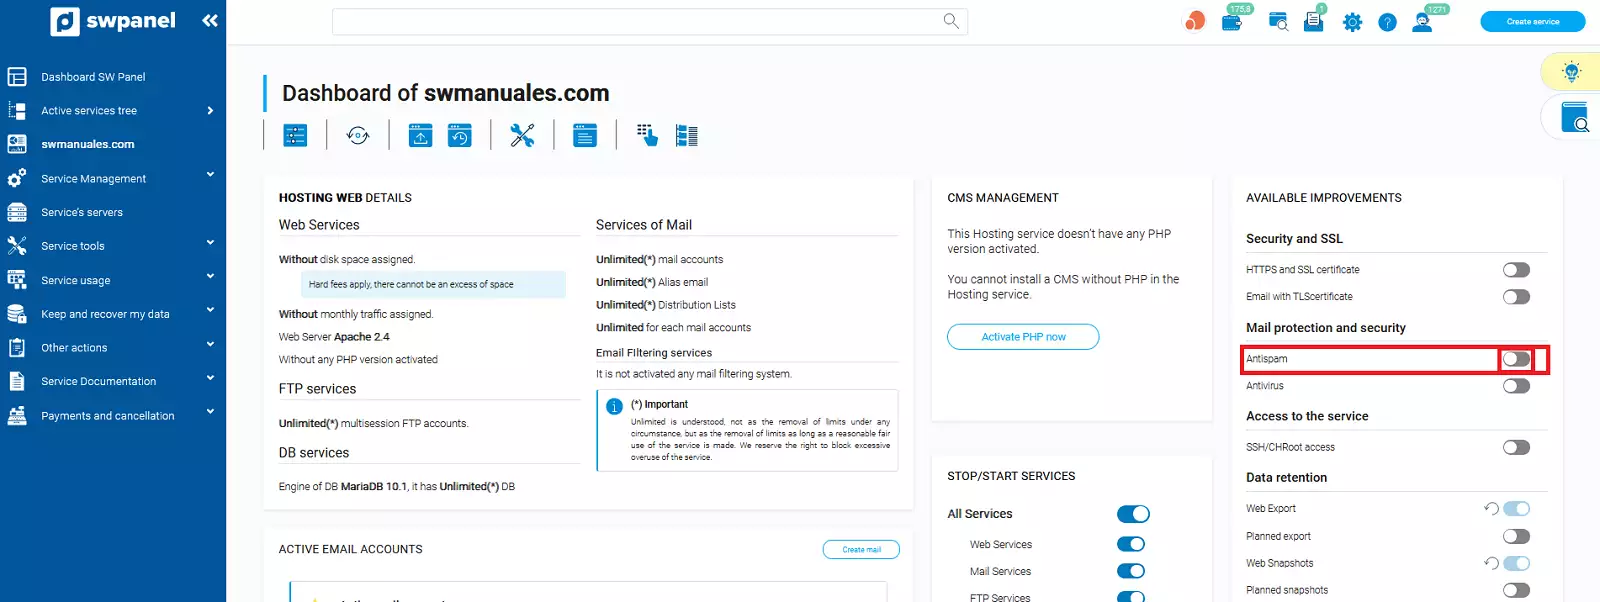
Access the SWPanel and use the search engine to find your hosting service, in our case it is called swmanuales.com, yours will have a different name. Once you find it, select it.
Once inside your Cloud hosting service, you must activate the antispam checkbox.
En la nueva ventana podremos ver un cuadro informativo donde se explica el funcionamiento del servicio de AntiSpam.
Para finalizar, deberemos aceptar la activación del servicio.
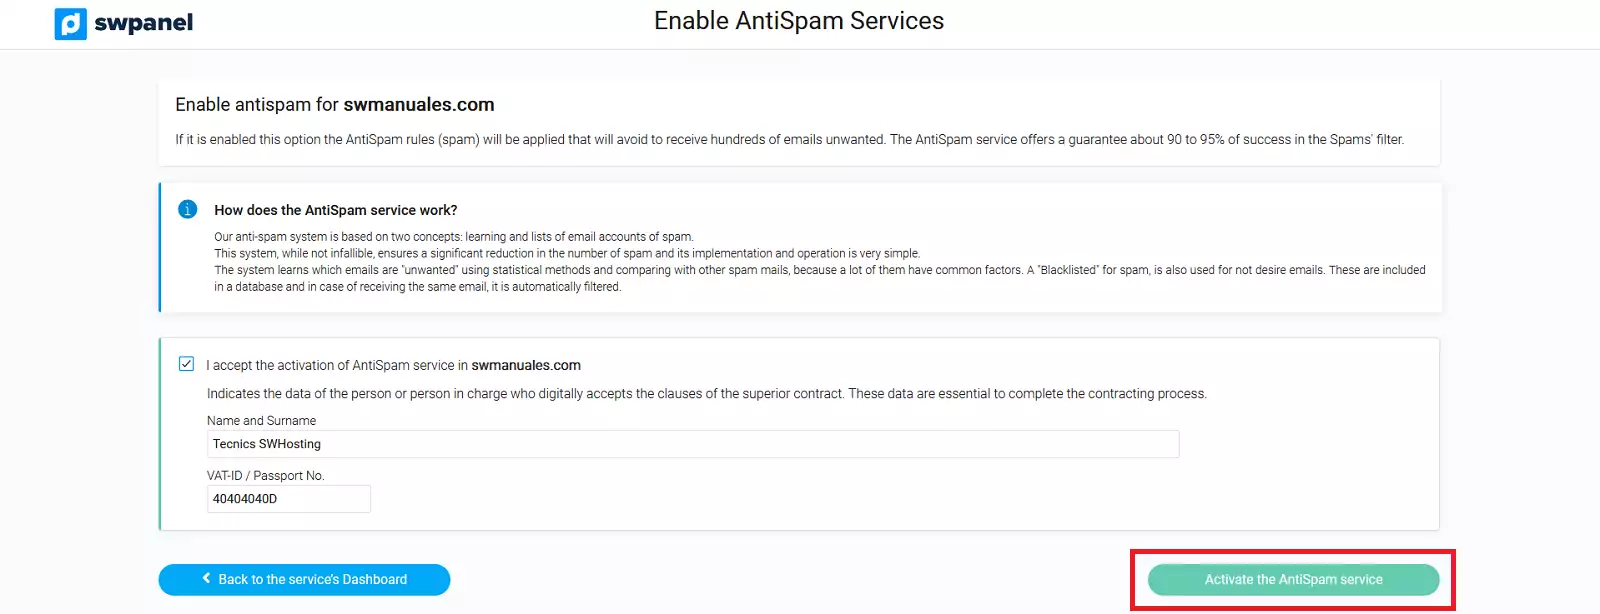
With this we will have already activated the antispam service in the service.
Disable the Antispam service on your cloud server
To disable the Antispam filtering of the main Cloud server (this will disable the service for all the services that hang from it and have it enabled) you must select Cloud Server -> Customize -> Disable Email antispam services.
You will have to go back to "Accept and make changes" and the anti-spam filtering will be disabled.