
It is common that for different reasons, such as vacations, leaves of absence, redirections, or project changes, we may need an automatic response to be sent to emails sent to a specific mailbox.
Below, we will explain how to access the auto-response activation section, and the different possible configurations for this email option.
First, we will go to the dashboard of the service associated with the domain for which we want to create an auto-response. We enter the name of the service in the top search bar and select it.
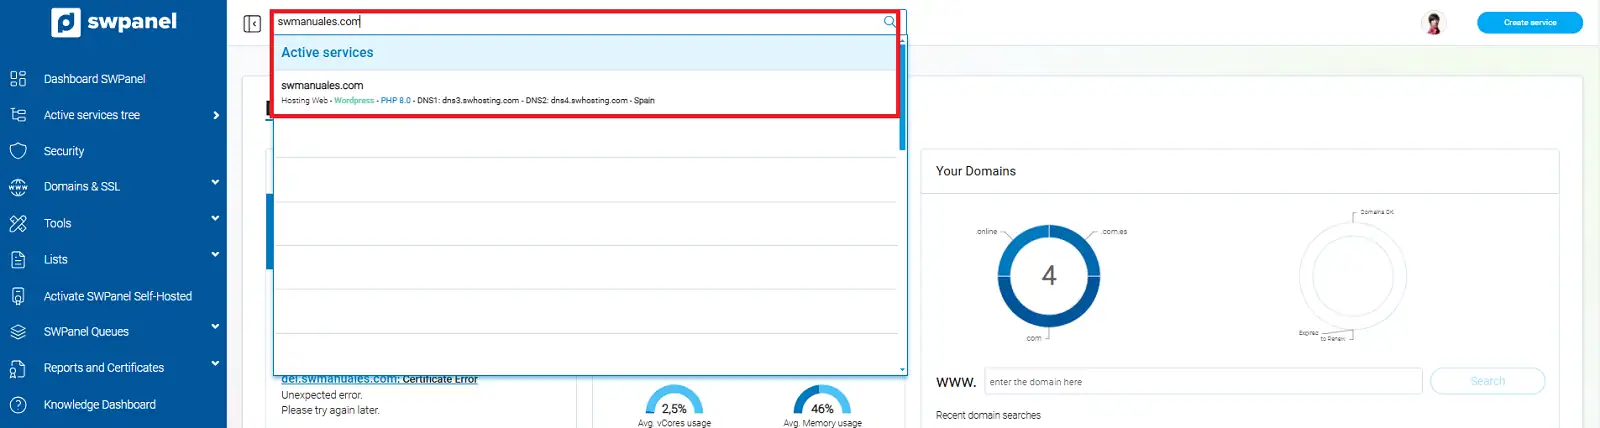
The screenshot is for guidance purposes. It was taken from version 2025.00.0008 dated 11/19/2024. It may differ from what the current version of SWPanel shows.
Once in the service dashboard, we will go to the side menu and select the section 'Service Management' -> 'Email Management'.
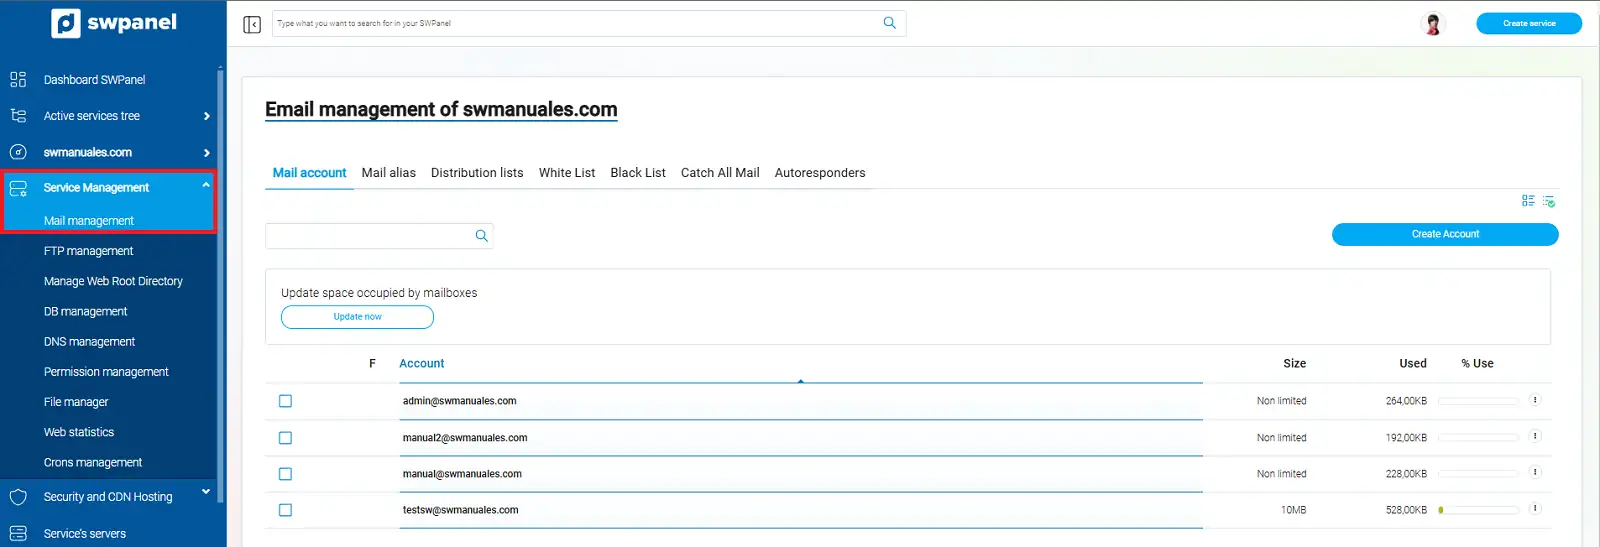
The screenshot is for guidance purposes. It was taken from version 2025.00.0008 dated 11/19/2024. It may differ from what the current version of SWPanel shows.
In the email management section, we will see that there is a tab dedicated to the configuration of 'Auto-responses' from which we will carry out the necessary configurations in this regard. We will go to that window and click on 'Create auto-response'.
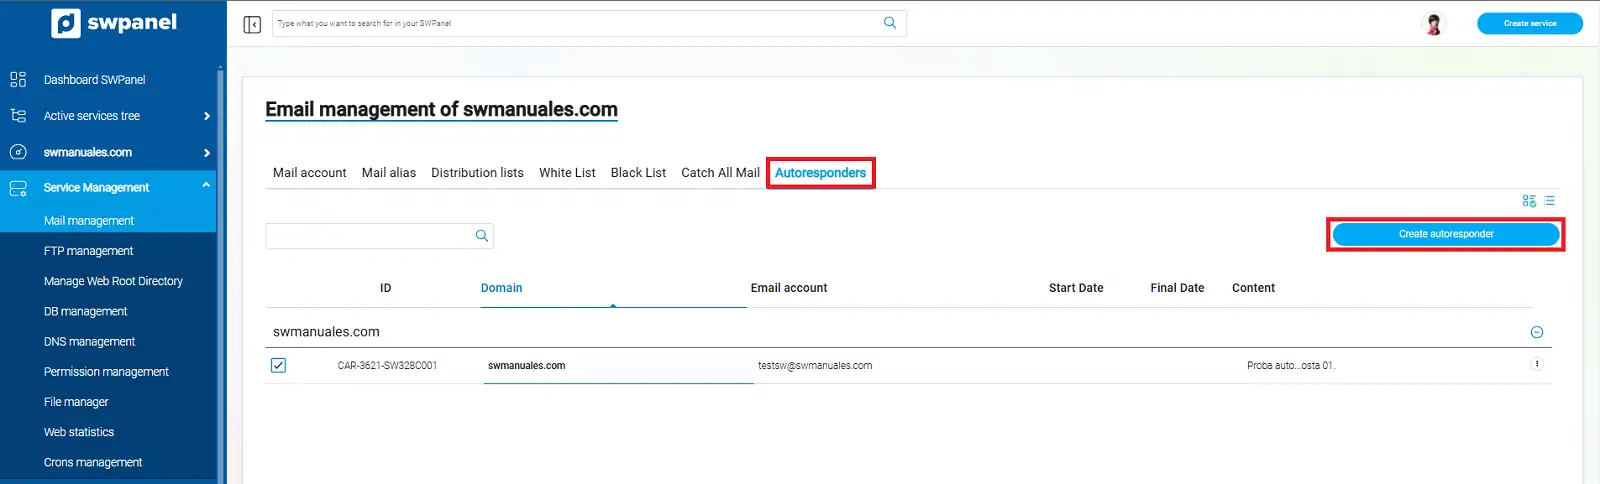
The screenshot is for guidance purposes. It was taken from version 2025.00.0008 dated 11/19/2024. It may differ from what the current version of SWPanel shows.
Once we click the button, a window will appear where we will determine the type of auto-response we want to configure.
In the first text box, we must select the email account for which we want to create the auto-response.
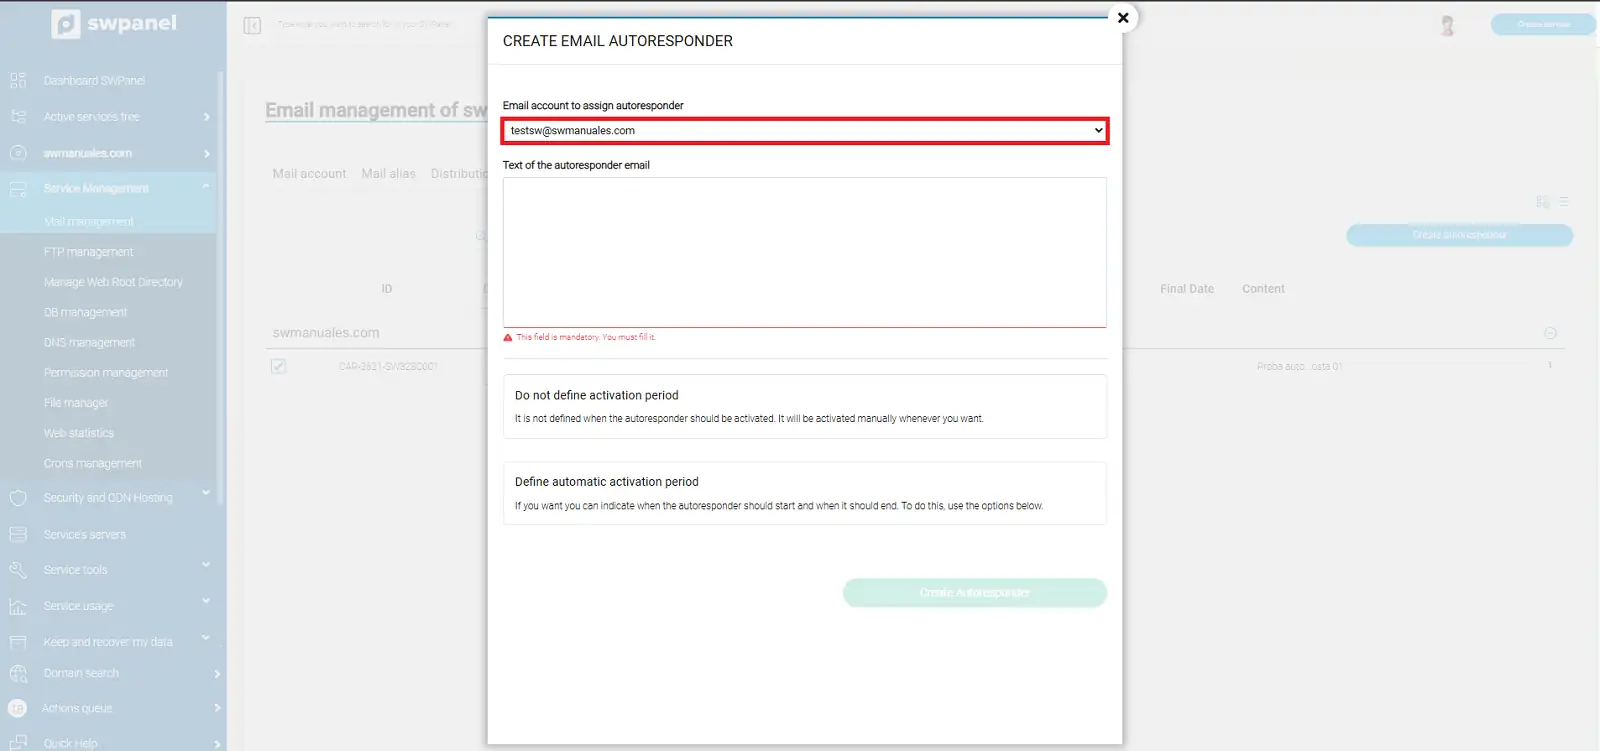
The screenshot is for guidance purposes. It was taken from version 2025.00.0008 dated 11/19/2024. It may differ from what the current version of SWPanel shows.
In the following section 'Auto-response email text', we must enter the text that we want to be sent in the response message that we will send automatically.
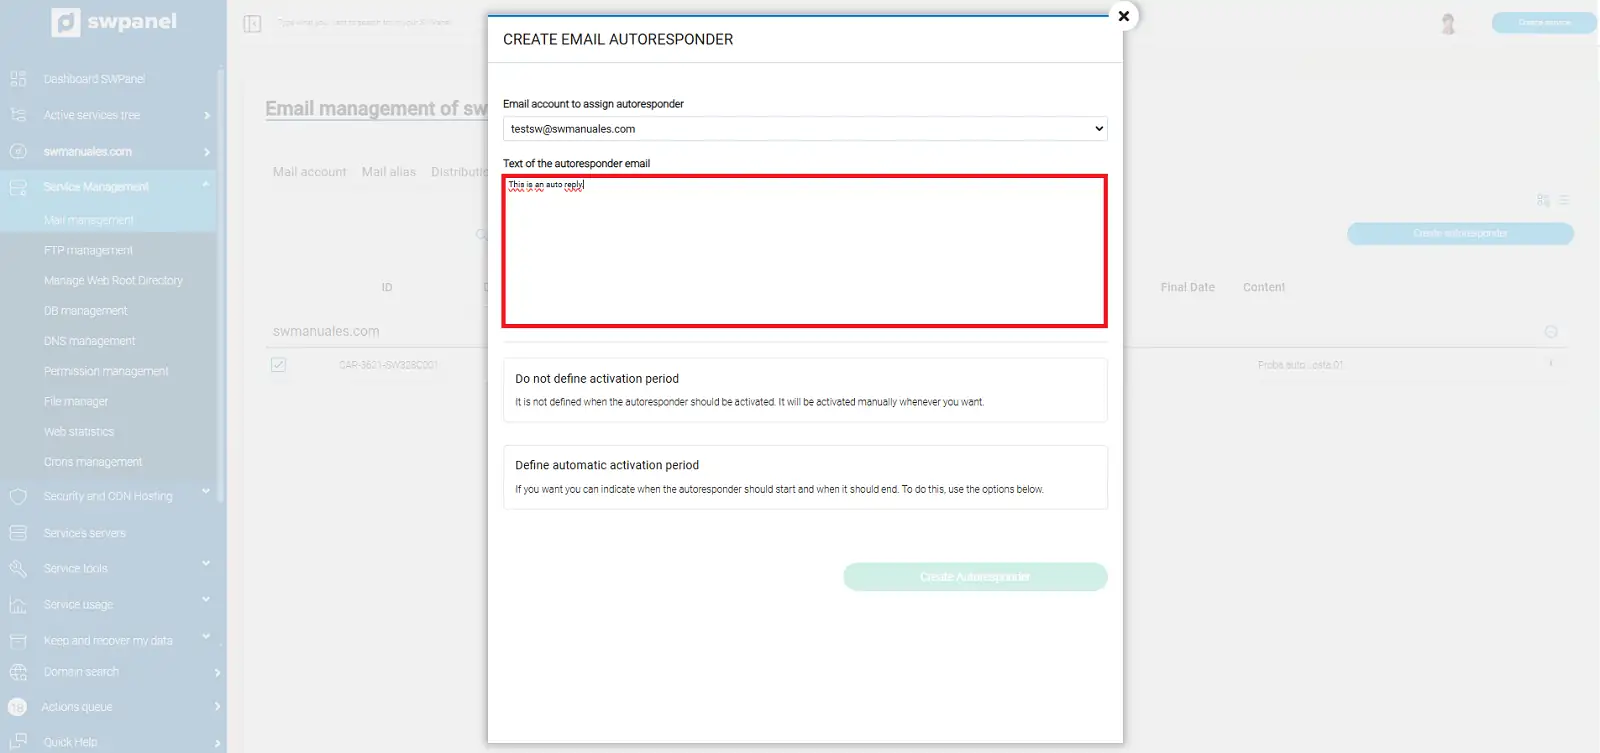
The screenshot is for guidance purposes. It was taken from version 2025.00.0008 dated 11/19/2024. It may differ from what the current version of SWPanel shows.
Once we have chosen the mailbox for which we want to create the auto-response and its text, we have two options when activating it. We can activate it immediately, or we can define a time period in which it will be automatically activated and deactivated as defined.
If we wish to activate and deactivate it manually, we will check the option 'Do not define activation period'. Additionally, we can check for it to be activated directly during its creation.
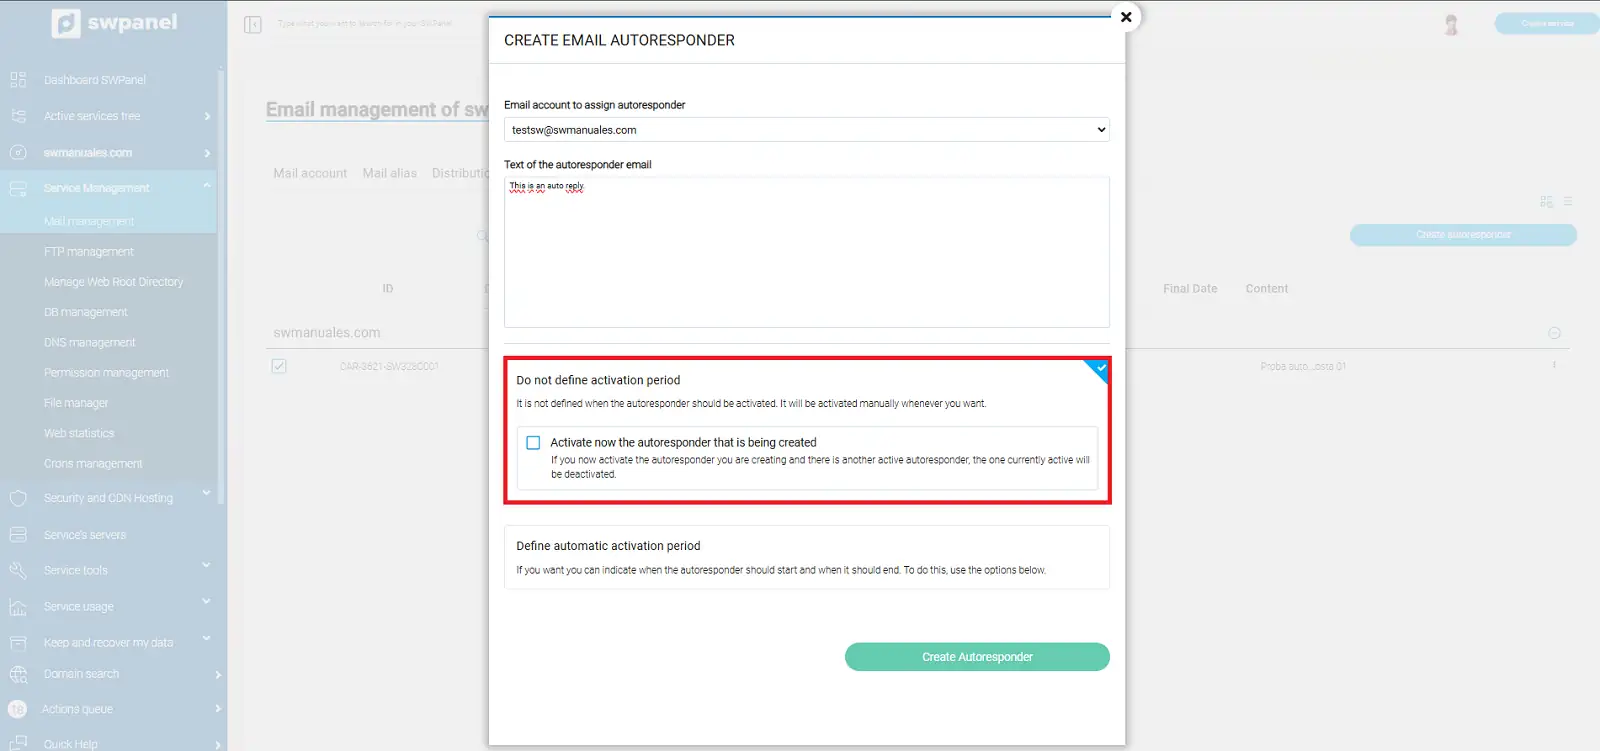
The screenshot is for guidance purposes. It was taken from version 2025.00.0008 dated 11/19/2024. It may differ from what the current version of SWPanel shows.
If we want it to be automatically activated and deactivated, we will check the option 'Define automatic activation period'. By checking it, we will have the possibility to indicate a start date and time when the auto-response will be activated, and an end date and time when it will be deactivated.
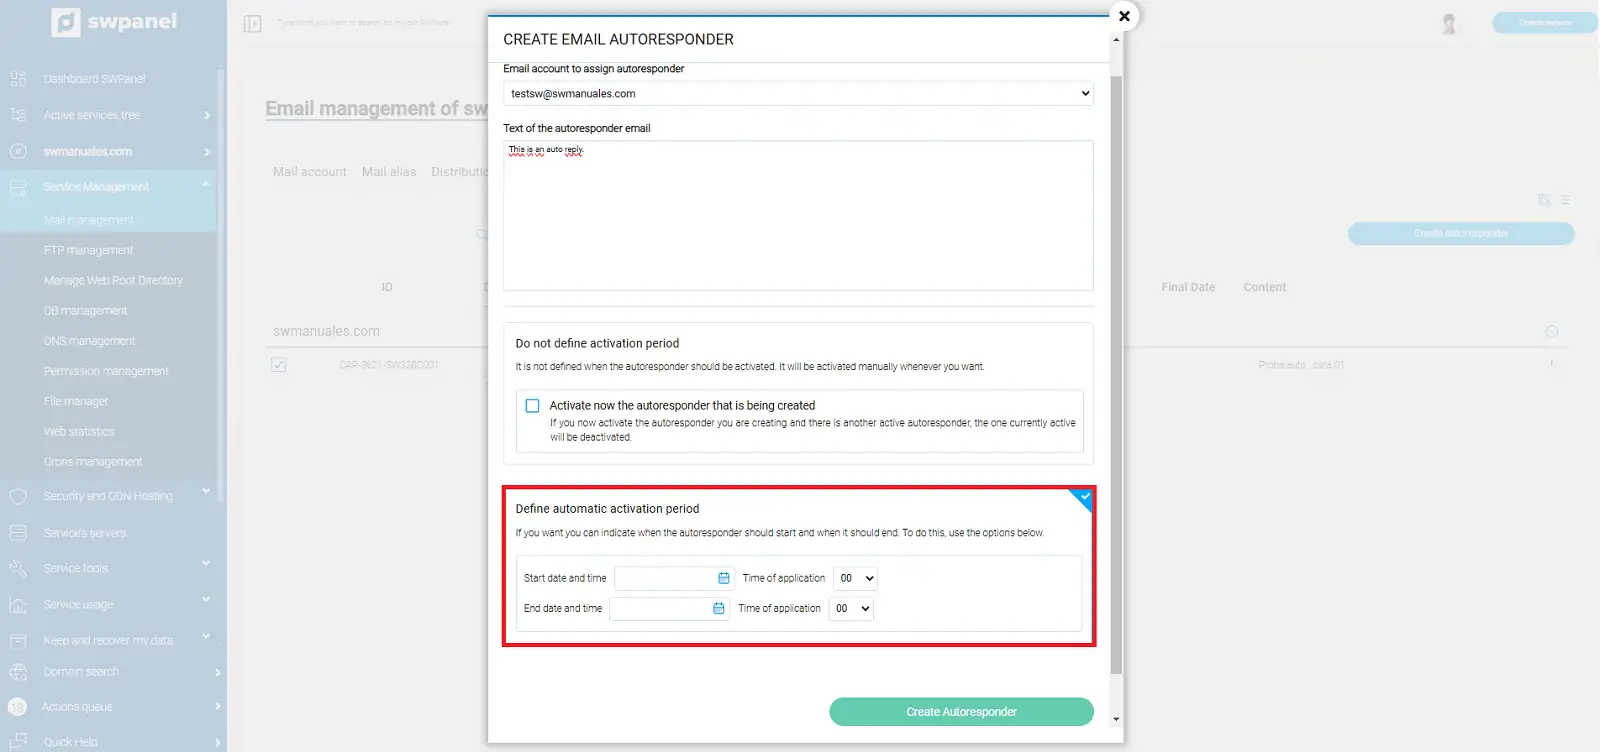
The screenshot is for guidance purposes. It was taken from version 2025.00.0008 dated 11/19/2024. It may differ from what the current version of SWPanel shows.